
CircleCI supports GitLab as a version control system (VCS). In this tutorial you will learn how to set up your first CircleCI CI/CD pipeline for a project hosted on GitLab. As GitLab can be used either as a SaaS tool, as well as self-managed on-premise installation, I will cover the steps to connect it with CircleCI for both.
Prerequisites and application basics
To follow along with this tutorial, you will need:
- Basic knowledge of Git commands
- Git installed and accessible on your machine
- A GitLab account — either self-managed or SaaS
- A CircleCI account
Starter app
Our starter application is a minimal Python Flask app with a single ‘hello world’ web page, which specifies required dependencies and includes a test. You can access a publicly hosted version of the starter app on GitLab.com.
You can get the application by downloading it straight from the GitLab web interface or cloning it via Git.
For the purposes of this tutorial, you don’t need to write the application from scratch, but if you are interested in complete development instruction, you can read through the beginning of [this blog post](https://circleci.com/blog/setting-up-continuous-integration-with-github/.
GitLab SaaS vs self-managed
As mentioned above, this tutorial will teach you how to configure and run your CircleCI pipeline for a project hosted either on a self-managed or hosted version of GitLab. You can learn more about the differences between the hosted and self-managed versions in the GitLab docs.
Setting up GitLab SaaS requires you only to sign up at gitlab.com. You will also need to make sure you can push to GitLab repositories, either by setting up your SSH key or personal access token for using GitLab with either SSH or HTTPS, respectively.
If you use GitLab self-managed, you will connect to it via your installation URL. This is specific to you, so for the purposes of this tutorial, use the URL yourgitlabinstance.com as a placeholder.
Create a new project with the starter app source code. You can use the new project wizard, either at gitlab.com/projects/new or yourgitlabinstance.com/projects/new, for SaaS or self-managed respectively.
Creating a CircleCI config file
Before you set up CircleCI, you can tell it what to eventually start building.
Create a new directory .circleci in the top level of the project.
Now, create a new file config.yml in that directory (.circleci/config.yml) — this is your main configuration file for CircleCI.
Paste the following in the file:
version: 2.1
jobs:
  test:
    docker:
      - image: cimg/python:3.10.11
    steps:
      - checkout
      - restore_cache:
          key: deps1-{{ .Branch }}-{{ checksum "requirements.txt" }}
      - run:
          name: Install dependencies
          command: |
            python3 -m venv venv
            . venv/bin/activate
            pip install -r requirements.txt
      - save_cache:
          key: deps1-{{ .Branch }}-{{ checksum "requirements.txt" }}
          paths:
            - "venv"
      - run:
          name: Running tests
          command: |
            . venv/bin/activate
            python3 tests.py
      - store_artifacts:
          path: test-reports/
          destination: python_app

workflows:
  run-tests:
    jobs:
      - test
In the CircleCI config file, you define everything you need CircleCI to do. In this case, you have added a single job (test) and a workflow (run-tests) containing that job.
The test job runs in a Docker container with Python installed, checks out the code at that specific commit, downloads the dependencies required for the app (Flask, in this case), sets up a Python venv, and runs the tests in tests.py. It also caches the dependencies to make subsequent pipeline runs faster and stores the test artifacts for easy access from CircleCI. To read more about CircleCI configuration, consult the configuration reference.
Save, make a new commit, and push to your GitLab repository. Now it’s time to configure your CircleCI integration with GitLab.
Configuring CircleCI with GitLab SaaS (GitLab.com)
If you don’t have a CircleCI account yet, create one now. Head to https://circleci.com/signup/ and follow the instructions to sign up using your preferred method. If you choose GitLab, you will also be prompted to select your GitLab instance. Press Connect next to GitLab.com.
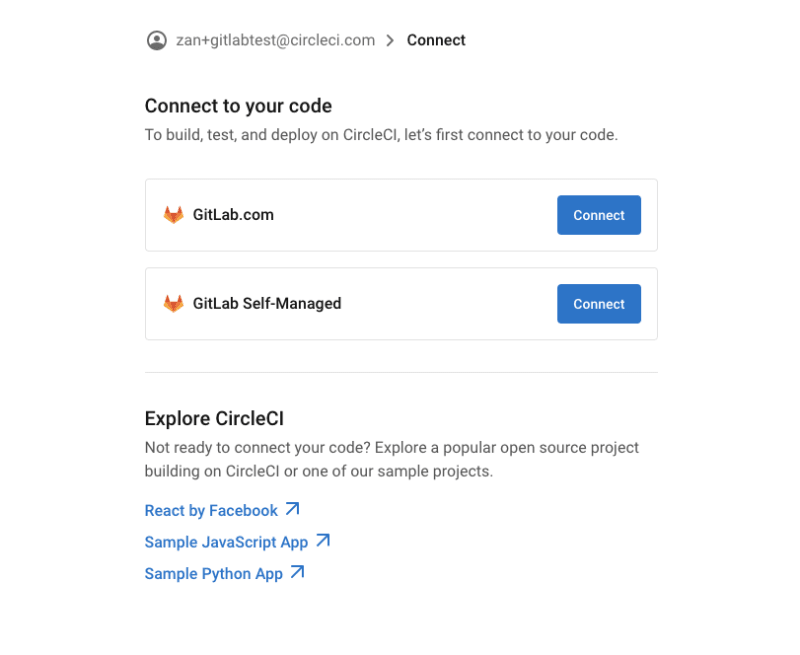
This should now prompt you to authorize CircleCI with your GitLab account, giving CircleCI access to your repositories.

Authorizing CircleCI will take you to the project creation wizard. You should see your repository on the list, and it should detect the CircleCI config you committed.
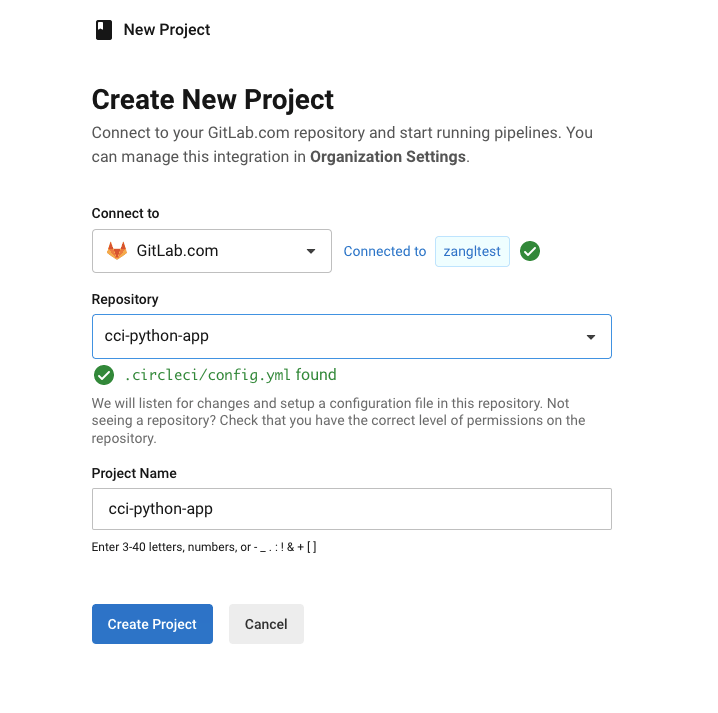
Click Create Project to start building. This has created the project in CircleCI, and what’s left is to commit and push a change to trigger your first CircleCI pipeline.
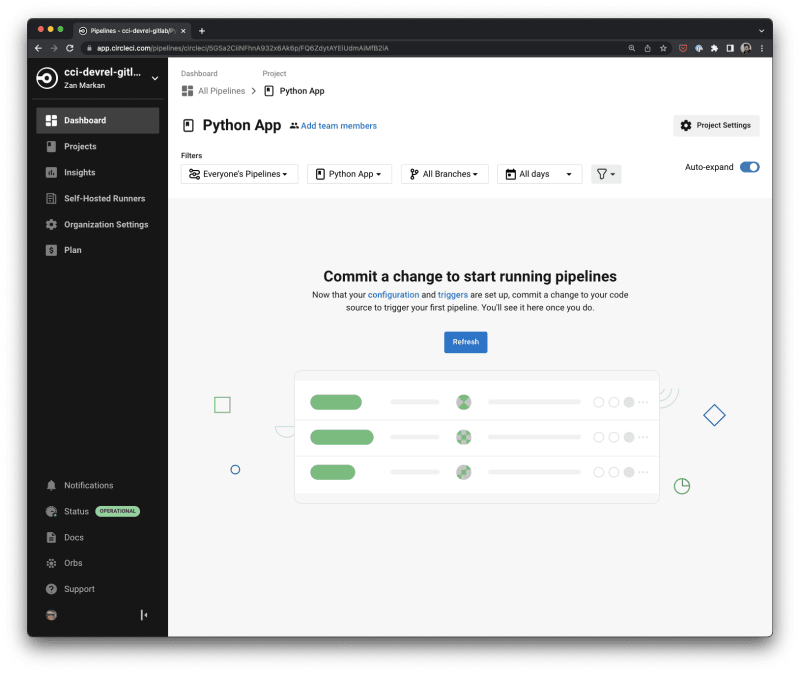
Make any change, such as an update to your README file, then commit and push. This will create your first pipeline and start building and running your test.

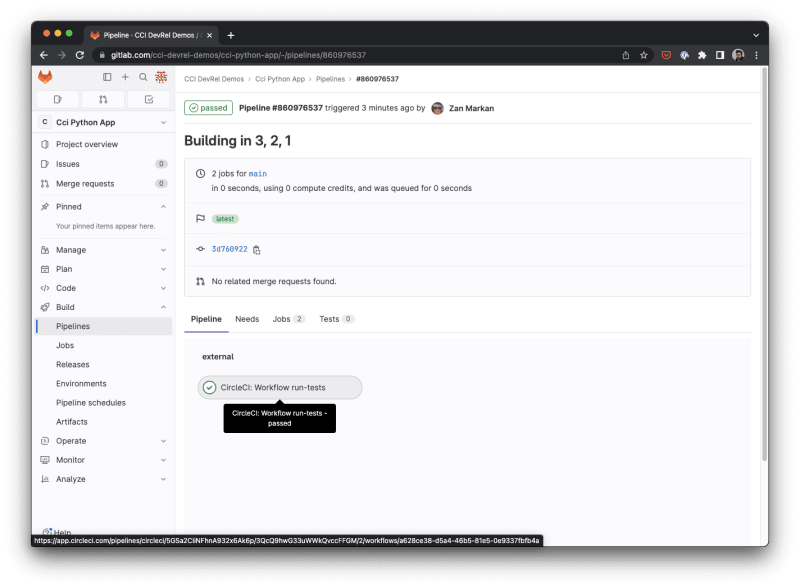
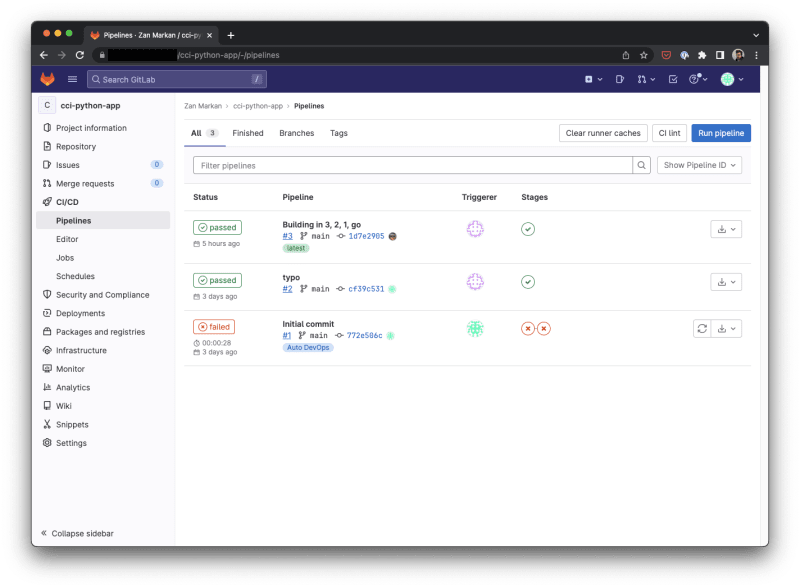
Seconds later it should be marked as successful. The status of your CircleCI pipeline will be automatically updated in your GitLab UI as well. Navigate to Build/Pipelines (on the left-hand side in GitLab) and the pipeline should show up there as well. You can see an example based on this tutorial in this public project.
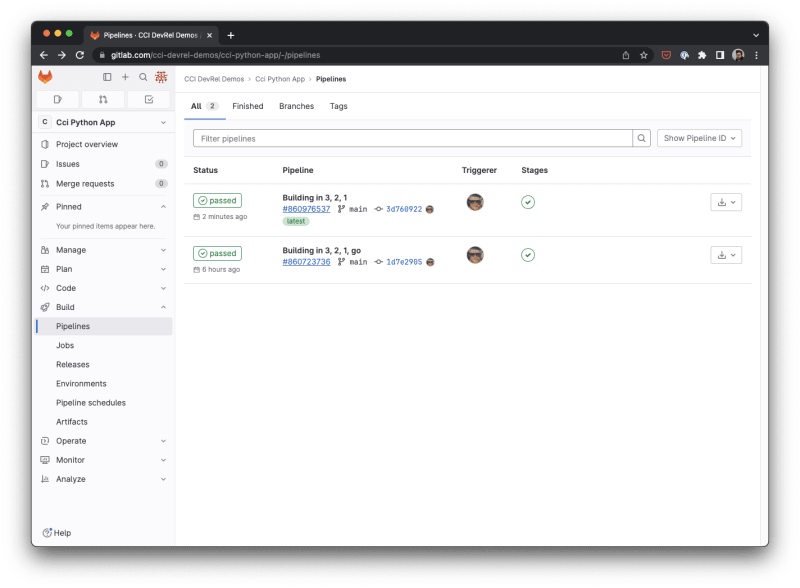
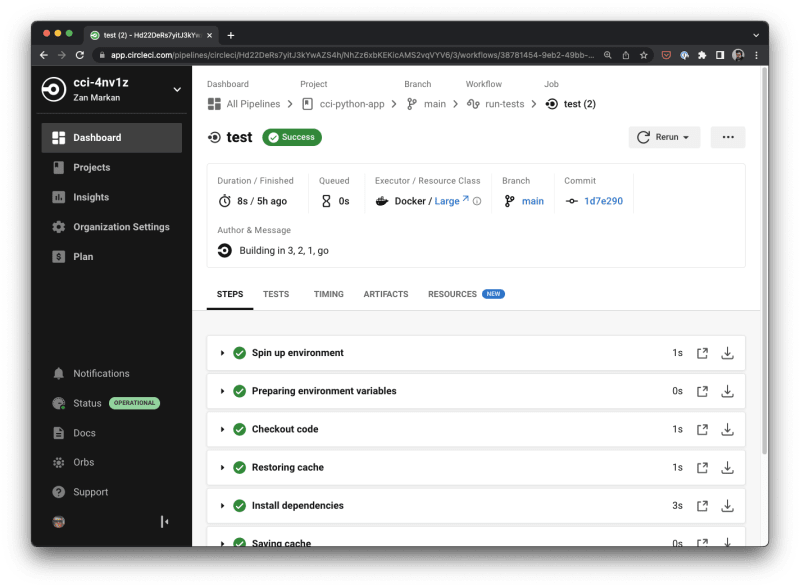
Clicking it will show you further details of the pipeline. Clicking the button under external - button CircleCI: Workflow run tests will take you back full circle into your workflow inside CircleCI.
Connecting CircleCI to a self-managed GitLab instance
Self-managed installations, unlike the hosted SaaS versions, run on infrastructure you control. They will of course also have a different URL to access them. In this tutorial, use yourgitlabinstance.com as a placeholder for your actual instance URL. This section closely follows the GitLab integration instructions in the CircleCI docs.
Assuming you have followed the steps to get the project into GitLab and committed your first CircleCI config file, you can proceed with connecting to GitLab.
If you don’t have a CircleCI account yet, create one now. Head to https://circleci.com/signup/ and follow the instructions to sign up with your preferred method.
If you choose to sign up with GitLab, you will be prompted to select your GitLab instance. Press Connect next to GitLab self-managed.
GitLab self-managed project setup
The wizard guides you through the setup process step by step.
First enter the URL of your GitLab instance and click Verify. It will suffix it with /api/v4 to complete your instance’s API endpoint.
Create your personal GitLab access token with an API scope, paste it in the Personal Access Token field and click Verify.
Next, pass in the known_hosts value and click Verify. You can get this by running ssh-keyscan yourgitlabinstance.com in the terminal and pasting the entire output in the known_hosts field. This allows CircleCI to verify the authenticity of your GitLab instance.
Finally, select your project in the dropdown. This will likely be cci-python-app. You can also give it a different name. This will set your GitLab self-managed project up for building on CircleCI.

Trigger a pipeline by committing a change and pushing it to your GitLab repo. This will start your workflow and show it in the next few seconds.

You can also see your pipeline in the GitLab UI by navigating to CI/CD > Pipelines on the left-hand side. Note that this might look different, depending on what version of GitLab you are using.
Clicking on its status it will take you to the pipeline details, from where you can navigate back to the CircleCI UI to give you a 360 degree view of your project and your CI/CD pipeline’s workflows and jobs.
Congratulations! You have successfully configured CircleCI to start building your project on a self-managed GitLab instance.
Conclusion
In this tutorial you have learned how to begin building projects hosted on GitLab with CircleCI. We have covered both on-premise self-managed GitLab as well as the hosted SaaS version on GitLab.com.
Wishing you successful building!

Top comments (1)
“Setting up continuous integration with CircleCI and GitLab” is an excellent tutorial that provides a comprehensive guide to setting up your first CircleCI CI/CD pipeline for a project hosted on GitLab.
I highly recommend this tutorial to anyone looking to set up continuous integration with CircleCI and GitLab. Great job! 👏