
Introduction
Infrastructure as Code is considered a best practice when managing infrastructure in the cloud. Tools like Terraform are becoming increasingly popular due to their ease of use and multi cloud nature. However, adopting the Infrastructure as Code model can become hectic and unmanageable if not organized strategically. With designing any automated process, simplicity is key to creating long lasting solutions. In Azure DevOps, one way of simplifying code for Terraform configurations is by using pipeline templates to represent our infrastructure. Each value in the template parameters is used to customize our configuration which is then built dynamically during the build pipeline. We can go from the traditional repository structure of storing our Terraform configuration files in folders to representing our infrastructure with pipeline template parameters:

Structuring our source code repositories this way allow us to scale our solution much easier and provides some of the following benefits:
- No more one-off changes can be made to Terraform configuration files since all configurations are built dynamically during the build pipeline and will all be the same. This prevents issues where team members are making changes to one system's Terraform configuration causing us to have separate one-off configurations to maintain.
- We can now separate our Terraform code from the team that deploys the configurations. All the Terraform modules and files are stored in another repository which we can limit access to and allow just our Terraform team to manage them.
- Change tracking of infrastructure resources is much more simplified now since we are just looking at template parameter value changes in a single file.
- Each deployment is going to be more consistent since we are using the same base Terraform configurations in each deployment. This also allows us to treat our Terraform configurations as cattle.
In this guide, we will use the Azure DevOps Demo Generator to import an Azure DevOps project. This project has been pre-configured to deploy Azure Container Instances with Terraform using pipeline templates as code. We will deploy some resources to our Azure subscription and review the innerworkings of this concept.
Prerequisites
Before you begin this guide you'll need the following:
- An Azure Subscription, you can get started with a free account.
- An Azure DevOps Organization. The basic plan is free for the first 5 users.
Step 1 — Importing the Project with Azure DevOps Demo Generator
First, we are going to import an Azure DevOps template project into our Azure DevOps organization. This will allow us to get started as fast as possible. To get started, navigate to the Azure DevOps Demo Generator website.
Sign in with your Azure DevOps account. Select Accept to authorize the Azure DevOps Demo Generator application to access your account. Now we are ready to import our template. Select Choose Template:
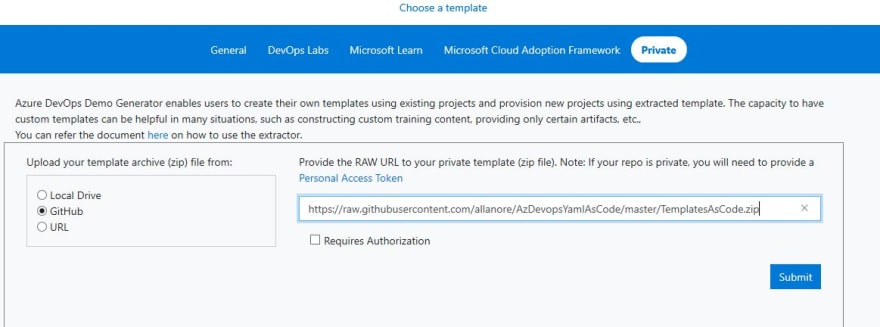
A pop-up window will appear, choose the Private tab and select the GitHub option. Paste in the following GitHub URL which hosts the template for our project:
https://raw.githubusercontent.com/allanore/AzDevOpsYamlAsCode/master/TemplatesAsCode.zip
Next, select Submit:
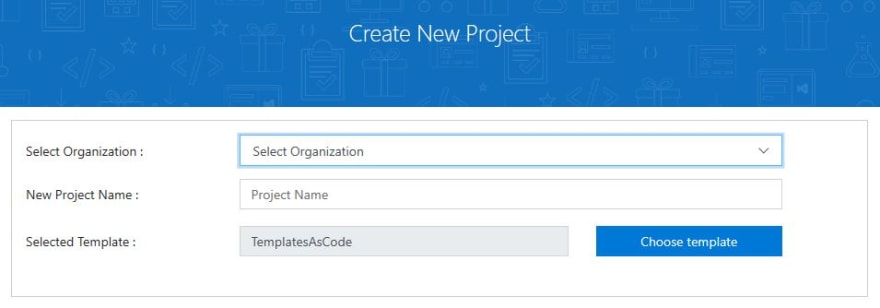
Select your organization from the drop-down menu and type in a name for the new project that we are creating. In the example I will be naming the project TemplateAsCode. Check the box for The extension(s) are offered to you... and select Create Project:
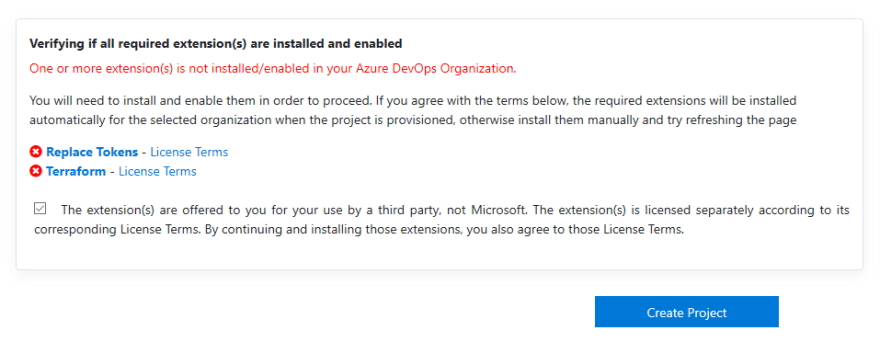
Notice that the Replace Tokens and Terraform extensions are required for this project. Extensions are add-ons for Azure DevOps that provide an enhancement to the service. In this case we will be using the Replace Tokens extension to build our Terraform configuration files during the build pipeline. Additionally, we are using the Terraform extension as well to easily deploy our configurations to Azure. These two extensions will automatically be installed when we import the project via the Azure DevOps Demo Generator.
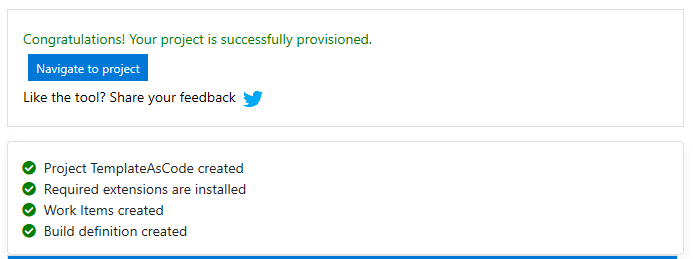
Finally, after the import is successful, we will get the following message. Select Navigate to Project to be directed straight to our new project:
In the next step we will review the innerworkings of the project that we just imported.
Step 2 — Reviewing the Template as Code Design
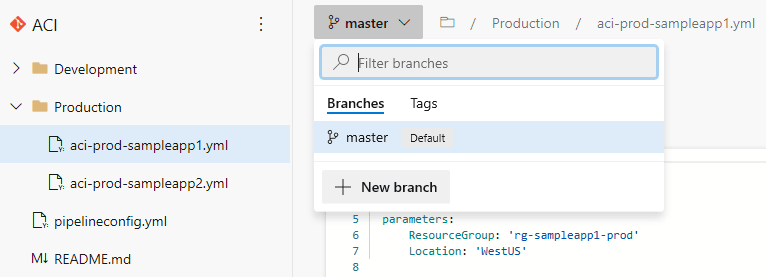
Let's look at how the code repositories for this project are set up. On the left-hand side select Repos then choose Files. By selecting the drop down, we can see that there are two source code repositories or repos in our project. Select the ACI repo:
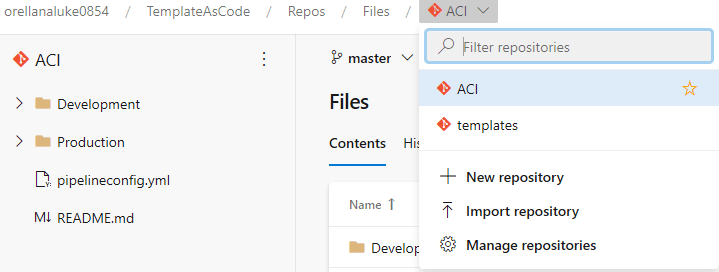
The ACI repo for this project contains the infrastructure code for the Azure Container Instances in our Azure environment with folders for Development and Production. In this project, instead of creating a repository for each application, or one for Dev and Prod, we are creating a repository for each cloud service or component. This allows for our infrastructure deployments to be simplified and as "cookie cutter" as possible which really shines with large environments. The environment size and business needs will really play a role on the most effective repo structure design. But, for this demonstration we are going to go this route to keep things simple.
The pipelineconfig.yml is our build pipeline yaml file. If we look at the contents of this file, we can see it starts with the resources section. This is sourcing the code from our 2nd repo, templates, and allows us to use that repo code in our build pipeline. Next, is the stages section which contains our job and tasks for building the Terraform configurations. In the template section we are calling the template that we want to build which is pointing to the aci-prod-sampleapp2.yml file. When we deploy this pipeline, it will deploy the components in that template file which we will look at next:

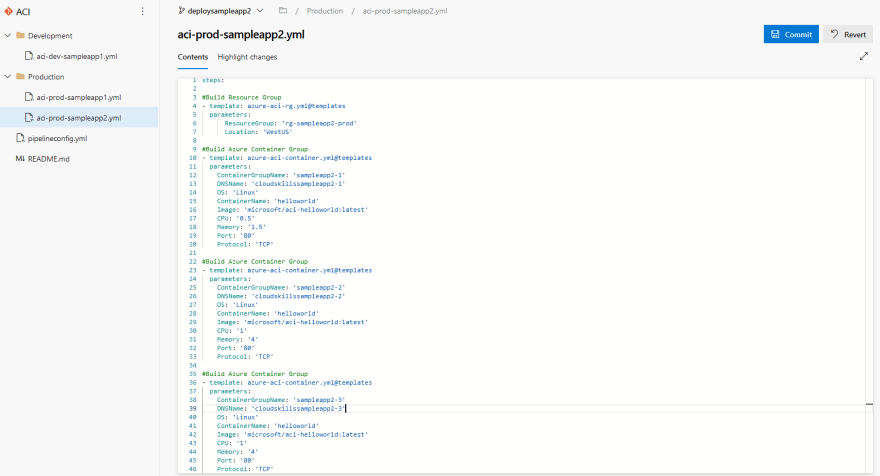
The other three yaml files in the ACI repo represent the Azure Container Instance infrastructure in our Production and Development environments. If we look at aci-prod-sampleapp2.yml, we can see that it's a series of pipeline templates sourcing from the templates repo. The template parameters are what is making up the configuration of our components, in this example we have two templates, one for the resource group and one for the actual ACI component. Breaking up the resource group and the ACI resource into separate templates allows us to deploy more than one ACI resource to a resource group:

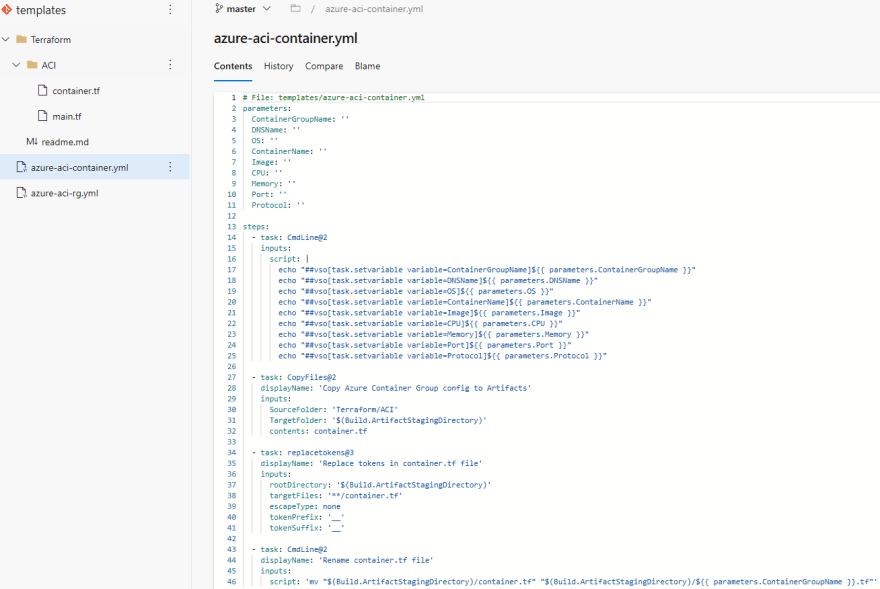
In our templates repo we can see our two yaml files for our pipeline templates along with a Terraform folder. This folder is where we keep our "templatized" terraform configuration files. These files contain generic Terraform configuration files with variables that are surrounded by a double "". This tells our Replace Tokens task, which runs during the build pipeline, to replace any strings in our container.tf and main.tf files that are surrounded by "" with it's respective environment variable. So `CPU_` will be replaced by the CPU environment variable that we declare in the pipeline template:
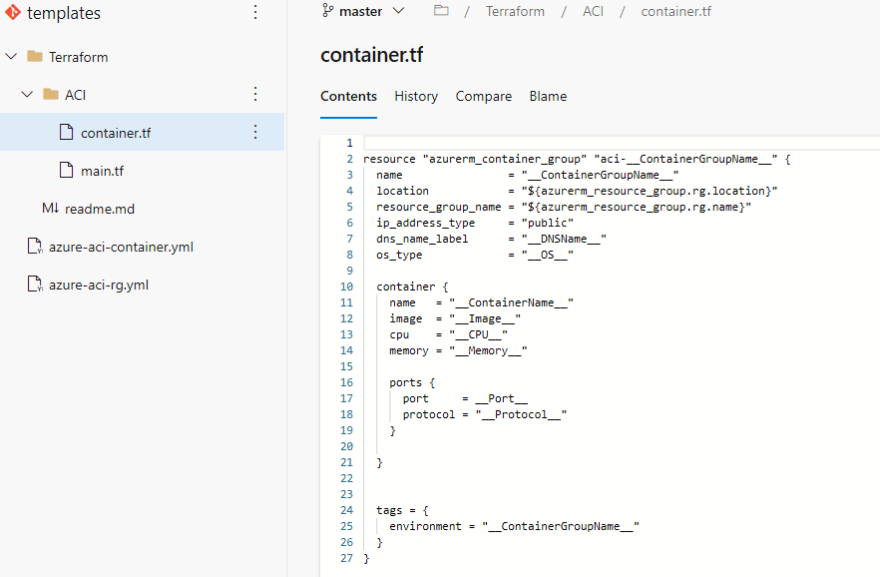
When looking at the azure-aci-rg.yml template, we can see at the top we are listing our parameters and then setting those as environment variables in the cmdline@2 task. Next is the CopyFiles@2 task. We are copying the Terraform configuration template file, main.tf, from the \Terraform\ACI directory of our source control repo to our $(Build.ArtifactStagingDirectory). This is where we are building our Terraform files to produce as an artifact. An artifact, from a developer perspective, typically contains the compiled binaries and libraries used to run an application. These application files are then deployed to an environment in the release pipeline. With our IaC build pipeline, our Terraform configuration files are the artifacts in this case; and we will be deploying them with the release pipeline. In the last task we run the replacetokens@3 task to swap out the variables surrounded by __ with our associated environment variable. This entire template allows us to take in parameter values and generate a Terraform configuration file from it:

If we look at the azure-aci-container.yml template, we can see the same structure as azure-aci-rg.yml. Since Azure Container Instances require many more values to create than a resource group, we have many more parameters declared at the beginning and in the CmdLine@2 task, where we declare our environment variables. The key difference in this template is the extra CmdLine@2 task at the end that renames the container.tf file to the name of the ACI resource. This allows us to create additional ACI resources in the same Terraform configuration by providing a unique name to the configuration file, so we don't copy over any files:
Now that we've reviewed our two repos, let's wrap our head around the workflow in this build pipeline. Our pipelineconfig.yml file is our build pipeline file, which references the desired infrastructure yml file to build such as aci-prod-sampleapp1.yml. This file then points to several pipeline templates located in the templates repository which each build out the Terraform configuration files according to the parameter values specified in aci-prod-sampleapp1.yml. Finally, once our Terraform configuration files are built, they are published as an artifact which will then be used by our release pipeline to deploy to Azure:

In the next step we are going to deploy the Azure Container Instance infrastructure described in the aci-prod-sampleapp2.yml file.
Step 3 — Deploying Resources
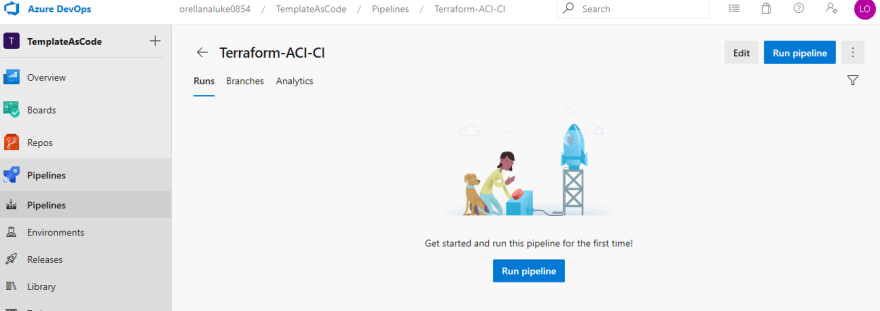
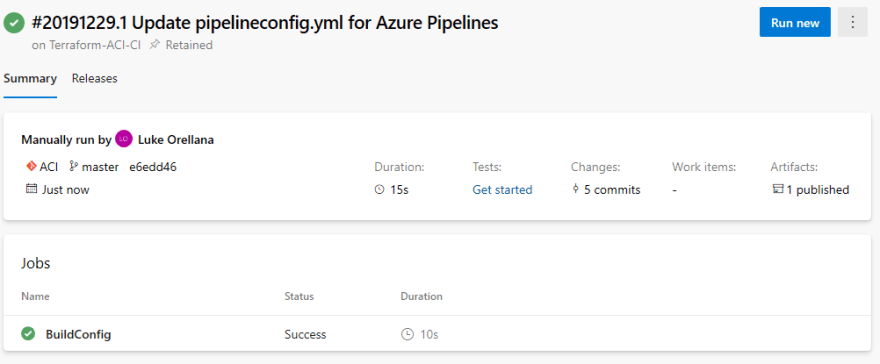
First, let's run our build pipeline. On the left-hand side select Pipelines to expand the options underneath it. Then, once again, select Pipelines to see our build pipelines. Select Terraform-ACI-CI and select Run pipeline:
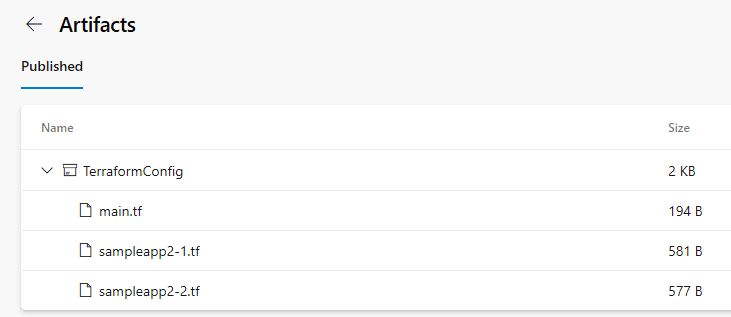
Select Run in the pop-up window to start our build pipeline. It will run for a minute or so and the artifacts will then be generated for our sampleapp2 infrastructure. We can view these artifacts by selecting 1 published under the artifacts section:
We can see our Terraform configuration files for both ACI resources are there:
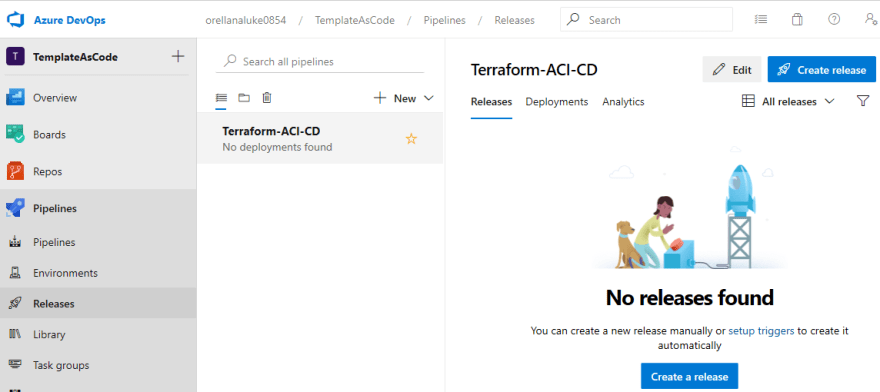
Let's deploy the infrastructure to our Azure subscription by running the release pipeline, but first we need to edit the release pipeline to configure a connection to our Azure subscription. On the left hand side expand Pipelines and select Releases. We can see our Terraform-ACI-CD pipeline has been imported, select Edit:
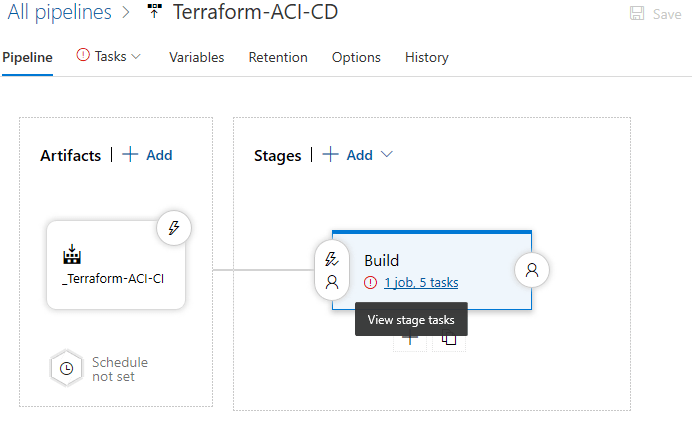
Under our Build stage select 1 job, 5 tasks to edit our tasks to include our Azure subscription:
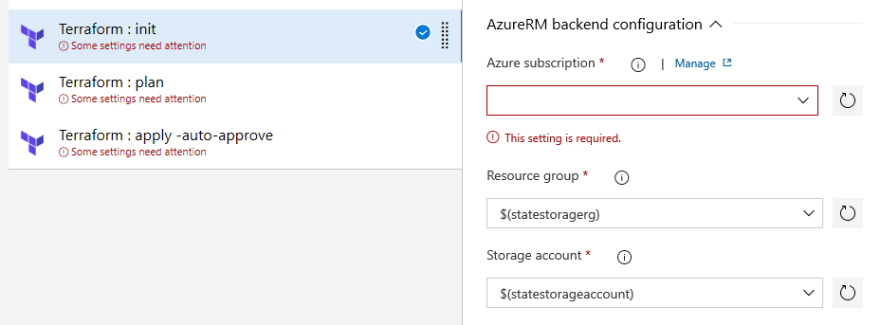
Select the first task Set up Azure Storage Account... and click on the drop-down box under Azure subscription. A list of subscriptions associated with your tenant will appear in this box. Select one that you would like to deploy the example Azure Container Instances too and select Authorize. You may be prompted to login to your Azure account. This process will create a Service Principal account in your Azure tenant and assign permissions to that subscription with that account. Azure DevOps will set this up as a service connection and use that to connect to Azure:

Next, we need to configure the remaining Terraform tasks with the same Azure service connection. The new connection that we made should now show up in the drop-down menu under Available Azure service connections. Select this for all 3 of the Terraform tasks that say some settings need attention this is because they are missing their Azure subscription settings:
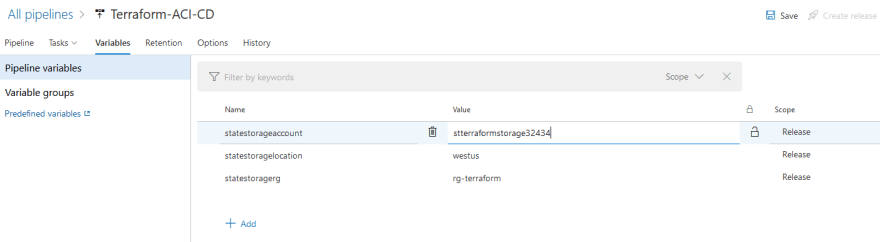
Select the Variables tab at the top. We will need to rename the statestorageaccount variable value. You can set this to anything you want. This because we are storing the Terraform state in an Azure storage account which is required to have a publicly unique name. If we don't rename this, we will get an error during the release pipeline deployment:
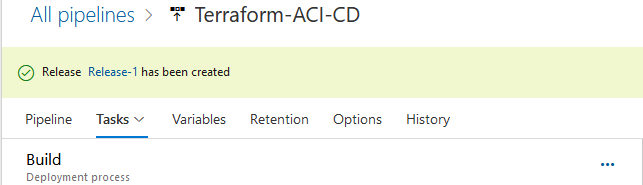
Once complete, select Save at the top. Now we are ready to deploy our infrastructure. Select Create Release and then select Create to initiate the release pipeline. We will see a new message in green indicating that the release has been created. Select Release-1 to view the release process for deploying the ACI resources into our Azure subscription:
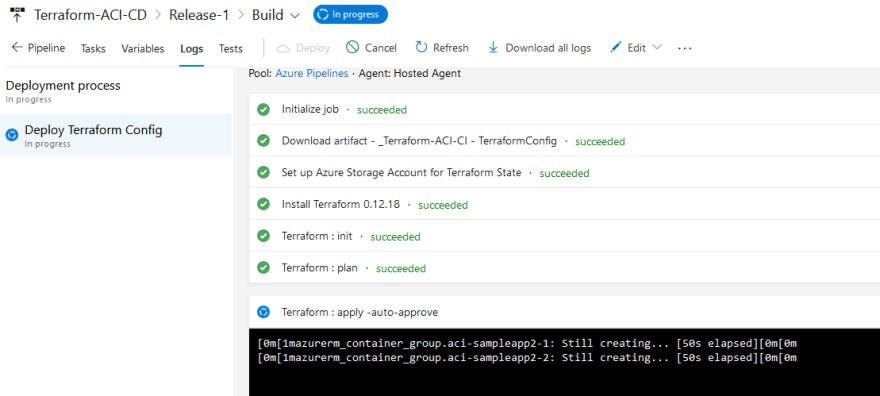
We will see that the release is running and can view the different steps of our release pipeline. This is a typical pipeline for deploying Terraform code, we provision a storage account to store our Terraform state, run a terraform init to initialize our Terraform environment and connect to our remote state (azure storage account in this case). Then we run a terraform plan to verify our configuration files have no issues. Finally if all the previous tasks are successful we run our terraform apply -auto-approve to deploy the infrastructure:
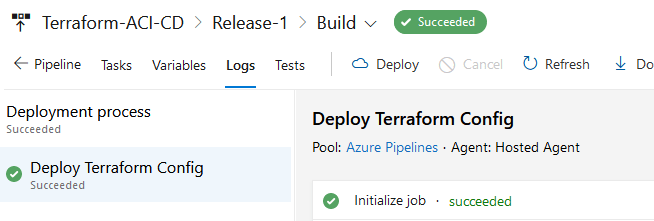
Once our release has run successfully, we will see a Succeeded message:
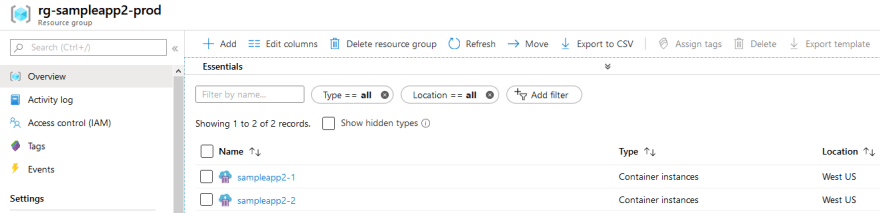
If we look in our Azure portal, we can see the resources are in fact there:
Next, we will add another ACI resource to our sampleapp2 application and redeploy our configuration with a pull request.
Step 4 — Modifying Resources with Pull Request
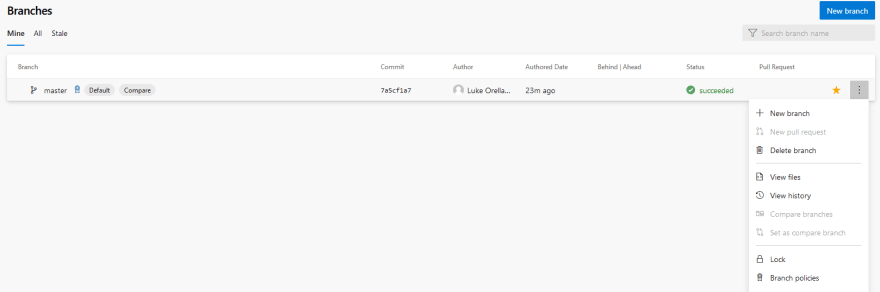
We need to set up a branch policy for our master branch, this will allow us to automatically kick off a build if a Pull Request is initiated. To do this expand Repos and select Branches. On the master branch select the ... all the way on the right side and select Branch policies:
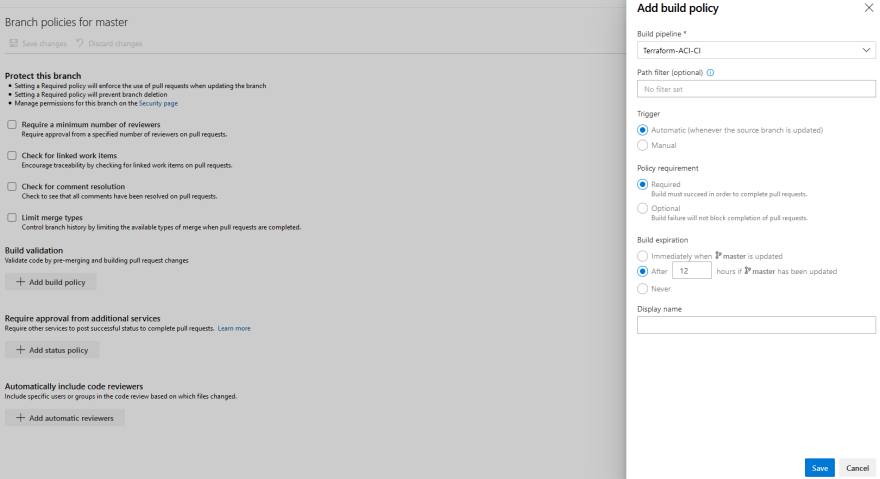
Select + Add build policy. In the pop-up window, select our build pipeline Terraform-ACI-CI and keep the defaults for everything else. Select Save to create the build policy:
Now we are ready to submit a Pull Request and trigger a new build. Let's create a new branch to make our changes in. In the ACI repository select the dropdown labeled master and select + New Branch:
In our example we will name the new branch deploysampleapp2. Select Create. We are now actively using the new branch we just created in Azure DevOps. Select the aci-prod-sampleapp2.yml file and select Edit to edit the file. We are going to add another ACI resource by adding in another ACI template with the required parameters:
#Build Azure Container Group
- template: azure-aci-container.yml@templates
  parameters:
    ContainerGroupName: 'sampleapp2-3'
    DNSName: 'cloudskillssampleapp2-3'
    OS: 'Linux'
    ContainerName: 'helloworld'
    Image: 'microsoft/aci-helloworld:latest'
    CPU: '1'
    Memory: '4'
    Port: '80'
    Protocol: 'TCP'
Next, select Commit to save our changes:
Select Commit again. Now there will be a pop up for a pull request, select Create a pull request:

In the next window we can write in some information on our pull request and description. This provides great documentation for our deployments:
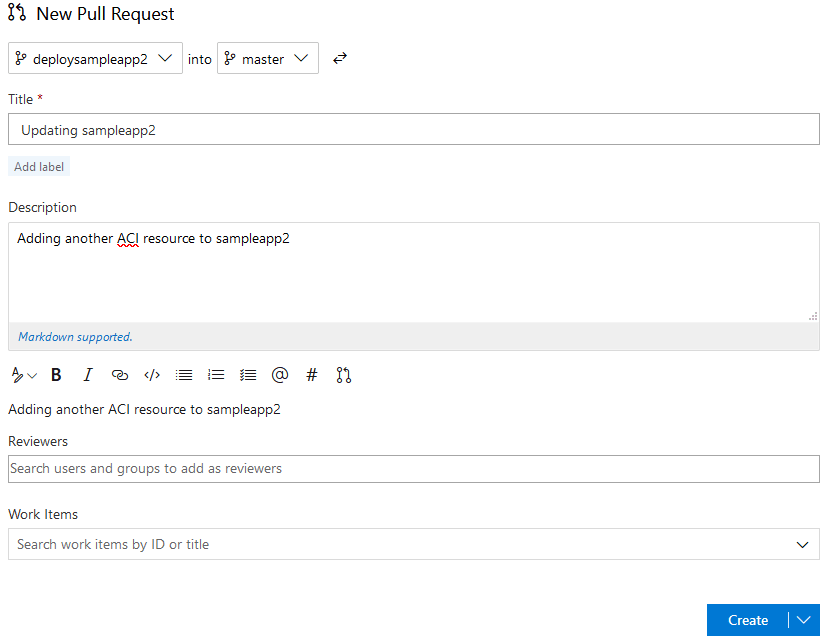
Select Create, and in the next windows select Set auto-complete. This will complete the Pull Request if our build runs successfully:

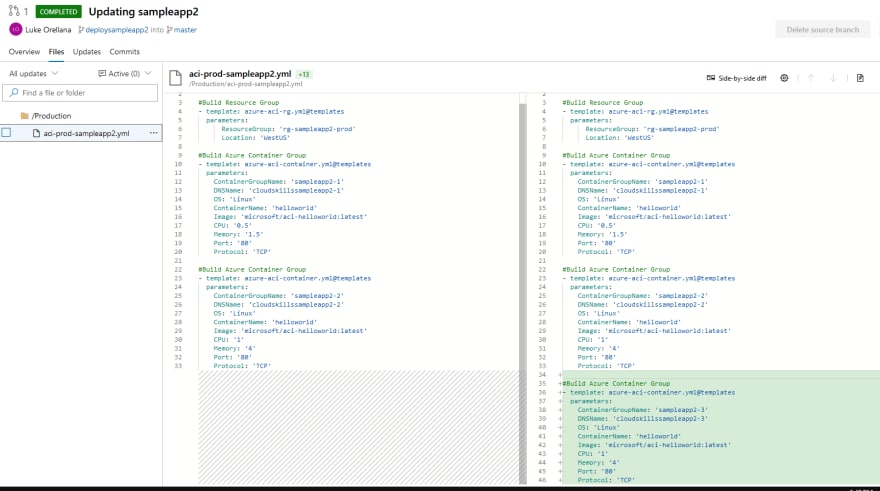
Then select set auto-complete again to confirm. Our build pipeline is now running with the changes from our new branch. If the build is successful, our branch will merge with the master branch with our new changes. Also note, if we look back at our pull request history, we can see a very simple outline of the new infrastructure that was added. This is one of the benefits of using the template parameters to define our infrastructure. Our pull requests get much easier to review:
Now let's go ahead and deploy our new resources. Expand Pipelines on the left-hand side and select Releases. Then select the Terraform-ACI-CD pipelines and select Create Release. Select Create to start deploying.
In our second release our additional ACI resource will be deployed. Once the release has been completed, we can double check in the Azure portal:

Conclusion
In this article we imported a project that utilizes pipeline templates to generate Terraform configurations during the build pipeline. We also successfully deployed Azure Container Instance resources from these pipeline templates and even added additional resources using a Pull Request.
As you can see, this model can greatly simplify Infrastructure as Code environments and provide greater management and consistency. However, keep in mind that this strategy might not fit all scenarios. For example, a tiny environment might not need to go this far with only a few resources. They may be fine with just a few repositories with Terraform configurations stored inside them. Also, an extremely complex environment could be too limited by the templatized configurations and may require a much more complex set up.
The Infrastructure as Code model can become difficult to manage at large scale, using pipeline templates instead of treating our Terraform config files like sheep prevents us from creating snowflake infrastructure and allows us to scale our infrastructure rapidly and in a stable way. For more information on Azure DevOps templates be sure to check out Microsoft's documentation. Also, if you're interested in learning more about Terraform take a look at their website for more material.

Top comments (0)