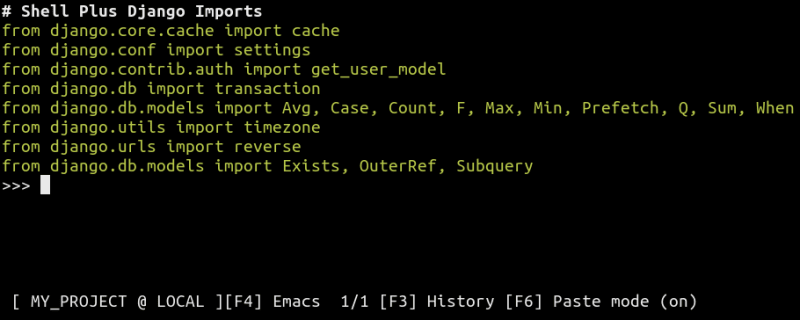
I often perform operational tasks such as modifying data or debugging failures using the Django shell. In fact, anything I can't do through the admin or through management commands I use the shell for. The package django-extensions provides a shell on steroids that I much prefer over the built in shell. It allows you to run a custom REPL such as IPython or Ptpython and has autocomplete, command history, automatic model class imports and a myriad of other dev tools. shell_plus is for a Django programmer what a scalpel is for a surgeon.
Most Django sites that have receive some amount of traffic have multiple development environments. Naturally there is always a production environment and usually a staging and (local) development environment. In the past I've fat-fingered and corrupted production data while thinking I was working on the staging environment. To avoid the fiasco I've built tooling to reduce the probability of future fuck-ups.
Using the shell and some Python configuration we can get visual indicators of what environment we're in. I like to mark the production environment in some tone of red to indicate danger and staging in blue to indicate that careless hacking is fine.
Installing shell_plus and ptpython
To use a programmable shell we need the following ingredients:
-
django-extensions/django-extensions which contains the management command
shell_plusand many other great tools - prompt-toolkit/ptpython a better Python REPL which will power the shell_plus experience. You could use other REPLs such as IPython or BPython, but I prefer ptpython.
Enable django_extensions by adding it to your INSTALLED_APPS
INSTALLED_APPS = (
    ...
    "django_extensions",
    ...
)
By default shell_plus will detect and use an enhanced REPL if one is installed.
Customizing ptpython
Ptpython reads from a configuration file where we can specify custom keybindings and the REPL colorscheme. The default configuration file can be copied from prompt-toolkit/ptpython/blob/master/examples/ptpython_config/config.py.
At the bottom of the configure method we'll add code that detects the current environment and changes the REPL title and colors depending the environment. I use Sentry in nearly all of my projects and filter issues based on the environment. SENTRY_ENVIRONMENT is injected by the deployment tool and we can use that variable to paint the shell distinctly for each environment. I like black for local development, blue for staging and red for production. Additionally we'll make the ptpython toolbar use bold font for for staging and production.
"""
Configuration example for ``ptpython``.
Copy this file to $XDG_CONFIG_HOME/ptpython/config.py
On Linux, this is: ~/.config/ptpython/config.py
"""
import os

from prompt_toolkit.styles import Style

__all__ = ["configure"]


def configure(repl):
    # Default configuration above...

    # Read the environment variable from what we set for Sentry
    environment = os.environ.get("SENTRY_ENVIRONMENT", "local")

    if "prod" in environment:
        custom_colorscheme = {"status-toolbar": "bg:#C70039 #000000 bold"}
        title = "PRODUCTION"
    elif "staging" in environment:
        custom_colorscheme = {"status-toolbar": "bg:#005ca4 #000000 bold"}
        title = "STAGING"
    else:
        custom_colorscheme = {"status-toolbar": "#000000"}
        title = "DEV"

    repl.install_ui_colorscheme("custom", Style.from_dict(custom_colorscheme))
    repl.use_ui_colorscheme("custom")
    repl.title = title
All that's left to do is to start the shell
./manage.py shell_plus
If you're trying out different colors and want to reflect the changes in real-time you can set the variable for the command and copy the configuration file to reflect the changes.
cp ptpython_config.py ~/.config/ptpython/config.py && SENTRY_ENVIRONMENT=production ./manage.py shell_plus
Configuring ptpython for Docker
FROM python:3.10.8

# Install your dependencies here

COPY ptpython_config.py /root/.config/ptpython/config.py

COPY . /app/

CMD ["gunicorn", "-b", "0.0.0.0:80", "config.wsgi"]


Top comments (0)