Now continuing with the series of posts. In this occasion I'll explain the "correct" (that worked for me after many many fails) installation of java 3D, and its configuration of the environmental variables to avoid the use of the local temporary variable CLASSPATH every time you need to compile a new program.
It's important to have only the installation that fits with your OS architecture to avoid compilation errors and exceptions with java 3D. So if you have an old installation of java that usually installs both 32 and 64 bits versions (for windows x64) you must uninstall the 32 bits version.
Step 1: Download.
As same as the previous post you need to have an Oracle Account to download this product, again you can register here and download the installer for Java 3D here, once you entered the page, select the one that fits with your OS (amd64 for x64 64 bits or i586 for x86 32 bits).

Step 2: Installation.
Now that you have the installer in your computer, run it.
Substep 1: Accept the licence agreement.

Substep 2: The Installer will show you where the new libraries will be stored.

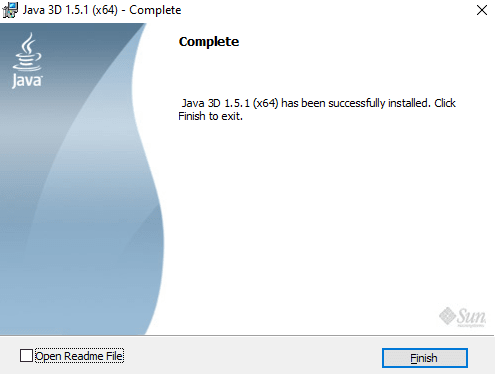
Substep 3: Wait till the installer finishes the process and click "Close" to exit.
Step 3: Environment variables Configuration.
Now lets start with the most important part of the installation, the configuration of the environment variables. This will help you to simplify the compilation process of your practices so that way you don't need to write a very long command adding the local temporary CLASSPATH variable.
Substep 1: To start press the "Windows" + "Q" keys on your keyboard to open the search bar, type the word "variable" and select the "Environment variable" option to open its configuration.

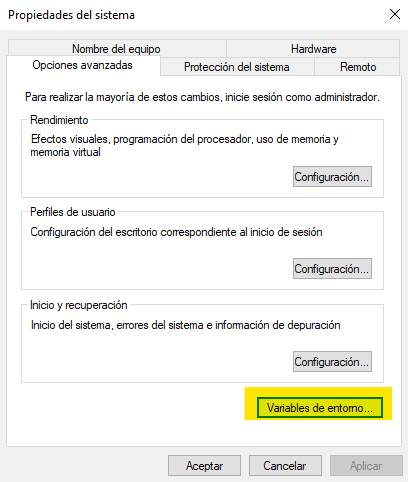
Substep 2: Once the "System properties" windows appear click the "environmental variables" button.
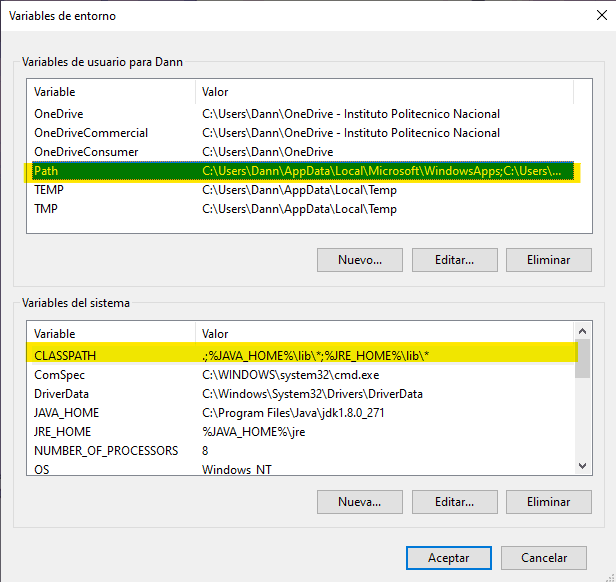
The variables that we're going to edit this time are the variable "Path" of your user (or the "Path" variable of "system variables" wichever you configured in the last post), and the variable "CLASSPATH" created in te previous post, the values you are going to add are the following.
| variable | Value |
|---|---|
| Path | C:\Program Files\Java\Java3D\1.5.1\bin C:\Program Files\Java\Java3D\1.5.1\lib\ext |
| CLASSPATH | C:\Program Files\Java\Java3D\1.5.1\lib\ext* |
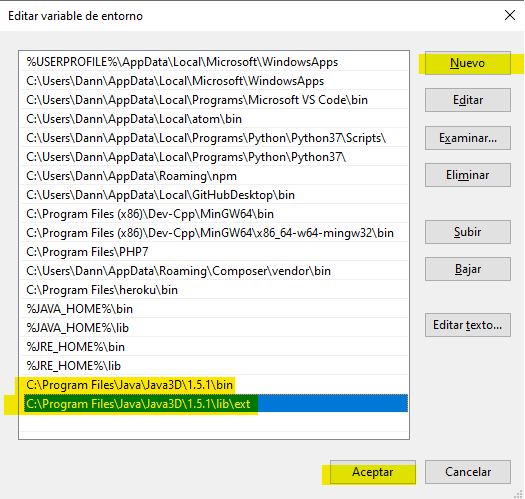
Substep 3: Click twice the variable "Path" that you are going to edit and add the values described in the table, once you are done click the "Ok" button to exit the variabe editor.
Substep 4: To edit the "CLASSPATH" variable, click it twice and at the end of the value of the variable put a semicolon (;) to separate the old values from the new one. Now add the value described in the table. Once finished click "Ok" to exit the editor, then "Ok" again to exit the "Environment variables" window and once again to exit the "System properties" window.

And That's all, now you can write and compile java 3D programs try it by copying the code of any example of this site.

Top comments (0)