
We may not have the blue tick mark against our Twitter handles, but that should not stop us from verifying our commits on GitHub. After all, a verified account somewhere is better than none at all!
![]()
Why do I need to sign my commits?
There are tons of great articles on the internet, especially this one at freeCodeCamp by Seth Falco where the author explains it better than I ever can.
So why is this targeted at Windows users specifically?
Good question.
Reason #1: I use Windows.
Reason #2: Everything is 100 times more complicated with Windows, IMHO, because there'll never be enough stackoverflow posts covering it.
Fair enough, how do I get started?
Please note as of writing, GitHub Desktop DOES NOT support signing commits per their official documentation
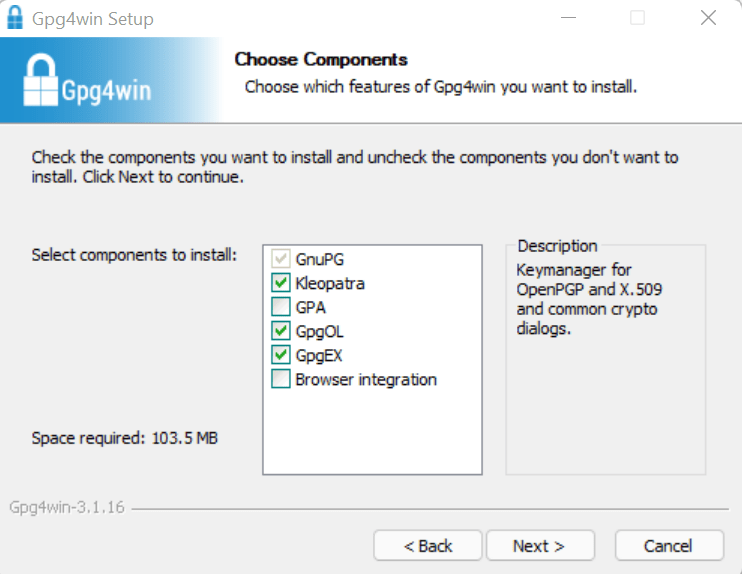
Step #1: Download gpg4win.
Step #2: After running the exe file, this is one of the very first pages of setup that you will come across. Please ensure that Kleopatra is selected during this step. We will need it later.
Step #3: Click install & finish the installation. You should see a Kleopatra icon on your desktop as shown below.

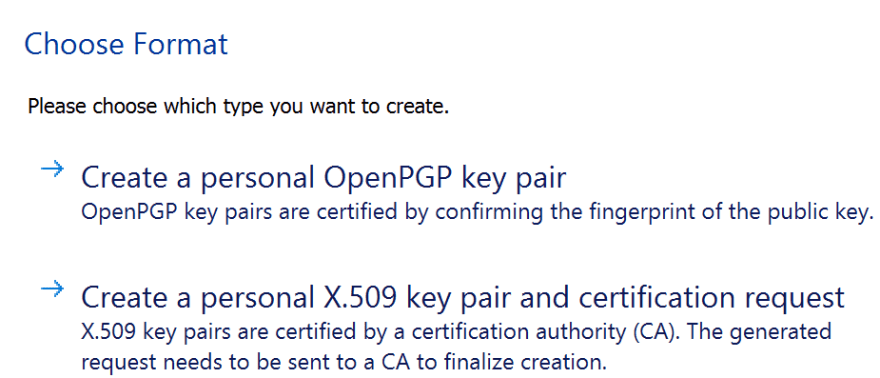
Step #4: Open the Kleopatra management tool & create your very first key pair by clicking File -> New Key Pair. Select the personal OpenPGP key pair in the dialog box that pops up.
Step #5: When you click Next, you'll be asked to enter some details. In the section against Name, I recommend entering your GitHub ID. In the email section, it's obviously a no-brainer at this point that you need to enter the one that is registered with GitHub.

Step #6: This step is optional, however you can change the validity period of the key you create. Default setting as of writing this is two years.
Step #7: Click create. You'll get a dialog box where the fingerprint of the key you just created will be made visible to you.
Step #8: This is one of the most important steps. So please ensure you follow it closely. On the Kleopatra console, you should now see the key you just created. Right click on it and select export. Save it & open it with a editor of your choice. I used Notepad because of its ease. Copy the contents of the file and navigate to your GitHub account.

Step #9: Under Settings -> SSH and GPG keys, click Add New GPG key & paste the contents from the file you just copied.
Step #10: Time to setup your CLI! You can use Git Bash or command prompt. I use the latter out of habit. On the prompt window, copy & paste the below command as is.
git config commit.gpgsign true
Step #11: If you want to enable the same keypair for signing any local repository on your machine, copy & paste the below command as is.
git config --global commit.gpgsign true
Step #12: So Windows is a tricky operating system and even if you follow all of the above steps, you still might not end up being able to sign your commits properly. This typically happens because git is not able to find the key you just generated. So, firstly let's list the keys you generated with gpg.
gpg --list-secret-keys --keyid-format=long
Next up, we will need to copy the listed public key and specify that Git needs to use that specific key with the below command.
git config --global user.signingkey your_key_here
Step #13 You should be all set to sign your commits now by appending an extra -S to your git commit command!
git commit -S -m "your_commit_message"
That's it! Once you push the commit to the repo, you should be able to see a green tick mark against your commit verifying that it came from you.
Hope this was useful!

Top comments (0)