
What is Azure App Service (Part 1)
Azure app service is a Platform As A Service (PAAS) offered by Azure that help you deploy applications on the cloud without worrying about setting up the environment you would use or updating the virtual machine or the operating system. You are only required to come with your code and then tell azure what you want.
In this article I would be showing you how to create an azure App Service and in the next post we would learn how to setup different amazing functions Azure App Service offers.
First thing we need to do is create an azure subscription if we do not already, this link help you create a free one month subscription that comes with 200 dollar azure credit. If you already have a subscription please skip this step.
Next we would be creating our App Service.
Step 1
In this step we would open the azure portal, when you open the azure portal, search for resource group then create a new one following the image step.

Then
Click create a resource group, in the basic tab select the subscription you want to use and the name of the resource group, you can decide not to make any change to the region.
After this you click review and create, then create
Step 2
Next we would search for app service and try to create a new one,
1. Go to the search bar and type *App Service *
2. Click on Azure App Service and open it

3. Click on create, this would open the basic windows.

4. Select the subscription you want to use.
5. Choose the resource group we created earlier, you can create a new one here too.
6. Give your web app a unique name as this is unique through out azure something like { Your name } + WEBAPP should do.
7. Choose code for Publish since we wouldn't be creating a container.
8. For Runtime stack choose Python 3.7.
9. If you choose Python 3.9 the Operating system by default is Linux and cannot be changed.
10. Region is where you decide where you app should be hosted, I chose Central US

App Service Plan
1. Depending on the Operating system you choose earlier, you would be asked to create a Linux or windows Plan, this helps you save the app service plan you choose for future Apps you want to create, you can leave this as it is.

2. For Sku and Size we click change size. This would open a Spec Picker which has three section depending on the kind of Web App you want to deploy, this determines the Memory and compute assigned to you App, and some additional features too. I choose S1 in the Production tier so that I would be able to access, deployment slot features, then apply.

- Ignore Zone redundancy since our service plan does not allow us to change this.
4. Click Review and Create as there is nothing we need to configure again.
5. Finally click create and wait for your App to be created
Step 3
Deploying your App
After your app has been created successfully click on go to resources.

This would take you to your Web Application.
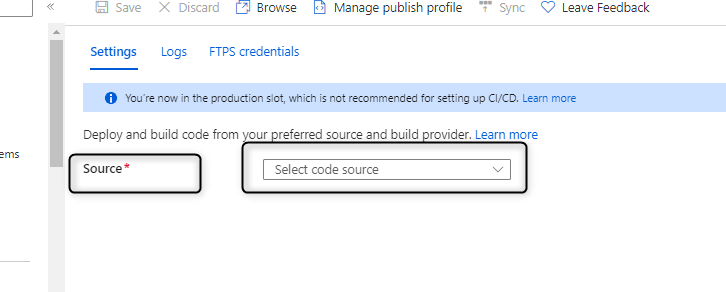
- In the Deployment Section click on Deployment Center, and waiting for it to load deployment settings, there are different columns of options, you can see Logs and FTPS credentials

- On Source in the settings Column, click on Select code source and you would see a drop down menu, In this tutorial we would be using External Git from Manual Deployment Section as it is the most straightforward and fastest way to deploy, this is not best practice. For best practice using an Option in Continuous deployment would be best.
In the new external git section for repository use this link, I create a Github repository for this purpose.
For Branch choose main and Choose Public for repository type.
On

Top comments (0)