
What is Git?
Git is a distributed version control system. If you're wondering what in the world is a distributed version control system then let me explain it for you. In a distributed version control system the information of versions and it's history is mirrored in everyone's machine, whereas in a centralized version control there is only one copy of the project.
Since git is a distributed version control it makes it perfect for open source projects, as in open source project there is no single person/company making that project, it's open to all and centralized version control systems are more suited for companies or closed sourced projects.
Installation
So the first step is to obviously install git in your system.
To check whether the git is already installed you can type the following command in the terminal(cmd for windows).
git --version
To install it you can follow this link - https://git-scm.com/downloads
Note:- If you're someone new to shell or never worked with terminals, I would highly suggest you to know basic commands, you can watch any tutorial about bash or simply you can give this blog a read.
Now that you've installed git, let us setup it and make a basic project and finally upload it on github.
For this blog I'll just be making a guessing game using JS and HTML, you can do anything you want, the main goal here is only to learn about using git.
Setting up git
Now that you have installed git we are going to configure git to use your information such as email and username.
To do that we are going to use the following commands
git config --global user.email "yourEmail@youremail.com"
git config --global user.name "YourUsername"
Replace the text inside " with the username and email you used when you made your github profile, if you haven't then take the time to create one.
You can remove the --global in the command but then it would only configure git in your local project, so you have to configure it every time you make a new project.
Let's Make the game
First let's create a directory containing our guessing game.
I personally find it convenient to use the terminal for it, the following commands that I mentioned is what I am executing if you're curious.
mkdir guessing-game
cd guessing-game
touch index.html
touch script.js
Now open the project directory in the text editor of your choice, if you don't have one I would highly suggest you to go with Visual Studio Code.
After opening the project let's add the boilerplate html in the index.html file.
<!DOCTYPE html>
<html lang="en">
  <head>
    <meta charset="UTF-8" />
    <meta name="viewport" content="width=device-width, initial-scale=1.0" />
    <title></title>
    <script src="script.js" defer></script>
  </head>
  <body>
    <input type="text" />
    <button>submit</button>
  </body>
</html>
Now let's use git in our project to record our version of the guessing game.
Initializing git
To initialize git in a project we use the following command
git init
This command would output something like this
Initialized empty Git repository in D:/Tanishq's Folder/github/guessing-game/.git/
Now this command says that it initialized an empty git repository to a folder path in .git
if you run ls -a in bash (or git bash for in windows) you can see that this command created a .git folder in the project directory.
This .git folder will contain all the information that git stores related to your project.
If you're are using VS Code, then you may have noticed some change in the project explorer.
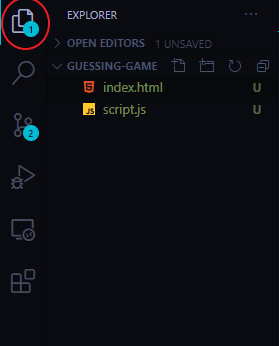
To view the project explorer you can either click the icon in the red circle in the image or use the shortcut key Ctrl + B(windows and linux) or Cmd + B(MacOS) to toggle it.
So the color of the file is now green and there is a U at the end of it. U here is for untracked or in other words git doesn't know about these files yet. VS code shows us this because it has inbuilt support for git, now that's one of the reasons to download it.
Let us take care about that.
Adding Files
We created two files and added a boilerplate to our HTML file, but unfortunately git doesn't know about it yet. What git add does is basically it adds the file contents and updates the index, the index is basically a snapshot of your working tree, and the working tree is basically the representation of your project versions.
You can read more detailed info here
Now you can either add files by mentioning them after the command
git add index.html
git add script.js
or you can mention every file in the current directory by using
git add .
For now, I will go with the second one. Now let's check what our project explorer says about them.
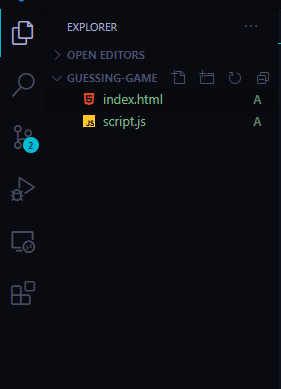
The symbol here is A which is short for Index Added you can check it by hovering your mouse over it.
Now that we have updated the index of our project, now we will record the changes, and for this we're going to use commits.
Committing our code
In layman's terms commits are basically records or checkpoints of our project. Commits are used for recording the change with appropriate comments(or captions).
For more detailed description you can check the documentation here.
Now let us record our changes
git commit -m "Added project files and boilerplate"
The -m flag is used for providing message or you can say caption and that caption is recorded between these "
If you check the project explorer in VS Code it shows no symbols, that's because we have recorded those changes and now git is ready to move on with new ones. Now we can continue making our game.
Let's receive user inputs using when the user clicks the button using JS. In the script.js file we'll add this.
let input = document.querySelector("input");
let button = document.querySelector("button");

function check() {
  console.log(input.value);
}

button.addEventListener("click", check);
Now that we've taken user input and shown them in console, we'll record this change and label it, using what we've learned.
git add .
git commit -m "Showing user input to console"
The game isn't complete yet, I'll be doing the rest of the changes and I'll make sure to commit all those changes, so you can view them and understand the different changes to code.
Let's share
Now let us upload our project on Github. If you know about Github then you may skip a few lines, but if you're new don't worry this blog got you covered up.
What is Github?
Github is the largest platform for sharing open source projects, for a layman, a social media platform for sharing your code.
Github is literally the king of open source platforms, so there is no point in explaining it, so let's cut the chase and upload our guessing game on github. So be ready with your github accounts and let's go.
Making a Repository
Log in to Github > Click on the button that says "New"
after that fill up the fields and add readme.
The form should look like this

Now click the beautiful green button below that says "Create Repository".
This would create a repository on your account and it would redirect to your repository link. Hurray! We successfully added a repo on our account, let's upload our guessing game.
First grab the https link (if you have an ssh key, then you may copy the ssh link) and copy it.

Now let's link our local project to our repository on github. In the terminal, make sure that you're in your project folder then type the following command.
git remote add origin <link of your repo>
Now that our local project is linked, let's upload the project by typing the following command.
git push -u origin master
master here is the master branch here, the branch where we're uploading our files to.
The -u here is short for --set-upstream I added to save us from typing origin master again and again whenever we push our changes to Github repository. So next time when you upload your changes you only have to type git push.
!Whoops if you're also faced with an error similar to this

Don't worry it was intentional. If you look at the hints, it says that "the remote contains work that you do", remote here is the Github repository but what work did we do into that, if you look up there was an Add README.md option that we checked, what it did was created a file called README.md in our repository, but in our local project we never included the step, so let's take the changes in our repository and add it to our local project.
For that we're going to use
git pull origin master --allow-unrelated-histories
Since the push command failed the upstream was never set in git that's why we typed origin master and for --allow-unrelated-histories it's because we messed up our work tree, since the first record in our repository was of README.md which was not a part in our git repository.
To avoid this mistake we shouldn't have checked the Add README.md option or alternatively we should have first created our repository with README.md from github and then cloned it to our local machine and then we should've done the changes. Whew!
So whenever you have to pull the changes which are not causing any conflict with your local project and the repo you can use git pull only.
Now that everything is dealt with, we can finally push, so without wasting any further time let's type push command
git push -u origin master
and don't forget that we only have to type -u origin master once, after this there is no need.
Now on github you can check your project and you can check my project as well! You can also view the changes that I have done, furthermore I have created a commit on every step, so you can understand the progression of the code.
The link for the guessing game Github repo is https://github.com/TanishqSingla/Guessing-game/
Happy Coding!

Top comments (0)