In this multipart tutorial series, you will learn how to write a basic Microservice with Ballerina programming language, deploy it to Azure Kubernetes Service (AKS) and make it production-ready with features available in the Azure platform.
The first installment of this series focuses on getting the simplest things done with the bare minimum effort. At the end of this post, you'll learn the following:
Objectives
- Write a simple Ballerina microservice that returns a JSON array of Todo list items.
- Generate a Docker image with Docker annotations built into Ballerina.
- Push the generated image to Azure Container Registry (ACR).
- Create a Kubernetes cluster in Azure Kubernetes Service (AKS) and deploy the above container image into that.
- Test the microservice with Postman.
As we dive deep into the series, I'll show you how to make this microservice production-ready to have features like authentication, auto-scaling, load balancing, monitoring, and integrating with a CI/CD pipeline.
Before you begin
This tutorial assumes a basic understanding of Ballerina programming language. But we are not going to explore all the bells and whistles that come with Ballerina. I'll limit the scope to the implementation of a basic REST service. For a primer on Ballerina basics, see https://ballerina.io/learn/
To complete this tutorial, you need to install Ballerina on your local machine. Use https://ballerina.io/downloads/ to get it done.
In addition to that, you need a fair amount of knowledge on Microservices, Docker, and Kubernetes along with a local Docker development environment running Linux containers. Docker provides packages that configure Docker on a Mac, Windows, or Linux system.
Finally, you'll need an account on Azure. It gives you $200 credit to explore Azure for 30 days. If you don't have an account already, I suggest you register for a one.
Why Ballerina
Ever since the Microservices concept conceived, Java-based frameworks like Spring Boot had been the developer's first choice for writing Microservices. But here I'm going to take a little detour from that and introduce you to Ballerina, an open-source programming language purpose-built for optimizing microservices development.
The major reason I fell in love with Ballerina is it comes with all batteries included for Microservices development ' you don't need to borrow anything from the outside.
As a developer, my justification for Ballerina is you'll get more things done with less effort.
Part 1: Run Todo Service locally
1.1 Code walkthrough
In this section, let's create a Ballerina service called TodoService and run it locally.
Open up a text editor of your choice (Visual Studio Code in my case) and create a file called todo_service.bal file inside a directory of your choice. Then add the following code to it.
import ballerina/log;
import ballerina/http;

listener http:Listener todosListener = new(9090);

@http:ServiceConfig {
    basePath: "/todos"
}
service TodoService on todosListener {

    @http:ResourceConfig {
        methods: ["GET"],
        path: "/"
    }
    resource function getAll(http:Caller caller, http:Request request) {
        //return some mock Todo objects as a JSON array
        json todos = [
            {
                "id" : 1,
                "name" : "Create the Todo Service",
                "status" : "OPEN"
            },
            {
                "id" : 2,
                "name" : "Create an AKS Cluster",
                "status" : "OPEN"
            }
        ];
        //respond to the caller
        var responseResult = caller->respond(todos);
        if (responseResult is error) {
            log:printError("Error responding back to client.", responseResult);
        }
    }
}
In the above code, TodoService represents an HTTP service that is bound to /todos context. It listens for incoming HTTP connections with TodosEP endpoint which is bound to port 9090. It has got only one resource method getAll() that returns an in-memory array of Todo objects formatted as a JSON array.
1.2 Run TodoService
Now we have the basic Ballerina Microservice code in place. Let's try to run it locally just to make sure that our code works.
Open up a terminal and navigate to the place where you save the todo_service.bal file. Then execute below command in the terminal.
ballerina run todo_service.bal
If you have installed Ballerina on your local machine successfully, the ballerina command will be added to your *PATH * variable automatically. When you run a Ballerina service, it will spring up a lightweight web server under the covers and bind it to a port specified with the listener configuration. In our case, the port is 9090.
You will see an output similar to below when everything is properly in place.

A GET request to http://localhost:9090/todos will give you the below response in Postman.

Part 2: Set up the Azure environment
In this section, you'll configure your Azure environment using Azure CLI to deploy above the Todo service.
2.1 Install Azure CLI and kubectl tool
I'll be executing almost all the commands related to Azure configurations with Azure CLI. If you haven't installed it already in your local machine, see this guide to get it done. Note that you need to have Azure CLI version 2.0.53 or later to complete this tutorial. You can verify the version by running az --version command.
In order to point to the Kubernetes cluster in AKS and manage it from the local machine, you are going to need the kubectl command-line tool. If you haven't installed it already, see this guide to get it done.
2.2. Create a resource group
Once installed locally, the Azure CLI tool can be accessed with az command. Type the following command in a terminal to log in with your Azure account credentials.
az login
Once you are successfully logged in to your Azure account, let's create a resource group.
An Azure resource group is a logical group in which Azure resources are deployed and managed. When you create a resource group, you are asked to specify a location. This location is where resource group metadata is stored.
The following example creates a resource group named myResourceGroup in the eastus location.
az group create --name myResourceGroup --location eastus
You'll get an output like below when your resource group created successfully.
{
   "id":"/subscriptions/<guid>/resourceGroups/myResourceGroup",
   "location":"eastus",
   "managedBy":null,
   "name":"myResourceGroup",
   "properties":{
      "provisioningState":"Succeeded"
   },
   "tags":null
}
2.3 Create an Azure Container Registry
Azure Container Registry (ACR) is a private registry for container images. A private container registry lets you securely build and deploy your applications and custom code.
Let's create a container registry now so that it'll be useful in the later parts of this tutorial. The following example creates a container registry named dunithd and attaches it to the resource group that I have created previously.
az acr create --resource-group myResourceGroup --name dunithd --sku Basic
The registry name must be unique within Azure and contain 50 alphanumeric characters. The Basic SKU is a cost-optimized entry point for development purposes that provides a balance of storage and throughput.
Once created, you can refer to your container registry as dunithd.azurecr.io
Part 3: Generate Kubernetes artifacts with annotations
Now we have a basic Ballerina service that works and we have configured our Azure environment accordingly. Then let's see how to generate Kubernetes artifacts for the Todo service.
Ballerina offers a convenient way of generating corresponding Kubernetes artifacts automatically with annotations built into the language. The Kubernetes builder extension offers native support for running Ballerina programs on Kubernetes with the use of annotations that you can include as part of your service code. Also, it will take care of the creation of the Docker images, so you don't need to explicitly create Docker images prior to deployment on Kubernetes.
For more information, see How to Deploy Ballerina Programs in the Cloud.
To add annotations, open the todo_service.bal file and overwrite its content with the below code.
import ballerina/log;
import ballerina/http;
import ballerina/kubernetes;

@kubernetes:Service {
    name : "todos",
    serviceType: "LoadBalancer"
}
listener http:Listener todosListener = new(9090);

@kubernetes:Deployment {
    name : "todos",
    image : "dunithd.azurecr.io/todo-service:v1"
}
@http:ServiceConfig {
    basePath: "/todos"
}
service TodoService on todosListener {

    @http:ResourceConfig {
        methods: ["GET"],
        path: "/"
    }
    resource function getAllTodos(http:Caller caller, http:Request request) {
        //return some mock Todo objects as a JSON array
        json todos = [
            {
                "id" : 1,
                "name" : "Create the Todo Service",
                "status" : "OPEN"
            },
            {
                "id" : 2,
                "name" : "Create an AKS Cluster",
                "status" : "OPEN"
            }
        ];
        //respond to the caller
        var responseResult = caller->respond(todos);
        if (responseResult is error) {
            log:printError("Error responding back to client.", responseResult);
        }
    }
}
Here, @kubernetes:Deployment is used to specify the Docker image name, which will be created as part of building this service. Notice that I have put the private Docker registry name created in **Part 2 **in the image name as below.
image : dunithd.azurecr.io/todo-service:v1
The @kubernetes:Service {} annotation will create a Kubernetes service that will expose the Ballerina service running on a Pod. For simplicity, I have put LoadBalancer as the service type. Then Azure will automatically provision a load balancer resource for me with an external IP address. I will show you how to configure NGINX as an Ingress controller in a later tutorial.
Now let's use the below command to build the Todo_service.bal file. This will also create the corresponding Docker image and the Kubernetes artifacts using the Kubernetes annotations that you have configured above.

You can use the docker images command to verify that the Docker image specified in the @kubernetes:Deployment was created.

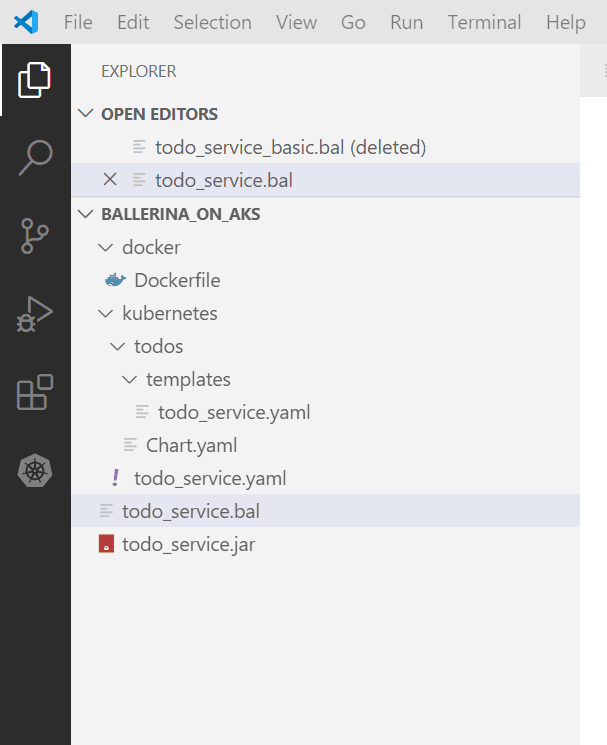
The Kubernetes artifacts related to your service will be generated in addition to the .jar file. Notice the docker and kubernetes directories created in your working directory.
Part 4: Push Docker image to Azure container registry
Now we have Todo service as a Docker image in our local repository. This needs to be pushed to the Azure container registry (ACR) so that our Kubernetes cluster can pull it from there.
4.1 Login to container registry
In a previous step, we created a container registry in Azure. In order to use it, you must first login. In the Azure CLI, type the below command with the name you have given as the registry name before (dunithd in my case).
az acr login --name dunithd
The command returns a Login Succeeded message once completed.
4.2 Push the image to ACR
Use the docker push command to push to the local image to your ACR as follows.
docker push dunithd.azurecr.io/todo-service:v1
This command may take a few minutes to complete.
The following command returns a list of images that have been pushed to your ACR instance
    > az acr repository list --name dunithd --output table

    ------------
    todo-service
The following command returns the tags for the todo-service image we just pushed.
    > az acr repository show-tags --name dunithd --repository todo-service --output table

    --------
    v1
Part 5: Create Kubernetes cluster and deploy artifacts
So far, we have tested the todo-service locally, generated a Docker image, and Kubernetes artifacts out of it and pushed the local image to the Azure container registry. What's left is to create a Kubernetes cluster in AKS and deploy the generated artifacts into that.
5.1 Create a cluster of two nodes
The following command creates a Kubernetes cluster of two nodes named myAKSCluster in the resource group named myResourceGroup which we have created in a previous step.
Here, the AKS cluster needs to access Azure Container Registry (ACR) instance to pull the todo-service:v1 image you pushed earlier. For that, Azure automatically creates an Azure Active Directory service principal and grants the right to pull images from the ACR instance. If needed, there's an option to use a managed identity instead of a service principal for easier management.

After a few minutes, the deployment completes and returns JSON-formatted information about the AKS deployment.
5.2 Configure kubectl to connect to your cluster
The following command configures the kubectl tool to connect to your AKS cluster. It fetches credentials for the AKS cluster named myAKSCluster in the myResourceGroup and creates an entry in your *~/.kube *directory.
az aks get-credentials --resource-group myResourceGroup --name myAKSCluster
Verify the connectivity to your cluster by running kubectl get nodes command as follows.

5.3 Deploy generated Kubernetes artifacts
Now we are at the final moment of our tutorial. The only thing left is to deploy the Kubernetes artifacts generated in a previous step.
From your working directory where todo_service.bal resides, execute the below command.
kubectl apply -f ./kubernetes
If everything goes fine, it should produce an output like below.

Behind the scenes, kubectl has created a deployment and a service for our Todo service. You can verify the service as follows.

Notice the external IP address assigned our todos service. That is because I have set the service type to LoadBalancer when configuring the service annotation.
Now our service is accessible from outside the cluster. Here's the output I got when I called the todo service with the external IP using Postman.

See, how easy it is to spin up a Kubernetes cluster and deploy your Microservice into that!
Cleaning up
As this tutorial is the last part of the series, you may want to delete the AKS cluster. As the Kubernetes nodes run on Azure virtual machines (VMs), they continue to incur charges even if you don't use the cluster. The following command removes the resource group, container service, and all related resources.
az group delete --name myResourceGroup --yes --no-wait
What's next?
Well, I guess the tutorial was a bit long. But it covers almost every step that is essential to write a Microservice with Ballerina and getting that deployed into AKS. For an absolute beginner on Ballerina and AKS, this tutorial would be an ideal place to start.
We merely scratched the surface here. When I said ÔÇ£production-gradeÔÇØ in the title, there's a lot more to come in this series.
Hence, expect the following posts as follow up items to this article in the future.
- Using Azure DevOps to build a CI/CD process for our Todo service and perform rolling updates
- Configure NGINX as an ingress controller and use TLS with Let's Encrypt
- Secure Todo service with Azure AD and JWT authentication
- Access databases from Todo service
- Configure Service-to-Service communication with Istio (Todo service will be calling another service via Istio)
- Configure Azure Monitoring and logging
If there's any additional topic you want me to discuss in this series, put them as a comment or tweet me.

Top comments (0)