
In this article, I'm going to talk about how to create a scene in Godot! For this, we're going to go through some steps.
Godot version
I'm using Godot 4.1.1 for this series, if I update it, I'll write an article on how to do it, differences and what changes from what I previously wrote 😉
Source code
The source code for this article (and series) can be found in my Github under the name GodotDevTo.
Creating a project
Launch Godot, on the right side you're going to find a panel with different options, for now, lets press + New Project, this will open another window for you to choose the project name and path.
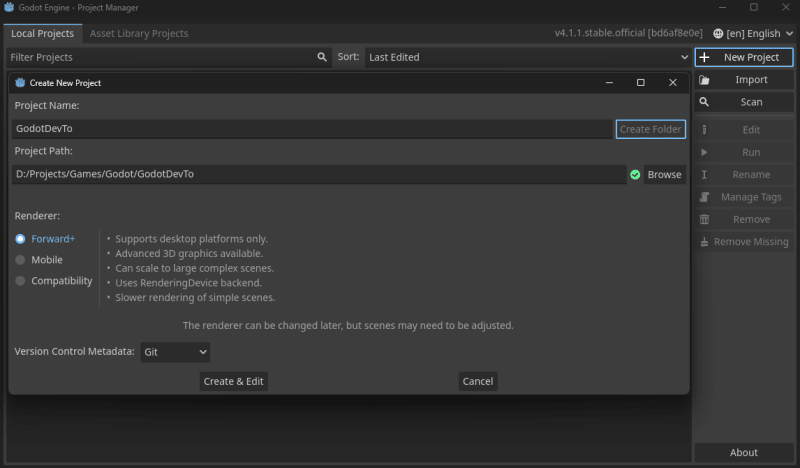
I', using Forward+ renderer since it has more functionalities and we're not targeting older systems.
Once all is done, press create and we're good to go!
What are the differences?
Forward+
Forward+ is a modern rendering method, but requires a powerful device.
Mobile
Mobile is a simplified rendering method that works well on low-end devices, but has limited features.
Compatibility
Compatibility is a legacy rendering method that is compatible with older devices and drivers, but has poor performance.
Learn more on rendering
Godot documentation has a extensive article on how the different types of rendering works.
Welcome to Godot
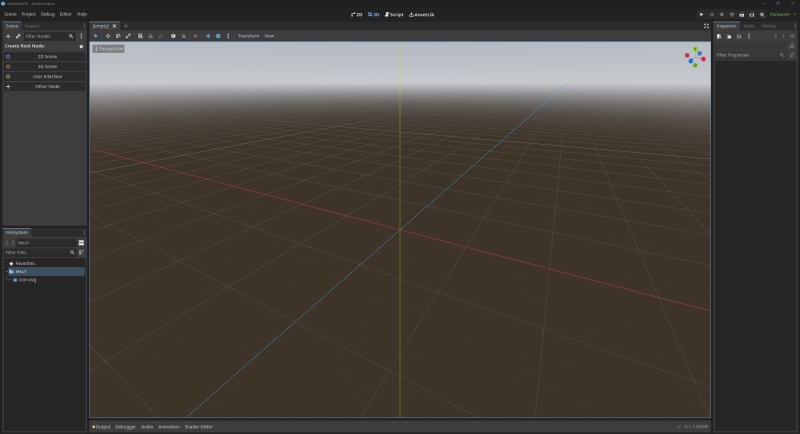
Now that we have a project created, let's get started by getting used to what we're seeing 😄
Scene
In this area, you have everything related to your scene, all your nodes such as player, camera, UI etc.
Scene editor

Here is where you're going to create your scene, by moving nodes around and creating your world/
Upper panel

In here you can change the scene editor to be 2D, 3D, script and open Godot asset lib.
Let's go ahead and select 2D since we're creating a 2D Game.
Note on Script
Since we're using VS Code as our editor, opening a script will open VS Code and will not use the script editor the engine provides.
File System

This area shows all files related to the project, assets, sprites, scripts, nodes, etc.
Bottom Panel

Here you can find some cool windows to help you with yout project!
Inspector
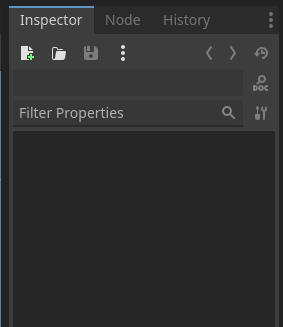
Inspector is divided into 3 tabs:
Inspector
Shows the properties of the selected node.
Node
Shows details to the selected node, you can find Signals and Groups here (We're going to tackle these later)
History
The edits the selected node suffered.
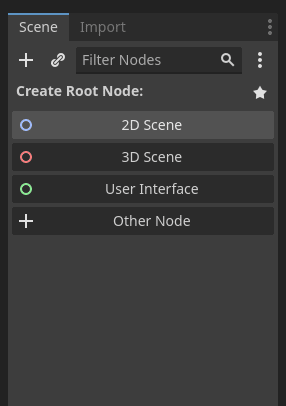
Creating a Scene
FINALLY! What we're being waiting for, how to create a scene!
And it's pretty easy, in the Scene panel, click on 2D Scene option and that's it, you have a scene!
Don't believe me? Let's create out "player".
Creating the Player
To create a player, right click on Node2D option and select + Add child node

A new window will open, in there, search for CharacterBody2D, select it and press create.

Now we have a player node in our scene 😁... granted it does nothing, for now.
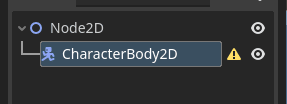
Note there's a warning message on the right side of it, it's telling us we need a collision node attached to it. Don't worry about it for now, as I'm going to cover it in the next articles.
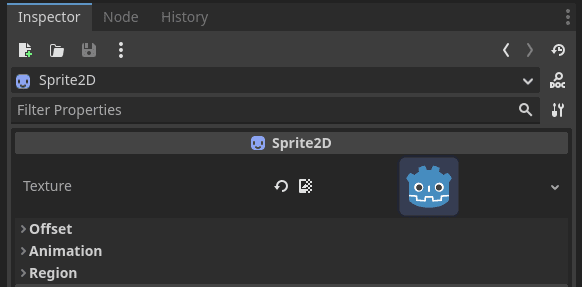
Add a sprite to our player
Same as we did to our scene, right click the CharacterBody2D and + Add Child Node. This time, look for Sprite2D, select it and press create.
For now it's just for testing as we don't have a propper sprite for our player.

Adding a sprite to our Sprite 2D
Let's use the icon.svg that's already in our File System. Select the Sprite2D Node and in inspector, drag and drop the icon.svg into the Texture Property.
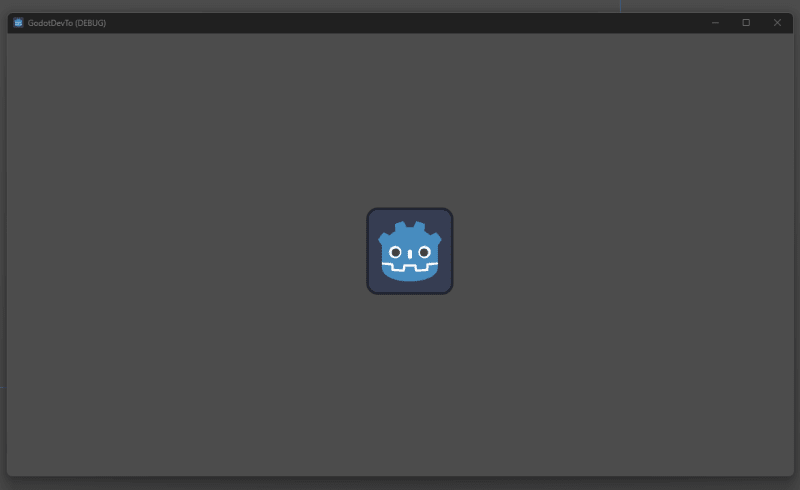
And let's move our CharacterBody2D to the middle of the screen, so we can easily find it.
Here are the coordinates I used.

Running the scene
To run our scene, we need to first save it. So let's create a Scenes folder in our File System.
Right click the res:// folder > Create new > Folder and name it Scenes. Now, select the base Node and save it in the Scenes Folder, I named this scene FirstScene.
Now that everything is setup, press F6 (this will run the selected scene).
This will open a new window with your scene! YAY!
Thank you!
I hope you find this article helpful!
See you in the next article!

Top comments (0)