I'm a person who relies deeply on notes app, mostly I use Bear Note for taking notes for tech books or courses. When a note became huge and included enormous topics and headings inside, TOC(Table Of Contents) will be very useful for an efficient searching. So I created this simple tool for generating TOC in Bear Note.

User Interface
Cause it's just a simple tool, I quickly built the UI with simple settings in QtDesigner without any further edits.

Dev Workflow
Step1: Export identifier & html page of that note.[operations inside Bear Note]
Reference to Bear Note API document, we define a method to generate TOC with valid jump links inside Bear Note.
Ref:https://bear.app/faq/X-callback-url%20Scheme%20documentation/
def textFormat(self, aster, insert, factor):
    return '\t' * factor+aster+' '+'[' + insert + ']' + '(' + self.bearNoteUrl(insert) + ')\n'
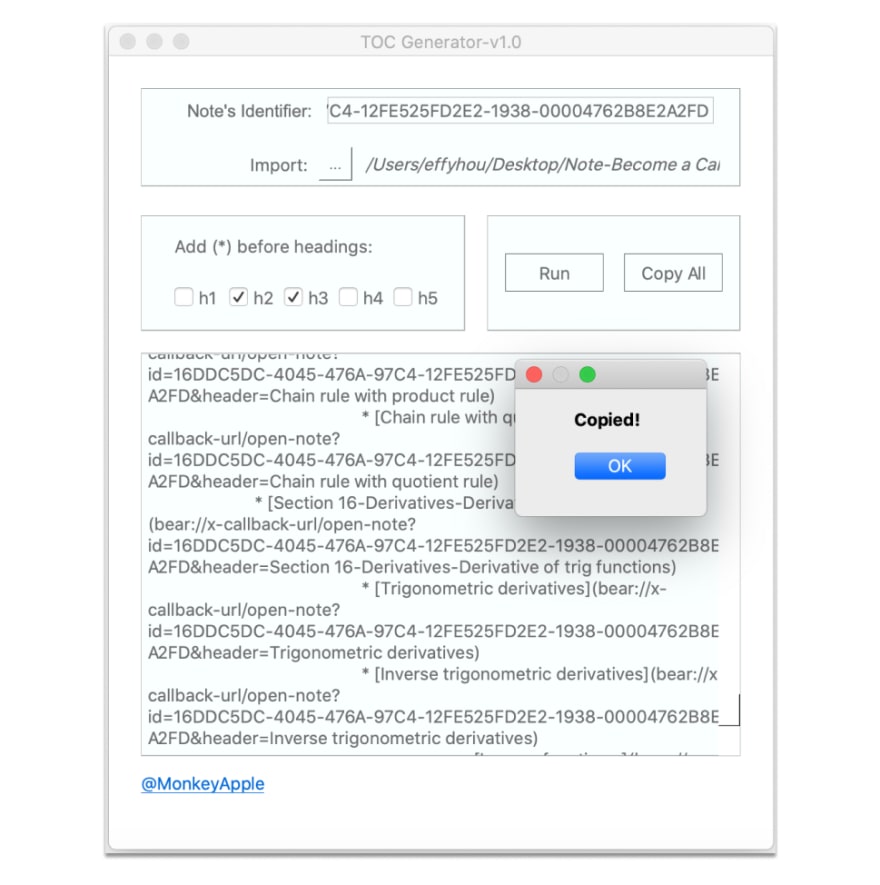
Step2: Hit 'Run' button to trigger the scraping process
Use beautifulSoup to extract Headings from HTML file:
- Cause the HTML code exported from Bear Note is very clean, so html.parser is enough to reach our goal, and no need to import extra module library such as 'lxml'
- Search all lines of the html code and generate appropriate links which matched with the conditions (here conditions are all types of Headings,from'h1'to'h5')
def scraping(self):
    self.ui.textBrowser.clear()
    self.scrapResult = ''
    self.asteriskAdd()
    if self.htmlFilePath[0] != '' and len(self.ui.identifier.text()) != 0:
        url = open(self.htmlFilePath[0], encoding='utf-8', errors='ignore')
        bs = BeautifulSoup(url, 'html.parser')
        self.collectList = bs.find_all(['h1', 'h2', 'h3', 'h4'])
        self.scrapResult = "# Table of Contents\n"

        for i in self.collectList:
            if i.name == 'h1':
                insert = i.get_text()
                self.scrapResult+=self.textFormat(self.aster1,insert,0)
            elif i.name == 'h2':
                insert = i.get_text()
                self.scrapResult+=self.textFormat(self.aster2,insert,1)
            elif i.name == 'h3':
                insert = i.get_text()
                self.scrapResult+=self.textFormat(self.aster3,insert,2)
            elif i.name == 'h4':
                insert = i.get_text()
                self.scrapResult+=self.textFormat(self.aster4,insert,3)
            elif i.name == 'h5':
                insert = i.get_text()
                self.scrapResult+=self.textFormat(self.aster5,insert,4)
        self.scrapResult += '***\n'

        self.ui.textBrowser.append(self.scrapResult)

    else:
        QMessageBox.warning(self, 'Warning', 'identifier or html file needed!')
Step3: Markdown texts of TOC will be shown in text browser at the bottom, then users could copy & paste them into Bear Note
Operation Screenshot
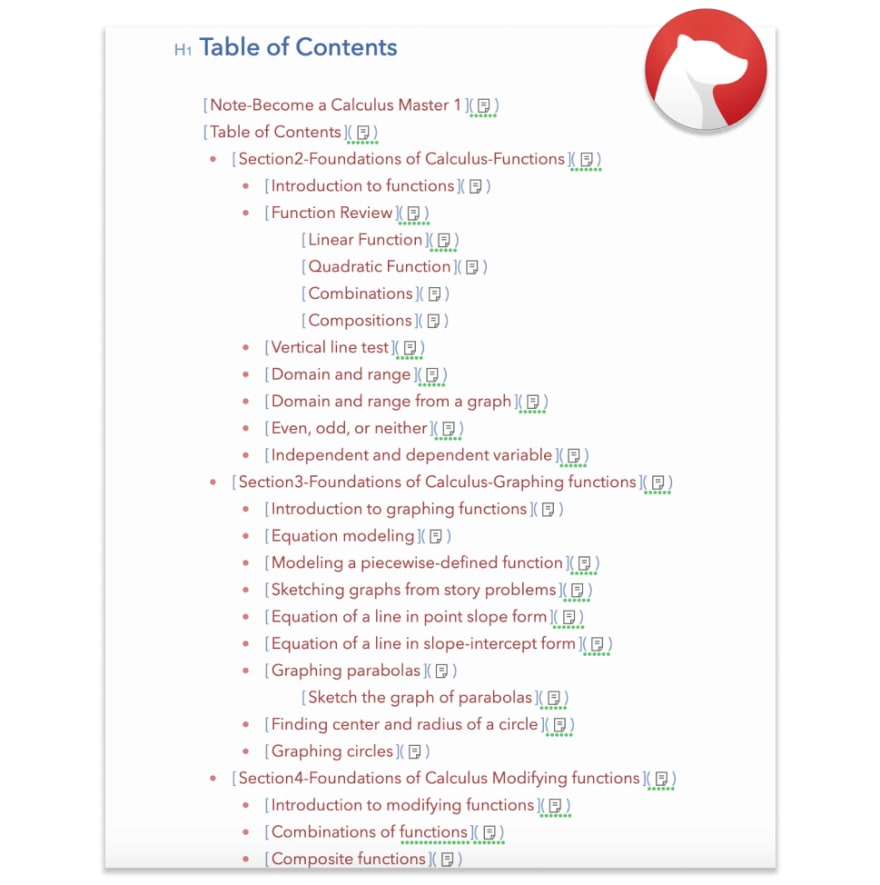
Results
Sample of generated TOC in Bear Note
Deployment
I use Pyinstaller to create distributable .EXE file for Windows users and .app for Mac users(find them in "dist" folder). But there is one thing we needs to pay attention: The default .spec setting generated from Pyinstaller will lead to low resolution rendering in Mac Retina. We need to add one more line into .spec file to solve this problem.
Reference:https://pyinstaller.readthedocs.io/en/stable/spec-files.html
info_plist={'NSHighResolutionCapable': 'True'}

Project link
You can find the source code and executable files here:
https://github.com/monkeyapple/TOC-Generator-for-Bear-Note
What's next
- provide more customization options like:ordered Lists
- seek better solution for packaging: Pyinstaller generated 70M executable file for Mac seems too much, compare with the Windows version which is 33M.

Top comments (0)