
Introduction
One fun thing about JavaScript is that it can be used to do a lot of mind-blowing things. Now, for educational purposes, I’ve always longed for an Interactive Quiz Project that beginners can easily follow.
So for this Guide, we’ll be looking at how To Build An Interactive Quiz Project.
After following the step-by-step guide in this tutorial, the Interactive Quiz Project will be up and running in your browser interface. Without wasting much of your time, let’s jump into this tutorial.
Prerequisite
To achieve the Interactive Quiz Project, you should be familiar with the following languages:
- HTML
- CSS
- JavaScript
Step-by-Step Process Of Making An Interactive Quiz Session
So, we’re about to dive into the process of making a quiz session for this project! Note. We’ll be using basic arithmetic as our example.
Without further delay, let’s head on.
First, you’ll create a folder. In our case, we’re calling it Quiz_Tutorial Then you’ll create a file inside of this folder and name it index.html Then you’ll open it in your code editor.
so the index.html will contain codes like this
<!DOCTYPE html>
<html>
<head>
        <meta charset="utf-8">
        <meta name="viewport" content="width=device-width, initial-scale=1">
        <title>Quiz Tutorial</title>
        <link rel="stylesheet" type="text/css" href="style.css">
</head>
<body>
        <div class="center">
                <div id="quiz"></div>
                <button id="submit">Get Results</button>
                <div id="results"></div>
        </div>

        <script type="text/javascript" src="main.js"></script>

</body>
</html>
After doing this, your interface will look something like this 👇
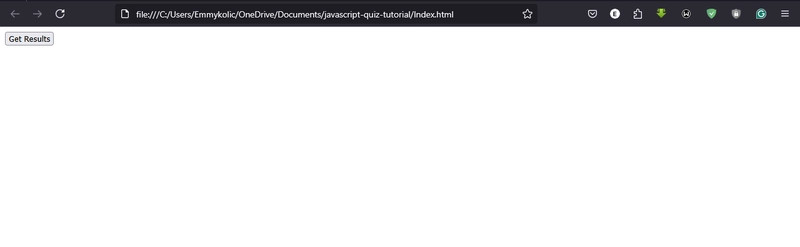
Once you get to this point, you know you’re on the right track. And we need to add some styling to it. To make it presentable, create another file called style.css and add the following codes inside it.
body{
        font-size: 20px;
        font-family: sans-serif;
        color: #333;
}
.center{
    display: flex;
    flex-direction: column;
    justify-content: center;
    align-items: center;
    height: 100vh; /* Adjust as needed */
}

.question{
        font-weight: 600;
}
.answers {
    margin-bottom: 20px;
}
#submit{
        font-family: sans-serif;
        font-size: 20px;
        background-color: #297;
        color: #fff;
        border: 0px;
        border-radius: 3px;
        padding: 20px;
        cursor: pointer;
        margin-bottom: 20px;
}
#submit:hover{
        background-color: #3a8;
}
After doing this, the interface will change to something like this: 👇

If you notice, the aritimatics are not showing, and it wasn’t added in the HTML. Good, that is because we’re fetching the maths questions from our JavaScript. To see how we did that, create another file and name it as main.js and add the codes below
var quizContainer = document.getElementById('quiz');
var resultsContainer = document.getElementById('results');
var submitButton = document.getElementById('submit');


var myQuestions = [
        {
                question: "What is 10/2?",
                answers: {
                        a: '3',
                        b: '5',
                        c: '115'
                },
                correctAnswer: 'b'
        },
        {
                question: "What is 30/3?",
                answers: {
                        a: '3',
                        b: '5',
                        c: '10'
                },
                correctAnswer: 'c'
        }
];


function generateQuiz(questions, quizContainer, resultsContainer, submitButton){

        function showQuestions(questions, quizContainer){
                // code will go here
                // we'll need a place to store the output and the answer choices
                var output = [];
                var answers;

                // for each question...
                for(var i=0; i<questions.length; i++){

                        // first reset the list of answers
                        answers = [];

                        // for each available answer to this question...
                        for(letter in questions[i].answers){

                                // ...add an html radio button
                                answers.push(
                                        '<label>'
                                                + '<input type="radio" name="question'+i+'" value="'+letter+'">'
                                                + letter + ': '
                                                + questions[i].answers[letter]
                                        + '</label>'
                                );
                        }

                        // add this question and its answers to the output
                        output.push(
                                '<div class="question">' + questions[i].question + '</div>'
                                + '<div class="answers">' + answers.join('') + '</div>'
                        );
                }

                // finally combine our output list into one string of html and put it on the page
                quizContainer.innerHTML = output.join('');
        }

        function showResults(questions, quizContainer, resultsContainer){
                // code will go here


                // gather answer containers from our quiz
                var answerContainers = quizContainer.querySelectorAll('.answers');

                // keep track of user's answers
                var userAnswer = '';
                var numCorrect = 0;

                // for each question...
                for(var i=0; i<questions.length; i++){

                        // find selected answer
                        userAnswer = (answerContainers[i].querySelector('input[name=question'+i+']:checked')||{}).value;

                        // if answer is correct
                        if(userAnswer===questions[i].correctAnswer){
                                // add to the number of correct answers
                                numCorrect++;

                                // color the answers green
                                answerContainers[i].style.color = 'lightgreen';
                        }
                        // if answer is wrong or blank
                        else{
                                // color the answers red
                                answerContainers[i].style.color = 'red';
                        }
                }

                // show number of correct answers out of total
                resultsContainer.innerHTML = numCorrect + ' out of ' + questions.length;
        }

        // show the questions
        showQuestions(questions, quizContainer);

        // when user clicks submit, show results
        submitButton.onclick = function(){
                showResults(questions, quizContainer, resultsContainer);
                // on submit, show results
        }
}

generateQuiz(myQuestions, quizContainer, resultsContainer, submitButton);
The above code makes the math question display and also display the result once you click Get Result. Here’s a GIF that shows your end result: 👇
Conclusion
Building an interactive quiz project using Vanilla JavaScript is an exciting way to enhance your web development skills while creating a dynamic and engaging user experience. By following a step-by-step approach, you can break down the project into manageable tasks, such as structuring the HTML, styling with CSS, and implementing JavaScript functionalities for question handling, answer validation, and score tracking.
Through this process, you gain hands-on experience with JavaScript concepts like event listeners, DOM manipulation, and data handling, which are crucial for interactive web applications. Additionally, you can enhance the quiz by adding features such as timers, progress tracking, and animations to make it more engaging.
With practice and creativity, you can expand your quiz project into a more sophisticated application, integrating APIs or databases for a richer experience. The key takeaway is that Vanilla JavaScript provides a solid foundation for interactive web development, empowering you to build projects that are both functional and user-friendly. Keep experimenting, and you'll continue to improve your skills as a JavaScript developer! 🚀
About The Author
Full-stack Laravel developer Emmanuel Okolie has 4+ years of experience in software development. He has developed full-fledged skills by combining software development, writing, and instructing others in what he does.
His stacks include ReactJs Laravel PHP JavaScript, and other languages and frameworks.
As a freelancer, he creates websites for clients and writes technical guides to show people how to do what he does.
If given the chance, Emmanuel Okolie would enjoy speaking with you. Please follow him on his website, Github, LinkedIn, and Twitter.

Top comments (0)