It’s really common for apps that support notifications to use them to update the application badge to display numbers of unread messages, undone tasks, etc. But what if you don’t need or want the added complexity of supporting push notifications, or even local notifications, but want to alert the user via an app badge?
Apple’s documentation on this particular way of using app badges is not the best. Badges are combined with the UserNotifications framework, but if you want to set the badge yourself outside of a notification, that is part of UIKit. And the documentation are missing important points like: do you need to check that you’re authorized to show badges to set the badge manually? Will it error out? Crash? Result in strange app behavior?
Manual app badges turn out to be really easy, but the docs don’t make it seem that way. Let’s demystify them right now.
First of all, as I alluded to above, badges are part of the notification functionality of iOS. This means that before you do anything with notifications, you need to get authorization from the user.
let center = UNUserNotificationCenter.current()
center.requestAuthorization(options: [.badge])
   { (granted, error) in
   }
If you want to do something if the user rejects the authorization, then you can include code that handles that case in the block. More than likely, if a user rejects app badge authorization, your app will not experience any problems, as we will touch on a little later, so I generally don’t do anything to handle the condition (but you must pass a block, because it isn’t optional…).
Apple recommends you do this authorization process when the app is first launched. I’ve seen some apps that delay that to an initial onboarding process, so they can better explain to the user why they need notification access. Either way, you should do this step early in the app lifecycle.
Once you have that authorization, it’s time to set a badge. While other notification functionality is more complicated, setting the badge count is really easy, though not obvious. Setting the badge count manually is a property of your UIApplication object, but that isn’t indicated anywhere in Apple’s notifications documentation, only in the UIKit documentation.
Once you know that, it’s really, really easy:
UIApplication.shared.applicationIconBadgeNumber = 1
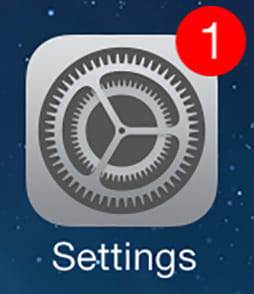
This will result in your app displaying a badge with the number 1 on it, like so:
Setting applicationIconBadgeNumber to 0 will clear the badge. (This also has the side effect of clearing any notifications your app has produced, because badges are normally coupled with notifications, but for this example, we are just implementing manual badges, so nothing to worry about here).
Now, you may have noticed that there was no checking around setting the badge number whether badges were authorized by the user. That is perfectly okay. iOS will simply ignore any request to set a badge if a user has not authorized a badge for your app, or revokes that authorization later on. You may want to check if you want to do something else instead of an app badge using UNUserNotificationCenter.getNotificationSettings(completionHandler:). For app badges, you’ll almost always want to do nothing if you haven’t been authorized, so no checking required.
A simple couple of lines of code, and you have support for app badges, the simplest way to notify your user that there’s something to do in your app!
Did you like this tip? The next tip on a workflow to get unstuck building a new app is already waiting for you.
Or sign up to get every tip straight to your inbox, plus newsletter-only tips and deeper dives on website articles and discounts on future product launches.
This post originally published at Apps Dissected.


Top comments (0)