Have you ever wondered how weather data is collected or analyzed?
In this article, you'll learn how to create a weather data collection system using Python, Matplotlib, and AWS SDK for Python (boto3). This approach allows you to create and analyze weather data from multiple locations effectively at scale.
Prerequisites
Before you begin, make sure you have:
- AWS Account: You can sign up for a free tier AWS account if you don’t have one. You'll need this to create and access the S3 bucket storing your weather data.
- AWS CLI: You can Install the AWS Command Line Interface to interact with AWS services. You'll use it to configure your credentials and manage your S3 bucket.
- IAM User Account: Create an IAM(Identity Access Management) user with full access and permissions to use the S3 service. You’ll need an IAM User instead of using your main account.
- OpenWeather API Account - You can sign up for a free tier account here. You need an API key to request the weather information.
- Python3.6 or higher
- Basic understanding of Python
Step 1: Configure AWS Credentials in the command line (CLI)
After installing the AWS CLI, You need to configure your AWS CLI to enable you to connect and access your account. Run the following command to configure your AWS CLI:
aws configure
Enter the following details:
AWS_ACCESS_KEY_ID=<your_aws_access_key>

AWS_SECRET_ACCESS_KEY=<your_aws_secret_access_key>

DEFAULT_REGION=<aws_region>
Step 2: Create a virtual environment
After configuring your AWS CLI, you need to create a virtual environment for Python to enable us to isolate all the packages we’ll use in this project in a separate Python environment.
Run the following command to create a virtual environment:
python -m venv <name-of-your-virtual-env-folder>
After creating your virtual environment, you need to activate your virtual environment before installing or using any packages in your virtual environment.
To activate the virtual environment on Windows (with Powershell) run the following command:
.\venv\Script\Activate.ps1

On macOS/Linux:
source venv/bin/activate
Step 3: Installing the packages and libraries
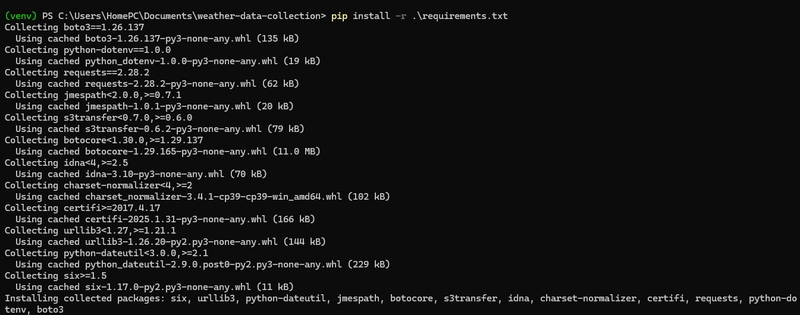
After activating the virtual environment. Run the following command to install the packages or library using the requirements.txt file. This file contains a list of all the tools (also called libraries or packages) you need for this project.
The requirements.txt file will contain the following libraries:
boto3==1.26.137
python-dotenv==1.0.0
requests==2.28.2
matplotlib
pip install -r requirements.txt
Step 4: Configuring the environment variables
Create a .env file in the root directory and configure the following contents:
OPENWEATHER_API_KEY=your_api_key
AWS_BUCKET_NAME=your_bucket_name
Step 5: Creating a Python file
After configuring the environment variables. Create a Python file named weather-dashboard.py.
Our python file will contain the following:
1. Setting Up The WeatherDashboard Class
Let’s start by creating our class constructor that will:
- Fetch weather data from OpenWeather.
- Create a S3 bucket.
- Save fetched data to S3
class WeatherDashboard:
    def __init__(self):
        self.api_key = os.getenv('OPENWEATHER_API_KEY')
        self.bucket_name = os.getenv('AWS_BUCKET_NAME')
        self.s3_client = boto3.client('s3')
This code creates a class constructor named WeatherDashboard and stores different methods with each task to be executed. The __init__ method takes a parameter self. self is a reference to the current instance of the class and is used to access variables that belong to the class.
The __init__ method creates various objects that store the self.api_key for the OpenWeather API, bucket_name for the s3 bucket name and self.s3_client initializes an s3 client using boto3
Fetch Weather Data From OpenWeather
def fetch_weather(self, city):
    """Fetch weather data from OpenWeather API"""
    base_url = "http://api.openweathermap.org/data/2.5/forecast?"
    params = {
        "q": city,
        "appid": self.api_key,
        "units": "imperial"
    }

    # Fetch weather data from API and handle errors if any occur
    try:
        response = requests.get(base_url, params=params)
    except requests.exceptions.RequestException as e:
        print(f"Error fetching weather data: {e}")
        return None
    else:
        response.raise_for_status()
        return response.json()
The function fetches weather data from the OpenWeather API, sends the request, and returns the JSON response. This function also includes error handling to manage any potential issues.
Create S3 Bucket
def create_bucket_if_not_exists(self):
    """Create S3 bucket if it doesn't exist"""
    try:
        self.s3_client.head_bucket(Bucket=self.bucket_name)
        print(f"Bucket {self.bucket_name} exists")
    except:
        print(f"Creating bucket {self.bucket_name}")
    try:
        # Simpler creation for us-east-1 region
        if os.getenv('AWS_DEFAULT_REGION') == 'us-east-1':
            self.s3_client.create_bucket(Bucket=self.bucket_name)
            print(f"Successfully created bucket {self.bucket_name}")
        else:
            self.s3_client.create_bucket(
                Bucket=self.bucket_name,
                CreateBucketConfiguration={
                    'LocationConstraint': 'eu-north-1'
                }
            )
            print(f"Successfully created bucket {self.bucket_name}")

    except Exception as e:
        print(f"Error creating bucket: {e}")
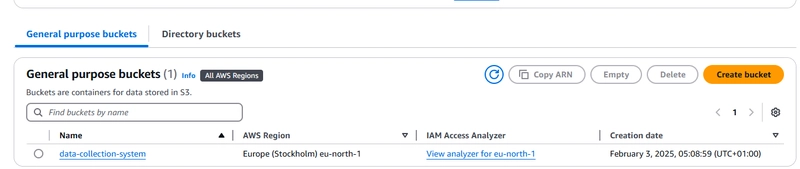
This function checks if an S3 bucket with the specified name already exists. If the bucket is not found, it creates a new one. This function also includes error handling to manage any potential issues.
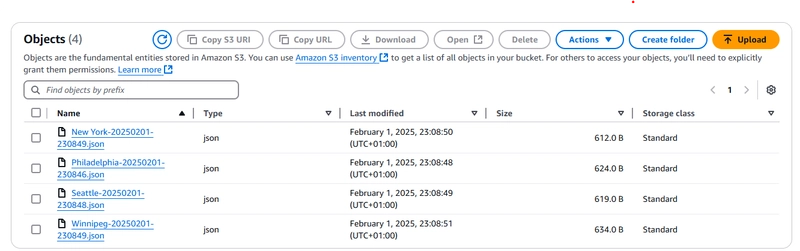
Save Fetched Data To S3
def save_to_s3(self, weather_data, city):
    """Save weather data to S3 bucket"""
    if not weather_data:
        return False

    timestamp = datetime.now().strftime('%Y%m%d-%H%M%S')
    file_name = f"weather-data/{city}-{timestamp}.json"

    try:
        """put weather data into S3 bucket"""
        weather_data['timestamp'] = timestamp
        self.s3_client.put_object(
            Bucket=self.bucket_name,
            Key=file_name,
            Body=json.dumps(weather_data),
            ContentType='application/json'
        )
        print(f"Successfully saved data for {city} to S3")
        return True
    except Exception as e:
        print(f"Error saving to S3: {e}")
        return False
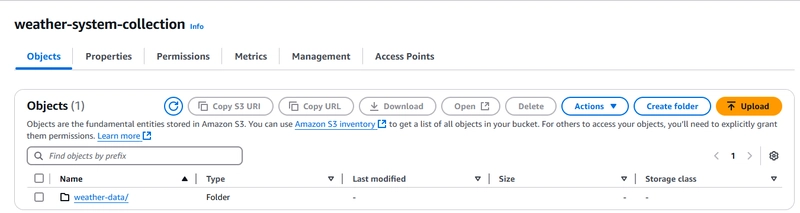
This function stores weather data as a JSON file in the S3 bucket. This function also includes error handling to manage any potential issues.
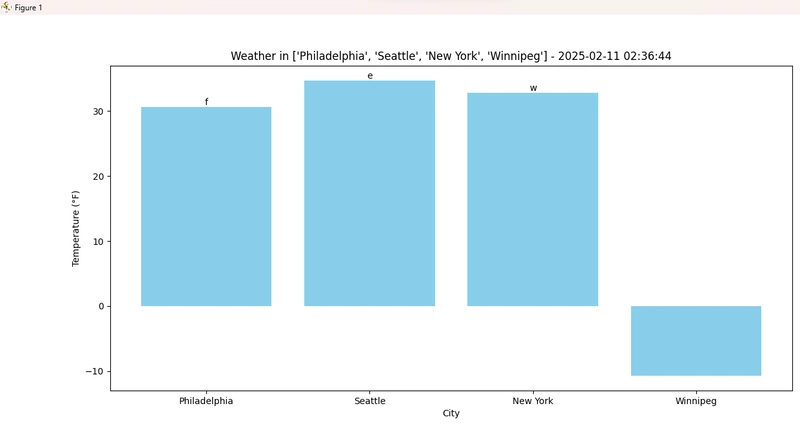
2. Visualize Weather Data Using Matplotlib
Next, Let’s create a function named visualize_weather_data outside our class constructor that:
Creates a bar chart to represent the weather data.
Adds city names on the x-axis and temperatures on the y-axis.
Annotates each bar with the weather conditions.
# create a function that takes three parameters for the cities, temperatures, and conditions

def visualize_weather_data(cities, temperatures, conditions):
    # Visualize the weather data using matplotlib.
    axes = plt.subplots()[1] # create multiple subplots
    # Create a bar chart
    axes.bar(cities, temperatures, color= 'skyblue') # create a bar chart using the cities and temperature values
        # Add labels and title
    axes.set_xlabel('City')
    axes.set_ylabel('Temperature (°F)')
    axes.set_title(f"Weather in {cities} - {datetime.now().strftime('%Y-%m-%d %H:%M:%S')}")

    # Annotate each bar chart with the weather conditions
    for i, condition in enumerate(conditions):
        if i < len(temperatures):
            axes.text(i, temperatures[i], condition, ha='center', va='bottom')

    # Display the plot
    plt.show()
3. Fetching And Storing The Weather Data In The Main Function
Next, Let's create a function named main outside our class constructor that:
Creates an of Instance of our class constructor WeatherDashboard
Fetches the weather data for our predefined cities
Allows user to add more cities
Saves data to S3
Calls the visualization function
def main():
    dashboard = WeatherDashboard()

    # Create bucket if needed
    dashboard.create_bucket_if_not_exists()

    cities = ["Philadelphia", "Seattle", "New York"]

    while True:
        # create an input that prompt the user if he will like to add another cities and if yes, add the city to the cities list and if no, continue with the existing cities list
        add_more = input(f"Will you like to add another city to the list? (yes/no): ").lower()
        if add_more == "yes":
            city = input("Enter city name: ")
            cities.append(city)
            break
        elif add_more == "no":
            break
        else:
                print("Invalid input. Please enter 'yes' or 'no'.")

    #create an empty list for conditions
    conditions = []
    # create an empty list for temperatures
    temperatures = []

    for city in cities:

        print(f"\nFetching weather for {city}...")

        # create a variable to hold the weather data for the city and print the temperature, feels like, humidity and description
        weather_data = dashboard.fetch_weather(city)
        if weather_data:
            temp = weather_data['list'][0]['main']['temp']
            feels_like = weather_data['list'][0]['main']['feels_like']
            humidity = weather_data['list'][0]['main']['humidity']
            condition = weather_data['list'][0]['weather'][0]['description']

            print(f"Temperature: {temp}°F")
            print(f"Feels like: {feels_like}°F")
            print(f"Humidity: {humidity}%")
            print(f"Conditions: {conditions}")

            # Add temperatures and conditions to respective lists
            temperatures.append(temp)
            conditions.append(condition)

        # Save to S3
        success = dashboard.save_to_s3(weather_data, city)
        if success:
            print(f"Weather data for {city} saved to S3!")
        else:
            print(f"Failed to fetch weather data for {city}")

    # calling the visualize_weather_data function
    visualize_weather_data(cities, temperatures, conditions)

    return "Weather data collected successfully"

If __name__ == “__main__”:
     main()
This function stores the instance of our class constructor in a variable name dashboard. The main function fetches the weather data for predefined cities, saves it to an S3 bucket, prints the status of the weather data, and visualizes the weather data using matplotlib.
STEP 6:
Run the following command to execute the application:
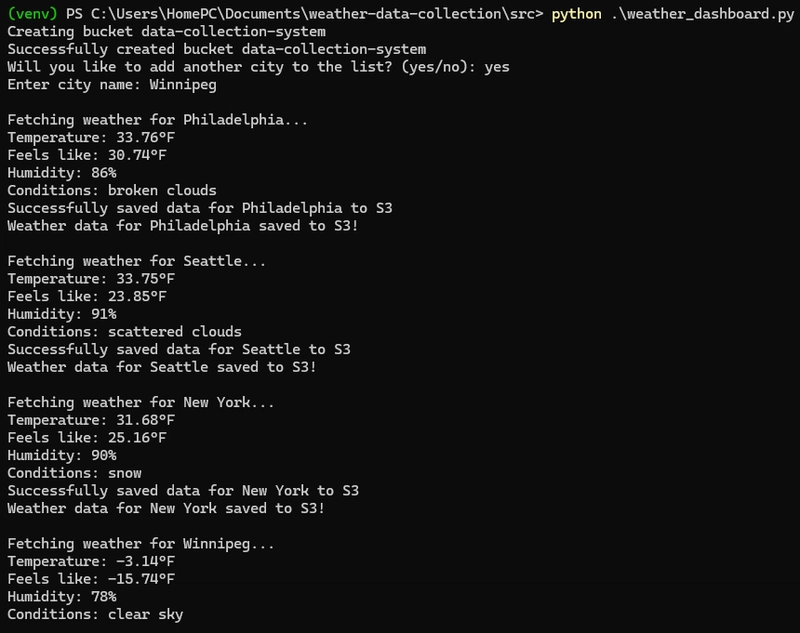
python weather_dashboard.py
You should see the following output:
Step 7: Conclusion
Congratulations! You’ve successfully built a weather data collection system using Python, Matplotlib, and AWS SDK. This application fetches real-time weather data, stores it in an S3 bucket, and creates visual representations of the data. Also, you can further enhance the project by:
- Adding automated data collection scheduling
- Adding automated testing
- Creating a web interface for your dashboard
GitHub Repositiory:
You can find the complete project files in this repository: Github
Resources for further learning:

Top comments (0)