
This article is my follow-up article to Up and running with RaspberryPi with Docker. In the previous article, I showed how you can configure docker and docker-compose on your RaspberryPi.
In this article, I will show how you can restrict external traffic from your RaspberryPi with PiHole using docker and docker-compose.
Installation
The first step to defining a place where you want to install PiHole. In my case, I am going to keep it under the ~ path.
$ cd ~
$ mkdir pihole
$ cd pihole
$ touch docker-compose.yml
Once you create the docker-compose.yml file inside the pihole directory, add the following code into it.
$ nano docker-compose.yml
version: "3"

services:
  pihole:
    container_name: pihole
    image: pihole/pihole:latest
    ports:
      - "53:53/tcp"
      - "53:53/udp"
      - "67:67/udp"
      - "80:80/tcp"
    environment:
      TZ: "America/Chicago"
      WEBPASSWORD: "strongPassword"
    volumes:
      - "./etc-pihole/:/etc/pihole/"
      - "./etc-dnsmasq.d/:/etc/dnsmasq.d/"
    cap_add:
      - NET_ADMIN
    restart: unless-stopped
After saving the docker-compose.yml file, you can run the following command to bring your PiHole server up and running.
$ docker-compose up --detach
Initial run will take some time since it will download the PiHole image from docker.
After a successful run, you can check PiHole instance is running on RaspberryPi as a docker service.
# Try following commands to check PiHole service

$ docker ps
# To check the list of running containers

$ docker images
# To check PiHole image
If you have static IP defined configure in my previous article then you can access PiHole, at http://192.168.0.4/admin
Configure devices
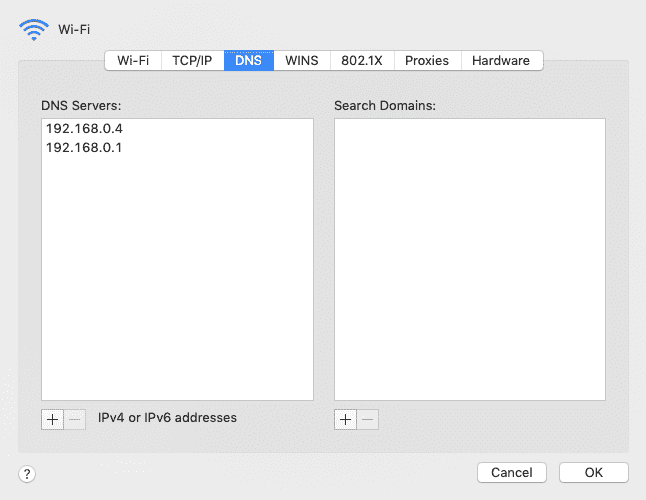
After the installation of PiHole now we need to map other devices to use PiHole as the default gateway. For that, you can go to the network/Wifi settings of your individual devices and add 192.168.0.4 IP address to the DNS list (should be on top). See the example below:
Thanks for following the tutorial, happy coding!

Top comments (0)