
10 Ways I Use Figma As A Creator
As a creator, I use Figma every day and I can honestly say it's 10x'ed my creation process.
By working in one application to do many different types of tasks, I save time and work more effectively. Not to mention my knowledge of Figma has increased to the point where I can use keyboard shortcuts like a ninja to quickly manipulate shapes, colors, and alignment.
If you'd like to learn about the different ways you can use Figma as a creator to 10x your design process, this is the right article for you. I'll also include examples of my work to show you exactly what I mean.
Way #1: Newsletter Graphics
The graphics I use in my weekly newsletter Design Insight are all created using Figma.
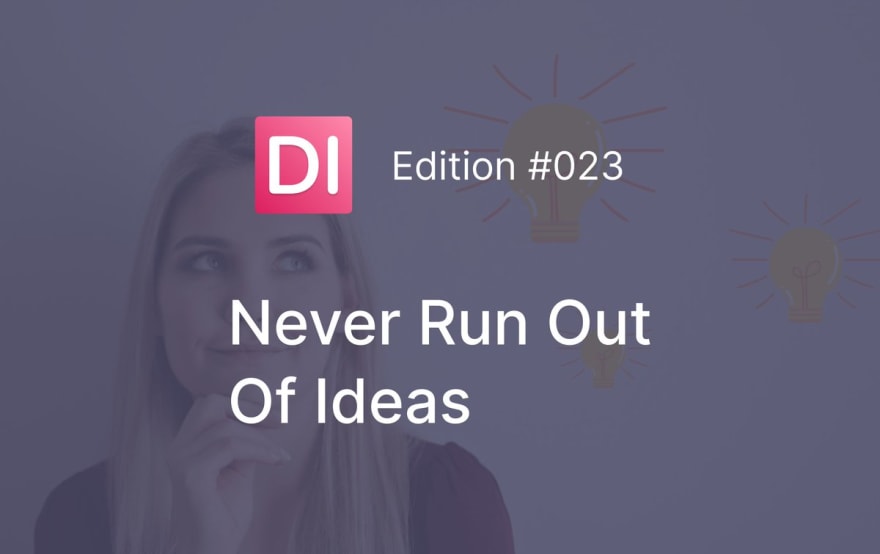
The first thing people often see relating to my newsletter is the cover image that accompanies each edition. I share what you can expect from the newsletter that week in a tweet. The cover image is included to add some visual interest to make you stop scrolling and read the tweet.
I have a relatively standard template for this cover image and tweak it every week for each new edition.
Below is an example of the newsletter cover image in action:
 Michelle@mishacreatrix
 In today's edition of Design Insight:
📃 Attention Residue Is Killing Your Productivity
🔨 Happy Hues @mackenziechild
🔨 Firmbee Freebies @firmbeecom
🎨 2 new tips to improve your designs
🦄 How To Never Run Out Of Ideas As A Designer
Don't miss it 👇13:09 PM - 08 Oct 2021


In addition to the newsletter cover image, there are a number of other types of graphics I create and include in my newsletter:
- Branding assets - logo design, about page images, that sort of thing
- Design Tips - we'll look at these in more detail further on in the article
- UI review screenshots - from when I used to perform a UI review of a website each week
If you're wondering how I manage all these assets, I have a dedicated Figma file called Newsletter Design Assets. Each type of graphic lives on its own page. For example: newsletter screenshots is one page, newsletter cover images is another page and so on.
Way #2: eBook Cover Image
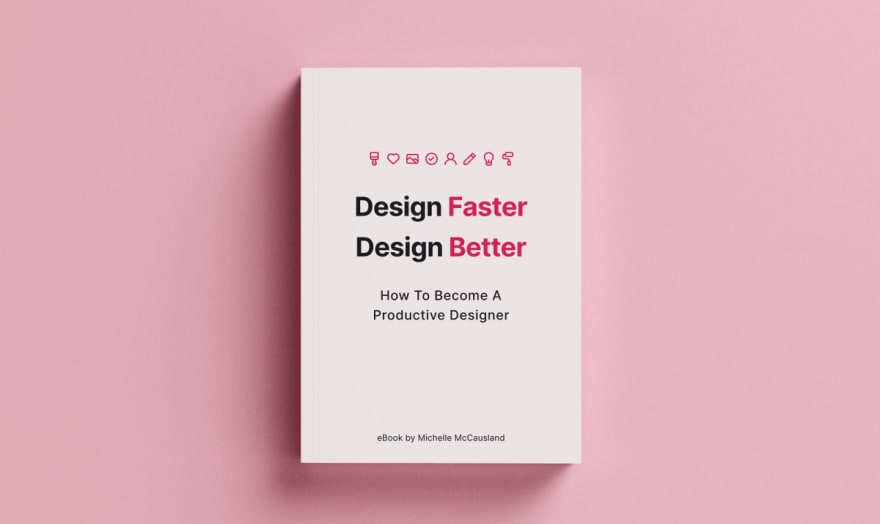
I recently used Figma to create the cover for my latest eBook: Design Faster, Design Better.
Before using Figma, I would have battled with Photoshop, Illustrator, or InDesign (which I actually tried to use initially) to design an eBook cover. I would have gotten bogged down trying to use the tools to accomplish what was in my head. So instead, I switched to Figma for this task because I was familiar with it and could easily re-create the idea that was in my brain.
Overall, I'm really happy and proud of how the eBook cover turned out. I was able to use my knowledge of Typography, Color Theory, and Whitespace to produce a clean and minimal design. Not to mention, using Figma meant I accomplished this in much less time than it would have taken if I used a more "fully loaded" tool like InDesign.
If you want to learn more about my process for designing the eBook cover, check out this thread I wrote:
 Michelle@mishacreatrixI'm very proud of the cover for my new eBook.
It took a long time to design but I'm happy with the result.
Want to know how I did it?
🧵19:03 PM - 21 Sep 2021
Way #3: Writing Short eBooks
In addition to creating the covers for eBooks, I also write shorter eBooks directly in Figma.
To add a bit of context here, I initially write the content for all my shorter eBooks in Typora and then migrate it into Figma. With that said, once I have a Figma eBook template created, I can simply copy the content over, include imagery, design a cover image, then export the whole thing as a PDF.
If you think about it, this process is something that could be done across many different tools which would require more mental overhead. With something like a short, simple eBook, why overcomplicate the process?
If you want to see what an eBook created totally in Figma looks like, you can download my free eBook: Blank Screen - How To Overcome The Blank Page As A Creator
Michelle@mishacreatrixDid you know I have a free eBook?
It shows you how to overcome the blank page as a creator ⭐
Check it out over on @gumroad:
mishacreatrix.gumroad.com/l/blank-screen13:09 PM - 19 Sep 2021
Way #4: Design Tips
I use Figma to create design tips to share my knowledge of design on Twitter, Instagram, and my newsletter.
The practice of creating design tips each day is really enjoyable. I can share my design knowledge in an easy to digest way, I'm practicing my craft (actually designing in Figma), and I can listen to Pokémon Lo-Fi on Spotify while I do it!
When I first started off creating design tips I created a rough template for how they should look. This saved me lots of time when creating multiple design tips each day. I was also only posting them to Twitter so they were the right size to fit in a Twitter post.
Over time this template has evolved and improved. I started to include 2 design tips in my weekly newsletter, and most recently I've begun re-purposing these design tips on my Instagram account.
Way #5: Social Media Graphics
I'm sure you expected this one to appear on the list but I use Figma to create social media graphics.
There are a few different types of graphics I create for social media:
- Instagram Posts - I re-purpose a lot of my Twitter content over to my Instagram account so I've created a set of templates to achieve this
- Tweet Post Graphics - daily visuals, more graphics that add to the written content, screenshots, etc.
- Tweet Thread Graphics - General threads, article summary threads, book summary threads
As I've been creating these graphics for a number of months now, my visual style has started to appear. I now work from a design system (also created in Figma) to make designing more efficient. I'm also better at creating visually appealing graphics that catch people's eyes.
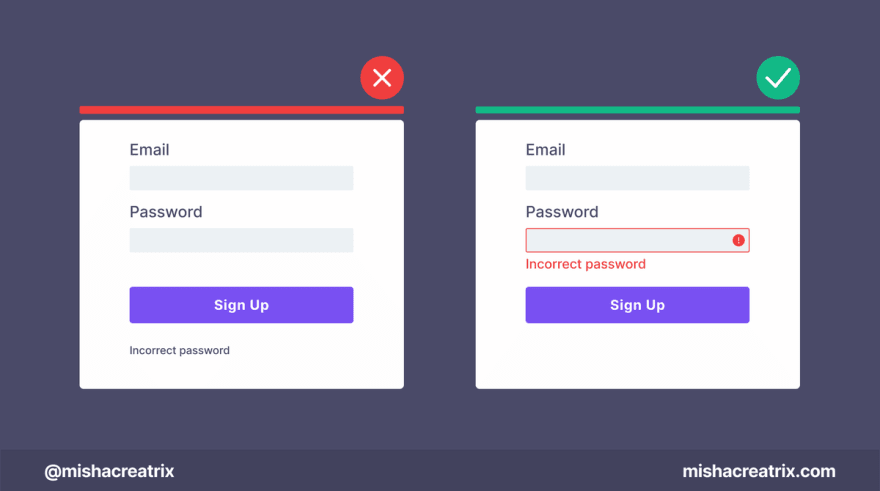
Below you'll find an example of a Tweet thread and an accompanying graphic I created to help add to the written content:
 Michelle@mishacreatrixColor is powerful and can influence how you think or feel.
In this thread I'll look at the basics of color theory.
You can apply this knowledge to your designs today to make them stand out.
(thread)20:45 PM - 09 Jul 2021
Way #6: Visual Essays
At the start of this year, I started the challenge of writing and publishing a visual essay every day for 90 days. This was heavily inspired by the Ship 30 For 30 movement that's taken Twitter by storm.
Did I achieve this goal? Not exactly, but I still published 70 visual essays over the 90 days and I learned a lot from the process so I still call it a success.
Fun side note here: this process is what ultimately resulted in me writing my first big eBook this year!
You can read more about the challenge I took below:
Today marks the day of my 70th and final visual essay (for now).
— Michelle (MishaCreatrix) June 22, 2021
Here's what I learned from creating 70 daily visual essays...
(thread) pic.twitter.com/hmuP6R7ujF
Anyway, for creating each visual essay I needed a template to work from.
Cue Figma.
I created a simple template and ended up writing my visual essays directly into Figma. Once I'd written the essay for that day, I'd export it as a PNG and upload it to Twitter.
Here's an example of a visual essay I wrote using Figma:
Consume High-Quality Content To Build Your Knowledge pic.twitter.com/EgXmD8gMBS
— Michelle (MishaCreatrix) April 20, 2021
Way #7: Digital Product Imagery
I use Figma to design digital product imagery to include with my digital products on Gumroad.
You've likely seen these types of mockups across Twitter and I'm sure they make you stop and take a second look. Creating a visual representation of that product is a great way to make it more tangible to people. I believe it's what ultimately adds more sales to each of my digital products.
Take My Knowledge Vault of Digital Notes as an example.
It's a Notion Database of all the notes I take on articles, videos, podcasts, etc. I believe it provides a lot of value to people but it's difficult to tangibly understand what this is using just visuals.
A common theme among these types of "Notion Dashboards" is to create a product mockup that looks like a software box. The kind that old versions of Adobe used to come in.. if you are old enough to remember that 😢.
I decided to replicate this type of design using Figma and Photoshop. The different sides of the box were designed in Figma then exported into Photoshop which is where the box is assembled and made to look like a real physical product.
Check it out here: https://t.co/fcVMYHpDB3
— Michelle (MishaCreatrix) October 4, 2021
Way #8: Daily Visuals
In recent months, I started creating "daily visuals", popular quotes or sayings represented in a visual way, and I use Figma to design them.
This daily practice of finding a quote, visually representing it in the simplest way possible, and publishing daily to Twitter was very beneficial for me. It helped to grow my audience, connected me with lots of great people online, and improved my ability to design in Figma.
Unfortunately, this practice has come to a stop in recent weeks due to my latest eBook but I'd love to get back to it soon!
Here's a great example of a daily visual I created in Figma:
Creativity is an infinite resource.
— Michelle (MishaCreatrix) August 15, 2021
Use it or lose it. pic.twitter.com/3Qf94XND8U
Way #9: Figma Templates
A lot of people say you should build things that solve a problem you yourself have.
A recent problem I had was scheduling Tweets in an analog format. I don't use a paid scheduling tool so I wanted a way to easily keep track of posts and when I was scheduling them. With that problem fresh in my mind, I feverishly spent a whole morning designing what would ultimately become my Twitter Posting Schedule Printable.
It made my life so much easier and to this day I still don't need to pay for a paid scheduling tool as a result.
Of course, I know this method isn't for everyone but it works for me so I decided to share it on Gumroad and it's been downloaded a handful of times. I also expanded it to include Instagram post scheduling. I am even selling the Figma file itself for people that want to customize the design for themselves.
Here's a Tweet that shows off the printable:
I just updated my free Twitter Schedule Printable to also allow for scheduling Instagram posts 🌟
— Michelle (MishaCreatrix) October 11, 2021
Take a look if you're trying to find an analog way to manage your social media scheduling:https://t.co/i7fpbH0OD1
Way #10: Designing Website Mockups
I thought I'd finish up on a more traditional use-case for Figma and that is designing website mockups.
In addition to all the other perhaps less obvious ways I use Figma, I still make use of this tool for its 'intended purpose'. I always create designs/mockups for websites before I build them. It gives me a chance to get ideas out of my head and into a visual format. I also iron out a lot of potential mistakes this way.
A recent example was when I created some rough mockups for my Changelog website. I wanted a single source of truth for all my online work. Someplace I could point people to who wanted to find all my articles on Design or an old digital product I created. So I designed and built a website to do all that, but started with the mockups in Figma.
The finished product has evolved over time but no doubt creating the mockups ahead of time saved me a lot of time.
Design before you build.
— Michelle (MishaCreatrix) October 3, 2021
You wouldn't build a house without drawing up blueprints.
Then why build a website without creating mockups?
My Key Take Aways
As you can see from this overview of how I use Figma, there are a lot of ways you can make use of a tool like this to accomplish a ton as a creator.
Be creative and try something at least once to see if it will work for you. I'm sure there are cases where a separate tool might get the job done better, but if you don't try new things you'll never improve.
Use more visuals. More graphics. More types of media in general in the content you create. A stunning visual will make someone stop scrolling their timeline and pay attention to what you have to say.
If you're not sure where to start, create something that solves a problem you have. Think of my printable example. I'm not making big money on this digital product but the learning experience it gave me was super helpful when it came to eventually launching my eBook.
I really enjoyed putting together this article and I hope you found it helpful. If you learned something today, please consider sharing this article on Twitter, or LinkedIn, or Facebook to let others know about it. That would really help me out 🙏

Top comments (1)
This article was originally published over on my website: 10 Ways I Use Figma As A Creator