
This is the step by step guide to install and configure Rollbar logger in the Ruby on Rails project in 2020.
You can find the original, 1:1 piece on Rails + Rollbar configuration on our website.
Let's jump right into it, you'll see how easy it is to have error-free Rails application!
What is Rollbar?
Rollbar is a realtime application monitoring and error tracking software which one can visit anytime via a web browser.
Applications can communicate with Rollbar via the HTTP protocol, sending data about their crashes and exceptions.
Developers subscribe to Rollbar's notifications and can almost instantly react to production problems by easily pinpointing them via sophisticated UI, which provides a complete set of data necessary for the job.
Why use Rollbar with Ruby on Rails?
- It is free to use up to 5000 API requests per month.
- It gathers more data than the default Ruby on Rails logger.
- It provides an intuitive UI, which is more comfortable to work with than primitive log files.
Ruby on Rails is provided with a basic logger that writes to the selected file, or files. Reading a single file with the constantly appended massive stack traces is a primitive way to monitor the application.
Rollbar collects and aggregates Ruby on Rails application crashes and exceptions data, with an additional context, such as a suspected release that started to cause the problem.
Via a sophisticated Rollbar web UI developer can browse errors by the latest, most occurrent and multiple additional pieces of information provided.
I cannot stress enough how crucial it is that your Ruby on Rails application is hooked up with an advanced logging and monitoring system such as Rollbar from its day one on production.
Rollbar account and project setup
Follow the instructions below to create your Rollbar account and set up Ruby on Rails project for further monitoring.
1.Sign up on the official Rollbar website. By default, every email from your email domain will be allowed to join.

2.Verify your email and set up your user credentials.

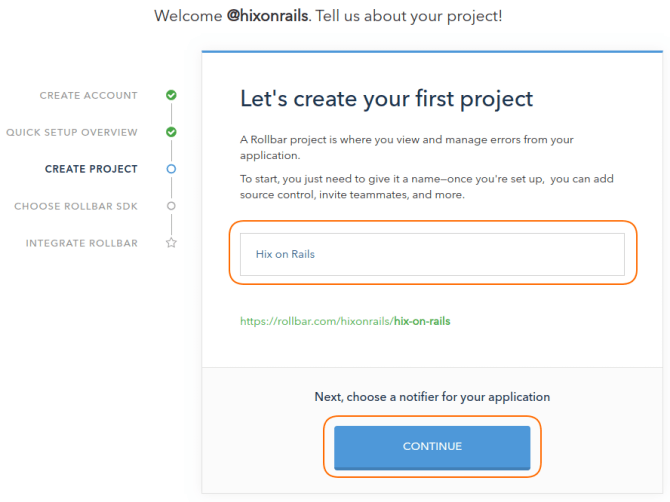
3.You'll be taken to the Quick Setup Overview. The first step is to create your project.

4.Enter your project name and press "Continue".
5.In the next step, select "Rails" for your project SDK.

6.Copy your Rollbar Access Token from the last step.

Rollbar allows you to set up multiple organization's projects and monitor them all via single web UI, which comes very handy especially for multiple services monitored daily.
Rollbar installation in Ruby on Rails project
If you use Hix on Rails, your job is done here, all you gonna do is paste your Rollbar Access Key into the first step of the Hix on Rails project initialization wizard.
Otherwise, if you sadly did not automate that part of your life yet, follow steps below for Ruby on Rails Rollbar configuration.
- Open your projects
Gemfileand paste the gem 'rollbar' so it's available for every environment. - In a command-line navigate to the project's directory, enter
bundle installand while it runs go to the next step. - Create the
config/rollbar.rbfile and paste the minimal configuration required, replacing the value with previously copied Rollbar Access Key. - Create the
config/initializers/rollbar.rbfile to wrap a defaultRails.loggerso whenever you use it, the results are visible in the Rollbar UI. - To report exceptions occurring in the Ruby on Rails booting process add the code to the
config/environment.rbfile, as Rails does not provide a way to hook into it.
config/rollbar.rb
# frozen_string_literal: true

Rollbar.configure do |config|
  config.access_token = 'YOUR_ROLLBAR_ACCESS_TOKEN_GOES_HERE'
end
config/rollbar.rb
# frozen_string_literal: true

Rails.logger.extend(ActiveSupport::Logger.broadcast(Rollbar::Logger.new))
config/environment.rb
# frozen_string_literal: true

require_relative 'application'
require_relative 'rollbar'

notify = -> (e) do
  begin
    Rollbar.with_config(use_async: false) do
      Rollbar.error(e)
    end
  rescue
    Rails.logger.error 'Synchronous Rollbar notification failed.  Sending async to preserve info'
    Rollbar.error(e)
  end
end

begin
  Rails.application.initialize!
rescue Exception => e
  notify.call(e)
  raise
end
This is a minimal setup required to hook up your Ruby on Rails application with your newly created Rollbar account, via the dedicated rollbar gem.
It is overall a better idea to not store credentials in your project repository and use dedicated environmental management instead. For example, if you use a dotenv-rails gem, it is a better idea to provide your DSN via the .env file.
.env
ROLLBAR_ACCESS_KEY=YOUR_ROLLBAR_ACCESS_TOKEN_GOES_HERE
config/rollbar.rb
# frozen_string_literal: true

Rollbar.configure do |config|
  config.access_token = ENV['ROLLBAR_ACCESS_TOKEN']
end
Let's see what other configuration options are worth tweaking while monitoring Ruby on Rails project with Rollbar.
Ruby on Rails Rollbar configuration
With the minimalistic setup, we started to report Ruby on Rails application exceptions to the Rollbar.
Rollbar default configuration with the access key passed at this point is:
Rollbar.configure do |config|
  config.access_token = ENV['ROLLBAR_ACCESS_TOKEN']
  config.async_handler = nil
  config.before_process = []
  config.capture_uncaught = nil
  config.code_version = nil
  config.custom_data_method = nil
  config.default_logger = lambda { ::Logger.new(STDERR) }
  config.logger_level = :info
  config.delayed_job_enabled = true
  config.disable_monkey_patch = false
  config.disable_core_monkey_patch = false
  config.disable_rack_monkey_patch = false
  config.dj_threshold = 0
  config.enabled = nil # set to true when configure is called
  config.endpoint = DEFAULT_ENDPOINT
  config.environment = nil
  config.exception_level_filters = {
    'ActiveRecord::RecordNotFound' => 'warning',
    'AbstractController::ActionNotFound' => 'warning',
    'ActionController::RoutingError' => 'warning'
  }
  config.failover_handlers = []
  config.framework = 'Plain'
  config.ignored_person_ids = []
  config.payload_options = {}
  config.person_method = 'current_user'
  config.person_id_method = 'id'
  config.person_username_method = nil
  config.person_email_method = nil
  config.project_gems = []
  config.populate_empty_backtraces = false
  config.report_dj_data = true
  config.open_timeout = 3
  config.request_timeout = 3
  config.net_retries = 3
  config.js_enabled = false
  config.js_options = {}
  config.locals = {}
  config.scrub_fields = [:passwd, :password, :password_confirmation, :secret,
                        :confirm_password, :password_confirmation, :secret_token,
                        :api_key, :access_token, :accessToken, :session_id]
  config.scrub_user = true
  config.scrub_password = true
  config.randomize_scrub_length = false
  config.scrub_whitelist = []
  config.uncaught_exception_level = 'error'
  config.scrub_headers = ['Authorization']
  config.sidekiq_threshold = 0
  config.safely = false
  config.transform = []
  config.use_async = false
  config.use_eventmachine = false
  config.verify_ssl_peer = true
  config.web_base = DEFAULT_WEB_BASE
  config.write_to_file = false
  config.send_extra_frame_data = :none
  config.project_gem_paths = []
  config.use_exception_level_filters_default = false
  config.proxy = nil
  config.raise_on_error = false
  config.transmit = true
  config.log_payload = false
  config.collect_user_ip = true
  config.anonymize_user_ip = false
  config.backtrace_cleaner = nil
  config.hooks = {
    :on_error_response => nil, # params: response
    :on_report_internal_error => nil # params: exception
  }

  config.configured_options = ConfiguredOptions.new(self)
end
Environments setup
Using Rollbar reporting in the test and development environments is an overkill. You can set up when it's enabled via the configuration.
Rollbar.configure do |config|
  config.enabled = %w[production staging].include?(Rails.env)
end
If you want to give your custom name to the environment, you can do that by yet another environment-related configuration option.
Rollbar.configure do |config|
  config.environment = 'your_custom_environment_name'
end
Asynchronous reporting
Error logging is not the primary task of most of the web applications, including Ruby on Rails. It is good to keep it asynchronous, and Rollbar allows users to do so by exposing the asynchronous configuration for the most popular choices of asynchronous code execution in Ruby.
Sidekiq integration with Rollbar.
Rollbar.configure do |config|
  config.use_sidekiq, queue: :rollbar
end
SuckerPunch integration with Rollbar.
Rollbar.configure do |config|
  config.use_sucker_punch
end
GirlFriday integration with Rollbar.
Rollbar.configure do |config|
  config.use_async = true
end
DelayedJob integration with Rollbar.
Rollbar.configure do |config|
  config.delayed_job_enabled = true
  config.use_delayed_job, queue: 'rollbar'
  config.report_dj_data = true
  config.dj_threshold = 0
end
Data sanitization
As we can see in the Rollbar defaults above, the logger scrubs some of the data from its reports.
Rollbar.configure do |config|
  config.collect_user_ip = false
  config.anonymize_user_ip = true
  config.user_ip_obfuscator_secret = "a-private-secret-here"
  config.scrub_fields = [:passwd, :password, :password_confirmation, :secret,
                        :confirm_password, :password_confirmation, :secret_token,
                        :api_key, :access_token, :accessToken, :session_id]
  config.scrub_user = true
  config.scrub_password = true
  config.scrub_headers = ['Authorization']
end
We can further configure that by adding the custom fields that we want to remove from the reports or even whitelist some that we don't.
Users data
Whenever your Ruby on Rails application provides any kind of authentication for the visitors, you can report user data for an additional context.
Rollbar.configure do |config|
  config.person_method = "my_current_user"
  config.person_id_method = "id"
  config.person_username_method = "name"
  config.person_email_method = "email"
end
Pinpoint guilty release
For an easier way to estimate what caused the reported exception to occur it is useful to report some release context to Rollbar, ideally extracted from your code version control.
Rollbar.configure do |config|
  config.code_version = `git describe --abbrev=0`
end
The following will give you the most recent annotated git tag. If you follow the Semantic Versioning, it will be for example 3.17.2.
Proxy and Secure Sockets Layer
It is possible to report the Ruby on Rails exception occurrences to Rollbar via a proxy.
Rollbar.configure do |config|
  config.proxy = {
    host: 'http://some.proxy.server',
    port: 80,
    user: 'username_if_auth_required',
    password: 'password_if_auth_required'
  }
end
An exported environment variable https_proxy will be respected as well.
export https_proxy='http://username:password@example.com:5000'
On top of that, you can disable SSL verification with a configuration flag, as it's enabled by default.
Rollbar.configure do |config|
  config.verify_ssl_peer = false
end
Custom reports modifications
Every Ruby on Rails application exception reported to Rollbar is expandable. It accepts lambda as an argument and has to return a Hash later merged to the original exception.
Rollbar.configure do |config|
  conifg.custom_data_method = lambda {
    { android_version: 6, dimensions: { width: 320, height: 540 } }
  }
end
Once sent, it appears in the Occurrences tab of the exception reported.
If there's some really important functionality in our Ruby on Rails application, it is a good practice to prepare for the worst with custom exceptions and to set their severity to critical with configuration options.
Rollbar.configure do |config|
  config.exception_level_filters.merge!({
    'PaymentException': 'critical'
  })
end
The same configuration option comes to help if we want to ignore reporting a chosen exception.
Rollbar.configure do |config|
  config.exception_level_filters.merge!({
    'ActionController::RoutingError': 'ignore'
  })
end
However, it's not the most developer-friendly to always remember to add the critical error severity to the configuration. My advice is to define your own critical exception class and inherit from it further down the code whenever.
Conclusion
Rollbar is a powerful tool that helps you to keep the Ruby on Rails application well-maintained and is definitely worth using if you want to monitor every newly developed feature seriously.
With Hix on Rails, all you need to do in order to have a fully configured Rollbar logger is creating your account and copy-pasting the Rollbar Access Key into the project initialization wizard.
If you found the tutorial helpful, please spread the knowledge by sharing it! Thanks!
Also, if you wish us to cover something else, let us know in the comment.

Top comments (0)