Chatbots are everywhere these days, and most businesses aim to use them to increase productivity and provide a better customer experience. In this tutorial, @kif01 & I demonstrate how to extend a Watson Assistant chatbot’s capabilities by connecting it to WhatsApp using Twilio. We will be using Twilio’s sandbox to show how this integration works.
In this tutorial, we are assuming that you already know what Watson Assistant is and how it works. We will be only focusing on the integration part with WhatsApp. However, if you haven't used Watson before then you can get started here.
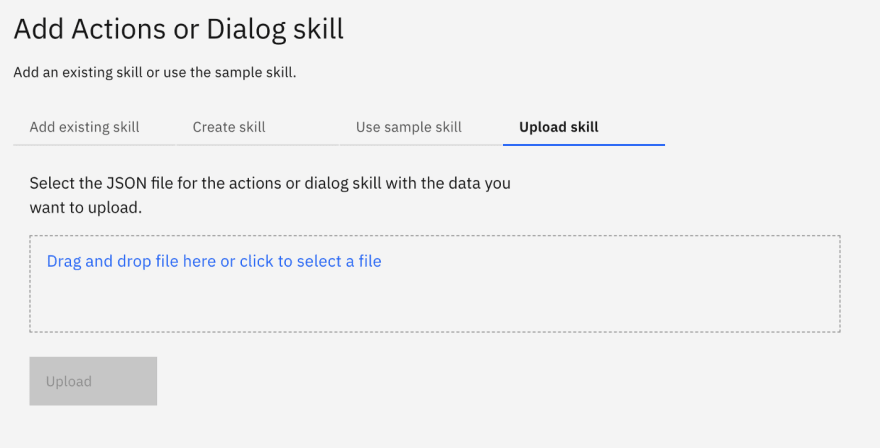
Go to your Watson Assistant service in IBM Cloud. Let's first add a dialog skill to our Assistant. Go to this GitHub Repo and download it. It has the dialog skill that we will be using for our assistant. Once it's downloaded, import the skill in the Assistant.
Under Integrations on the right side, choose WhatsApp with Twilio.

Choose WhatsApp with Twilio and then click Create.

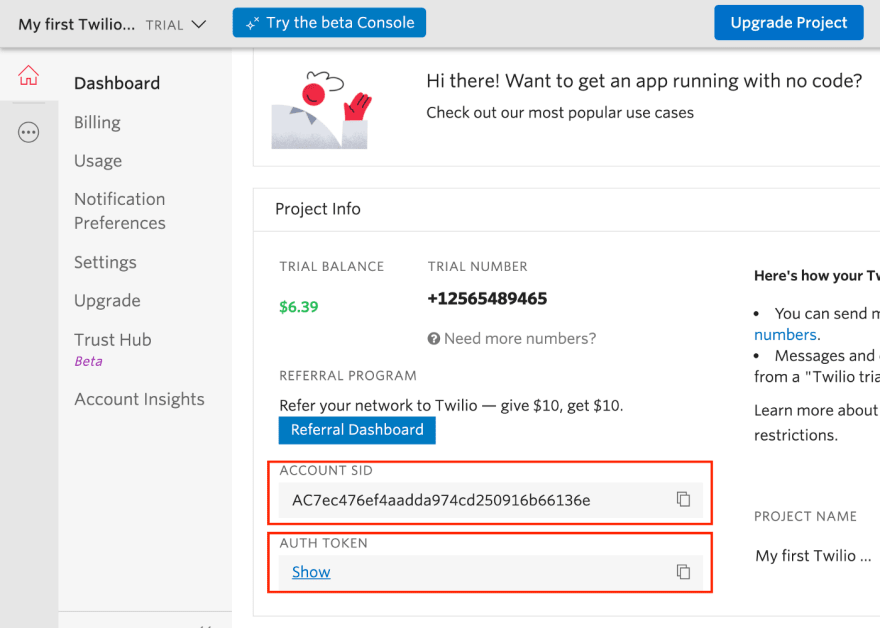
Now here we will need to set the Account SID and Auth token that we can get from Twilio. Go to your Twilio account (if you don't an account, you can create one here) and copy your Account SID and Auth token that are in the home dashboard. (Click on Show to reveal the token).
Go back to your Watson Assistant and fill Account SID and Auth token with the values that you got from Twilio.
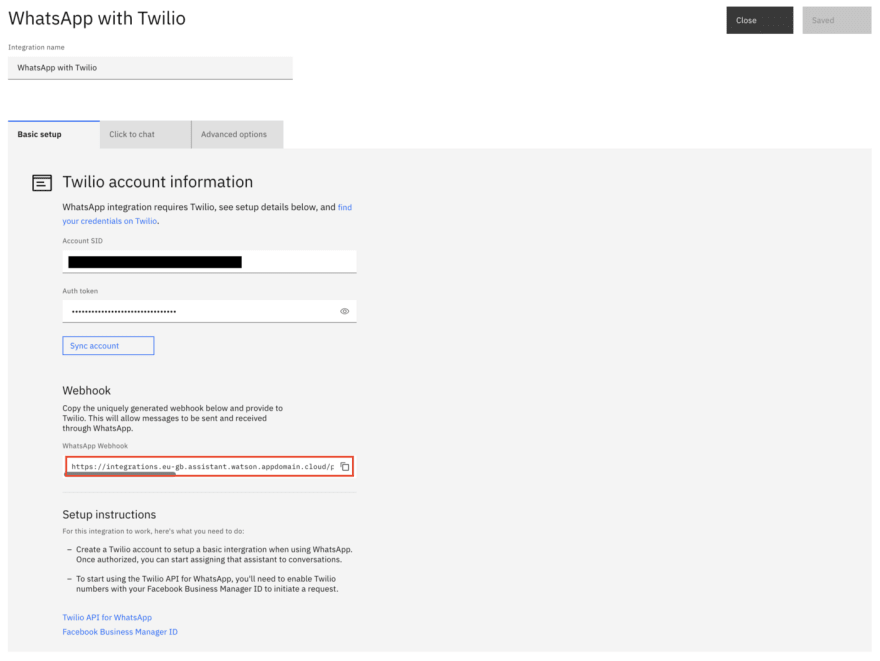
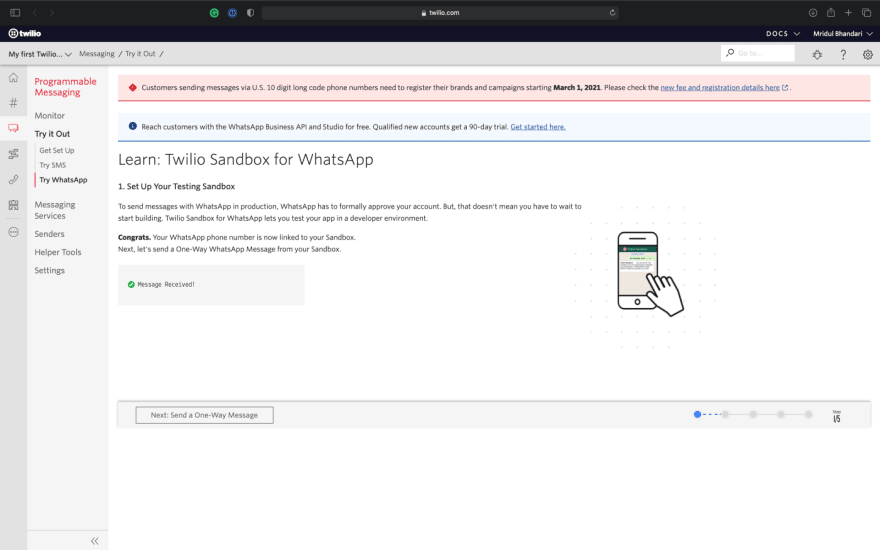
Click Sync Account and wait for it till it shows Synced. Once it's synced you will see a webhook URL generated in the WhatsApp Webhook field. Copy this URL and go back to Twilio.Now we need to set up and configure our Twilio sandbox to integrate it with Watson Assistant. In your Twilio Account, click on the icon that represents all products and services (it's below the home icon) on the left side go to Programmable Messaging from the expanded menu and select Try WhatsApp under the Try it out section.

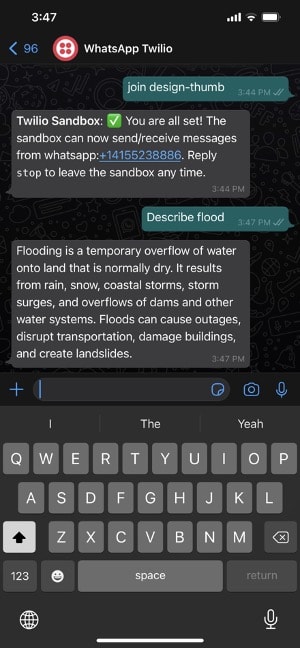
We will be using this testing sandbox for our integration. Send the given code/message to the number provided by Twilio from your WhatsApp.

Click here to send the message to given number or Scan this QR Code.

Once it's done, you should see Message Received on Twilio like this image.
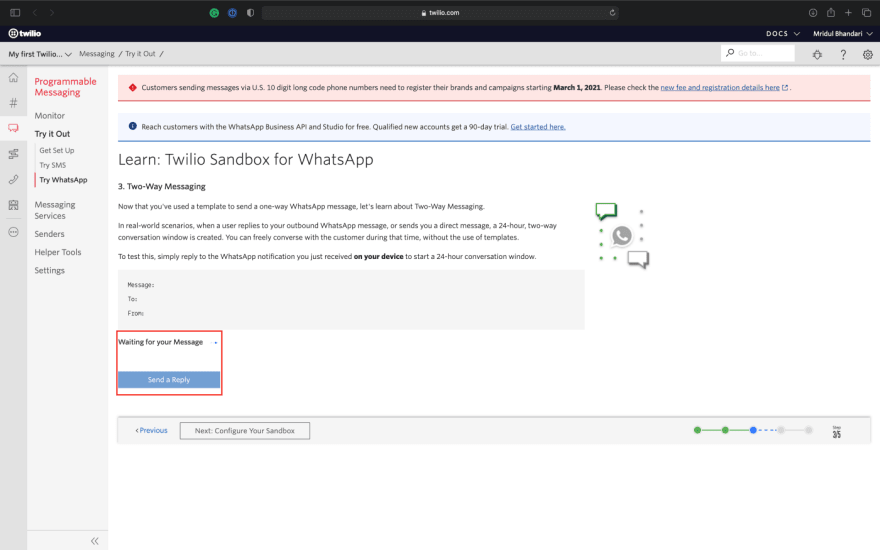
This means that now your phone number is connected to this Twilio-WhatsApp sandbox.Click Next. The second step is to set a template in case you're working with a One-Way Message case like appointment reminders, order notification and verification codes. So, in these cases, only the service is talking to the user. We are not interested in this step for this tutorial so you can click Next to move to the 3rd step which is Two-Way Messaging where both the user and the service can send messages which results in a conversation. The service triggers a 24-hour conversation window in which the conversation can take place. Send a reply to the message that you received on WhatsApp and click Next: Configure Your Sandbox.
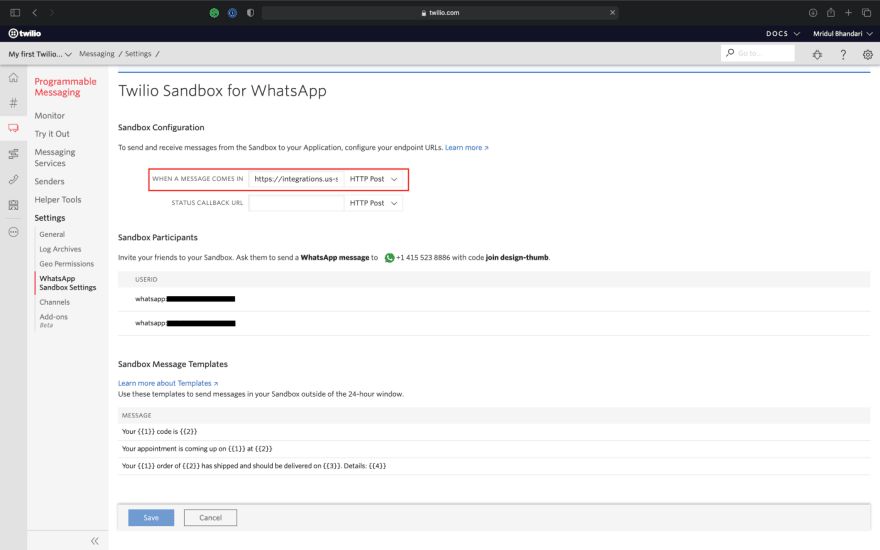
Paste the webhook URL that you have from Watson Assistant into the When a message comes in field. You should see your number in the sandbox participants and others can enter this sandbox by sending the code mentioned to the sandbox WhatsApp number (In the below image the code is join design-thumb). Once you're done click save.
All is set. Now the Assistant is integrated with WhatsApp through Twilio. From your device, send a WhatsApp message to the WhatsApp sandbox number and you will receive the assistant's response.
In this tutorial, you were able to successfully integrate your Watson Assistant with WhatsApp through Twilio. Since this is a tutorial, we were using WhatsApp-Twilio sandbox to show you how this integration work. If you want to use WhatsApp-Twilio with the Assistant for a real use case, then you will need to have a premium Twilio Account, a Facebook Business Manager ID and apply for permission. You can find more information about this here.

Top comments (0)