
Hello, technology enthusiasts! As a passionate software engineer, I'm always seeking exciting challenges. Recently, I embarked on an engaging side project. I decided to bring to life a digital version of a party game we all know and love - "Cards Against Humanity." This article unveils the high-level journey—the whys, the whats, and the wheres of this fascinating expedition.
This initiative arose from my personal fondness for "Cards Against Humanity." The game's unique ability to ignite laughter and connections is unparalleled, and I aimed to recreate that experience in an accessible digital format. However, I felt that existing online versions didn't capture the essence of the game, so I decided to create my own.
Before we proceed, let's do a quick review of some digital clones of our beloved game, each with its unique peculiarities:
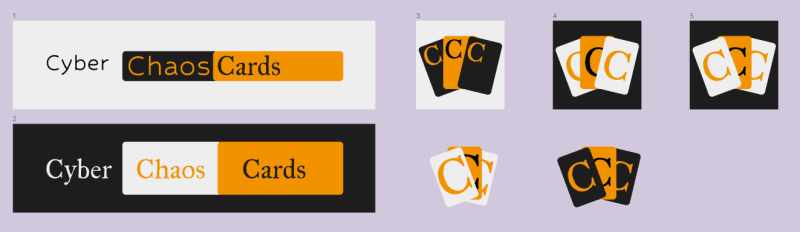
And now, a shameless self-promotion moment - I present to you my digital baby, Cyber Chaos Cards. Feel free to check them all out and decide which one brings you the most enjoyment!
Shall we continue?
The goal of this project was twofold. Firstly, to enrich my understanding of real-time game/application development. The process of building an online game from scratch was challenging yet rewarding, and I was eager to absorb the knowledge. Secondly, I wanted to create a standout piece for my portfolio, something that showcased both my technical proficiency and my passion for blending creativity and coding.
This article provides a high-level overview of this development journey - the initial concepts, design decisions, technology choices, and deployment dilemmas. For those interested in the details of the development process, I will be publishing a detailed article behind the code, delving deeper into the technical complexities of this project. You will be able to access that here.
The Design Drama: Balancing Ideas and Shaping Simplicity
I knew what I wanted - a digital reincarnation of "Cards Against Humanity" that was both intuitive and visually appealing.
I envisioned my creation with these three commandments engraved in stone:
- User-Friendly - The game had to be intuitive and easy to navigate. The experience should feel like a smooth stroll in a well-maintained park.
- Quick Start - I wanted to eliminate barriers between the joy of discovering the game and the excitement of playing. I aimed to avoid login obstacles, complicated room searches, and skipping name selection details.
- Responsive Design - Inclusivity was paramount, and the game had to be accessible to everyone, regardless of screen size.
One day, while pondering over this design dilemma, the simple elegance of Garticphone caught my attention. It was a beautiful blend of minimalism and functionality, an easy-to-understand and engaging game across all devices. Garticphone was like finding the Konami Code of game design. It was the hidden treasure, the trick to designing a game that was user-friendly, visually appealing, and fun. Simple yet elegant, responsive on all devices, and free from unnecessary complexities like login screens or room searches.
The game's monthly access of over 28 million serves as validation that it delivers a great experience.

With this inspiration as my guiding light, I entered the sketching phase. The Figma canvas became my playground, where gray boxes started to assume the roles of game components. Like a digital sculptor, I began shaping these shapeless boxes, breathing life into them gradually. Step by step, iteration after iteration, my vision started to materialize. The layout, once a vast emptiness, now began to overflow with the vitality of a game about to unfold.

After having the interface of my game designed, there was still a crucial piece missing from the puzzle - a logo. Much like a superhero emblem, a logo sets the tone and gives an identity to a product. So, with that understanding, I found myself back in Figma, but this time, with a different mission.
After numerous iterations, I arrived at a result that I would look at and think, "Well, it's good enough." The final logo may not be a masterpiece, but like a reliable piece of code, it's good enough for now and gets the job done effectively!

The Development Saga: Navigating Through Code and Technologies
Now, I'm going to switch gears a bit and venture into the realm of technology selection. But don't worry, I won't bombard you with a dense cloud of technical jargon. Think of it more as a panoramic tour rather than a deep dive. Let's hop on the virtual explanation bus, make stops at various technologies, and I'll introduce them with analogies. For those tech enthusiasts who like to peek under the hood and get their hands dirty with code, fear not! I'm preparing a separate article that delves into the intricacies of the development processes. But for now, sit back and enjoy the panoramic view of the technological landscape that underpins this project.
The Technology Selection: Choosing the Right Tools for the Job
Deciding on the appropriate tools and technologies was a crucial step in this journey. I wanted a robust stack that would allow me to effectively manage the stateful nature of my real-time game. That's when Next.js, TypeScript, Socket.IO, and Node.js came into play.

- Next.js: Imagine that programming in React is like putting together a puzzle. You have all the pieces, but it can be tricky to assemble them to form the complete picture. Now, Next.js is like a puzzle set with hints on the pieces, making the whole process easier. And what about Vercel? Well, Vercel is like that super helpful friend who, after you've finished the puzzle, carefully takes it and frames it on the wall (in other words, on the web) for everyone to enjoy. In summary, Next.js makes React easier to assemble, and Vercel ensures that everyone can see your artwork with minimal effort.
- TypeScript: Imagine it as a bulletproof vest for your code. It gives you a sense of security and confidence, knowing that it will protect you against possible "stray bullets" in the form of bugs and compilation errors.
- Socket.IO: Imagine a tireless messenger who runs to deliver messages (data) in real-time, no matter what happens. It also creates mailboxes (rooms) for each user. That's our efficient data messenger, Socket.IO!
- Node.js: This is like a sturdy off-road vehicle - not the fastest or most elegant, but extremely reliable and capable of handling any terrain (in this case, meeting different development needs). And as a bonus, it gets even better when equipped with the TypeScript "upgrade kit".
The Backend Challenge: Orchestrating Logic and Features

Firstly, some may be wondering why I didn't use the built-in backend in Next.js. Since I wanted to keep the development as simple as possible and didn't want to use databases for my game, I chose to store everything in memory. Well, it's like having a temporary dining table set up only for each meal, without retaining any state or information from the previous time the code was run.
Now, let's talk about this grand party that is an online game. Imagine you're organizing an epic party. To ensure that everything runs smoothly, you hire an experienced event manager, the RoomManager. When you approach the RoomManager and express your desire to have fun with your friends, the RoomManager quickly sets up a comfortable room specially for you. They hand you multiple invitations (the room link) so that you can share them and invite your friends to the party.
As your friends receive the invitations, they arrive at the party and introduce themselves to the RoomManager, who guides them to the room you reserved. In this customized party room, you set the rules, choose the music playlist, and decide which drinks will be served. It's like having your own exclusive space to create the perfect atmosphere for having fun.
The RoomManager also keeps an eye on who enters and leaves the room. If, as the host, you happen to leave the room, you have to pass the leadership responsibility to someone else so that the party doesn't stop. And when everyone leaves the party, the RoomManager quickly cleans up and prepares for the next one.
And here's the amazing part: each room represents a separate game. Imagine that each room is like a mini universe, with its own decks of cards, guest lists, and unique settings. These rooms are self-contained and take care of all the details - from shuffling the cards to declaring the grand winner of the party. It's like having multiple parties within a festive mansion. Simply spectacular!
Our reliable communication tool, Socket.IO, acts as the diligent butler of the room. Always present, always alert. This butler is not just there to attend to the internal demands of the room. Oh no! It also has the task of maintaining an uninterrupted line of communication with the outside world.
So, picture this: a guest (front-end) at the party wants to send a message to the room. They write a note (send a message) and hand it to the butler (Socket.IO). The butler, being the faithful intermediary, immediately takes that message to the corresponding party room (the back-end).
Now, remember our self-contained room? It's time for it to come into action. As soon as the message arrives, the room (GameRoom) knows exactly what to do. Whether it's calling a waiter to serve more drinks, moving on to the next song, or announcing the next game, the room triggers the necessary method based on the content of the message.
And that's how our reliable butler, Socket.IO, ensures that all messages from the guests (front-end) are promptly attended to by the room (back-end), ensuring a seamless and fun party for everyone!
And that, my dear friends, is how we organize a great digital party, in the style of "Cards Against Humanity"!
The Art of Frontend: Building Interfaces and Experiences

A game cannot "just work," it has to be enjoyable to play, and players need to have a good experience.
Creating the frontend of the game was an exciting and complex challenge. The first concern was to ensure that the interface was responsive and visually appealing across all screen sizes. After all, we wanted players to enjoy the game experience regardless of the device they were using. To expedite the development process, I decided to use Tailwind CSS in conjunction with the DaisyUI library. These tools were essential in streamlining the styling process and ensuring a cohesive and attractive design.
When dealing with the complexity of state management in React, context played a crucial role. In the project, we have the GameContext, a special context that stores all the information received from the server and is available throughout the project. This means that anywhere in the game, we can access and display real-time information about the current state of the game.
The GameContext also includes various important functions that allow us to interact with the game. We can join a room, leave it, and make moves. These functions enable players to actively participate in the game and ensure that all actions are reflected in the real-time game state.
By utilizing the GameContext, components can query this context to easily and efficiently obtain updated game information. If a component needs to display specific game data or perform actions related to the game state, it can simply query the GameContext for the necessary information. This approach simplifies development and helps maintain consistent synchronization between components.
Automating the Deployment

Alright, it works on my machine, but now the big question arises: how do I share this project with the world? The time has come for the long-awaited deployment. It is at this moment that we take our work from the development environment to a server accessible to everyone. It's time to showcase our creation to the world and allow everyone to enjoy the experience we've built.
However, the deployment process can be complex and challenging. We have many questions to answer, configuring services correctly and ensuring that everything is working perfectly are crucial steps for a successful launch. But don't worry! We are ready to face this challenge head-on.
When deciding on the hosting provider for my project, weighing the available options was crucial. While AWS and other renowned hosting providers have their advantages and widespread popularity, I chose to embark on the journey with Linode. Why? First and foremost, the determining factor was the financial aspect. Linode offers a more affordable hosting solution, ideal for smaller-scale projects like mine. Additionally, the Linode interface also played an important role in my decision. I felt that it was more organized and intuitive, which facilitated my management and deployment experience. While hosting choices may vary based on individual needs and preferences, Linode proved to be the right choice for my project, providing efficient and reliable hosting.
Great, we have a place to get the game up and running. I could access my host, download the project there, and run it. However, software is never finished, and if I want to make a small change, I would have to manually send the new files and restart the server, which is not practical, let alone fun.

Here comes into action some new tools, Docker and GitHub Actions. They are like the dynamic duo of superheroes in the world of software deployment. They have come to simplify and automate the process, bringing an extra dose of convenience and fun to the game.
Imagine Docker as a special package that you create for your project. It's like packing all the ingredients of a recipe into a magical box. Inside this box, you have everything you need - the dependencies, the configurations, and even the runtime environment. It's like having a personal chef who prepares all the ingredients perfectly for you, saving time and ensuring that everything runs smoothly.
Now, let's meet GitHub Actions. It's like the conductor of an orchestra. It coordinates all the moving parts of the deployment process, ensuring that everything happens at the right time and in the correct sequence. It's like having a conductor who leads the melody, calling the necessary actions when needed. With GitHub Actions, you can define custom workflows that perform automated tasks, such as building, testing, and deploying, without you lifting a finger.
With the party's heroes introduced, let me tell you what they did for the project, focusing on GitHub Actions. In the first action, the GitHub Actions pipeline puts your backend code in the spotlight by pushing it directly to Docker Hub. It's like having a fast and efficient courier that takes your code to a secure location, ready to be deployed in the digital world.
But that's just the beginning! The second action is even more exciting. The script calls a special character on the server named "update.sh". This script is developed specifically for our project. It is tasked with stopping the execution of the current server, removing the container where the game is running, downloading the updated project directly from Docker Hub, and finally running the Docker container with the latest version of the game.
This combination of actions is like a maestro conducting a perfect symphony. Every movement is synchronized, ensuring that the game is always up to date and ready to be played. It's like having a personal assistant who takes care of all the updates and deployments for you, leaving you free to focus on development.
Domain

After performing the necessary configurations, I directed the primary domain "cyberchaoscards.com" to the game's frontend, providing players with a unique experience when accessing the website. Additionally, I created a subdomain called "server.cyberchaoscards.com" dedicated to the backend.
In addition to the domain, I needed to add the SSL certificate so that beautiful lock icon indicating that HTTPS is available on my page.
On the frontend, it was easy as the hosting provider Vercel takes care of all the work for me. Now, on the backend, I needed to add another superhero to the list, Nginx.
Firstly, it was necessary to set up a reverse proxy to properly direct the web server traffic. Like a true master of ceremonies, Nginx entered the scene. It took on the role of directing requests received on the "server.cyberchaoscards.com" domain to the Docker container running the server, where the game was being executed. It's like having an experienced guide who leads each guest to the correct party room, ensuring that everyone reaches their desired destination.
With Nginx configured, it was time to add the SSL certificate. I found the tool Certbot and followed the documentation on how to use it with Nginx, and voila, everything worked perfectly.
In summary,
- I wanted to create an online version of the game "Cards Against Humanity."
- I found a successful game with a design that suited my game.
- Figma helped me "copy" the design and make the necessary adaptations.
- Development was done using React, Next.js, Node.js, and Socket.IO.
- The frontend was deployed on Vercel.
- The backend was deployed on Linode.
- Github Actions and Docker helped bridge the gap between development and deployment.
- I had a lot of fun playing the final result with my friends.
There's nothing more empowering than bringing your own visions to life. By merging your passion with technical skills, you can create a world of unlimited possibilities. Don't wait for others to do it for you - be the master of your own creation.
Results


Top comments (0)