Going from an application to a containerized application can have many benefits. Today we are taking the step further and looking at how we can go from a small application all the way to deploying it on Kubernetes.
We are going to take a small application, build a container image around it, write Kubernetes manifest and deploy the whole thing on Kubernetes. This is a practical guide, so I encourage you to follow along with your own application in your favorite programming language. Here we will use Python.
Application
We start out with a small Hello World python REST api in Flask.
The following dependencies in Python are needed:
- flask_restful
- flask
which can be installed with pip3 install flask flask_restful.
Our application is a simple python script hello-virtualization.py
from flask import Flask
from flask_restful import Resource, Api

app = Flask(__name__)
api = Api(app)

class HelloWorld(Resource):
    def get(self):
        return "Hello Python!"

api.add_resource(HelloWorld, '/')

if __name__ == '__main__':
    app.run(host='0.0.0.0')
Our app simply exposes an endpoint that returns "Hello Python!" and can be started with python3 hello-virtualization.py. You should see the following in your terminal:
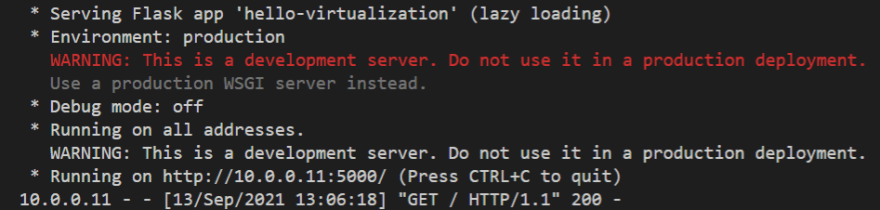
We can see that the server is listening on port 5000, and can confirm this by sending a request: curl 10.0.0.11:5000
Great! We now have a very simple application that responds when we call it. Lets wrap this in a container image.
Docker
First you need to get docker installed on your machine. If you are on Windows or MacOS, Docker Desktop should do the trick.
Next we will wrap the application in a docker image. To do this create a file called Dockerfile in the same folder as your application.
In the Dockerfile we will start by setting a base container image for our own container image. Since we need Python we will use python:3.8-buster by typing: FROM python:3.8-buster.
Next we need to include the packages needed for our application to run. We do this by writing RUN pip3 install flask flask_restful just as when we fetched the packages for our local system, we now fetch the to the image.
We the specify a working directory: WORKDIR /app which is where all commands we run will be executed from.
Copy the source code into the working directory: COPY hello-virtualization.py /app, inform that the container should have port 5000 open with EXPOSE 5000 and finally tell which command will be executed when we run the container image: CMD ["python3", "hello-virtualization.py"]
The final Dockerfile should look like this:
FROM python:3.8-buster

RUN pip3 install flask flask_restful

WORKDIR /app

COPY hello-virtualization.py /app

EXPOSE 5000

CMD ["python3", "hello-virtualization.py"]
We will then need to build the container image and give it the name hello-virtualization for reference:
docker build . -t hello-virtualization
Will build our container image. To run the image we simply type:
docker run hello-virtualization
The command will give an output very similar to when we executed the script using only python. Validate that the application works by curling the endpoint that is printed by the command.
Kubernetes
If you use Docker Desktop, Kubernetes can be enabled through the UI.
If you do not use Docker Desktop, there are multiple alternatives for setting up a Kubernetes cluster for development like:
For this demo all of them will work.
Kubernetes needs to fetch the container image that we just build from a container registry. To make a solution that works for all the different versions, we will push the container image to a remote container registry. The easiest way to do this is to create an account on Docker Hub and authenticate by typing docker login in your terminal. When this is done we need to retag the container image so that the Docker CLI knows that we want to push the image to a container registry owned by the user we just created.
To tag the container image:
docker tag hello-virtualization:latest <DOCKER_HUB_USERNAME>/hello-virtualization:latest
To push the image to Docker Hub:
docker push <DOCKER_HUB_USERNAME>/hello-virtualization:latest
Now we are ready for some Kubernetes.
Kubernetes resources are managed through manifest files written in Yaml. The smallest unit in Kubernetes is called a Pod, which is a wrapper around one or more containers. When you want to deploy a Pod in Kubernetes, you would often use another resource called a Deployment to manage the deployment of a Pod and the replication factor of the Pod.
Create a new file called hello-virtualization-deployment.yaml to create a Deployment for our app:
apiVersion: apps/v1
kind: Deployment
metadata:
  name: hello-virtualization-deployment
  labels:
    app: hello-virtualization
spec:
  replicas: 1
  selector:
    matchLabels:
      app: hello-virtualization-label
  template:
    metadata:
      labels:
        app: hello-virtualization-label
    spec:
      containers:
      - name: hello-virtualization-container
        image: <DOCKER_HUB_USERNAME>/hello-virtualization:latest
        ports:
        - containerPort: 5000
A few things to notice:
replicas: 1
This tells the Deployment that we want 1 instance of our container running.
  selector:
    matchLabels:
      app: hello-virtualization-label
Tells the Deployment that it shall control the template with the label app: hello-virtualization-label.
  template:
    metadata:
      labels:
        app: hello-virtualization-label
Is where we define that a template and set the label that binds this template to the Deployment.
template:
    ...
    spec:
      containers:
      - name: hello-virtualization-container
        image: <DOCKER_HUB_USERNAME>/hello-virtualization:latest
        ports:
        - containerPort: 5000
We configure that this template is using the container image that we build and that the container listens on 5000 when created.
To deploy this on the Kubernetes we use the tool kubectl:
kubectl apply -f hello-virtualization-deployment.yaml
You should be able to see the Pod being created by typing:
kubectl get pods

Kubernetes needs to pull the image and start the container in the Pod, but after a few seconds the pod should be have a Running status.

The Pod has an IP address within the Kubernetes cluster, that we can use to test that the application works. To get the IP address type kubectl get pods -o wide:

Since this IP address is only reachable from within the Kubernetes cluster we need to jump into a Pod:
kubectl run my-shell --rm -i --tty --image curlimages/curl -- sh
Now we can curl the IP address and see that the application works.
This is not a stable solution for many reasons. First the IP of the Pod is short lived, meaning that the Pod with the application will not have the same IP every time we start it. Try to kill the Pod with kubectl delete pod <POD_NAME>. The pods name is listed when you type kubectl get pods.
If you type kubectl get pods -o wide after having deleted the pod you will se that there is a pod running with a similar name and a new IP address. This happens because we have told Kubernetes that we wanted 1 replica of the Pod, and therefor Kubernetes will make sure that there is always 1 Pod alive with our application. If our application crashed, Kubernetes will simply deploy a new one! Though the IP will not be the same so we need to be able to contact our application another way.
Introducing Kubernetes Services:
Create a file hello-virtualization-service.yaml
apiVersion: v1
kind: Service
metadata:
  name: hello-virtualization-service
  labels:
    app: hello-virtualization-label
spec:
  ports:
  - port: 5000
    targetPort: 5000
    protocol: TCP
  selector:
    app: hello-virtualization-label
A few things to notice:
spec:
  ports:
  - port: 5000
    targetPort: 5000
    protocol: TCP
Tells our service that when we contact it on port 5000 it should forward the communication to port 5000 on the target using TCP.
spec:
  ...
  selector:
    app: hello-virtualization-label
Informs the service that the target is actually the Pods with the label app: hello-virtualization-label, just like we did in the Deployment. Labels and label selectors is how we bind resources in Kubernetes.
We deploy the service just as we did the Deplyment: kubectl apply -f hello-virtualization-service.yaml.
To see that the service was deployed type: kubectl get svc:

We then test that the service work by trying to contact our application through the service.
Once again jump into a pod on the cluster:
kubectl run my-shell --rm -i --tty --image curlimages/curl -- sh
This time we will not use the Pods IP, but the name of the service to contact our application:

Inside the Kubernetes cluster you can always use the names of services to communicate between Pods.

Top comments (0)