Our job as a programmer is to constantly find solutions to problems. Since we follow a DRY (don't repeat yourself) philosophy, whenever we encounter a problem, we immediately search for a module or discussion which has a solution. Sometimes the module found is not reliable to add to our codebase since it lacks proper testing coverage or doesn't look dependable at all.
In this post, I'll focus on the process of creating and publishing a typescript module. It will feature a codebase with proper testing and a publishing pipeline that will give you confidence while shipping code!
What We'll Use
Setting up a robust module codebase is hard. Adding tools like ESLint, Prettier, Jest, Rollup, or Webpack, a continuous integration pipeline, and many more can be daunting. A developer does not want or needs to spend all day just to create the backbone of a library. That is why we'll use something called tsdx which sets this all up for us and also gives us some cool human-readable errors. Think of it as the create-react-app of modules.
Creating our Codebase
To start let's run this command in the terminal. This will start a new project. I'll name our module react-awesome-library.
When choosing the library select any template you need. In this case, I'll use React.js.
npx tsdx create react-awesome-library
It will add all necessary dependencies, an example, a continuous integration pipeline with Github Actions, and a test. This is perfect for starting development right away!
This is an example of what it will generate.
Publishing The Module
First, create an npm account, and be sure to confirm your email. Head here if you don't have one.
Second, log in to your account in your terminal using:
npm login
It will prompt you to enter your username, password, and email.
Finally, just run npm publish to publish your package:
npm publish
Supercharging Publishing Process
Whenever we need to publish a package, we'll probably want to:
- Run written tests.
- Update version in
package.json. Most modules follow Semantic Versioning. It consists of a version number like this1.1.2which each number representsMAJOR.MINOR.PATCH. A major version indicates incompatible API changes. A minor version marks functionality that is backward-compatible. A patch version specifies that it is a backward-compatible bug fix. - Create a git tag for easier navigation between versions.
- Push the new version to GitHub.
- Push the new version to npm
- Create a release note for the package.
Handling these can be tiresome and time-consuming. That is why a package called np makes it easier to do all these tasks. Thus, let's install it:
npm install --global np
You may have to use sudo for global installs.
For np to work we have to at least push once to a git repository. Here are some steps to set up for any git repository:
# Initialize git repository
git init

# Adds a remote repository
git remote add origin <REPOSITORY_URL>

# Commit changes
git add .
git commit -m "First Commit"

# Push your changes
git push -u origin master
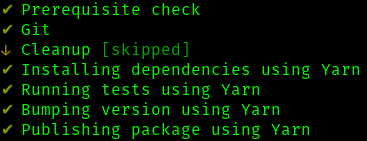
After you have pushed your code changes, just run np --no-2fa (Note: here we disable 2-factor authentication, but it is highly recommended to enable it.) to publish your package.
That's it! It ran all necessary checks before publish and we can rest assured that we didn't miss anything our pipeline.
Conclusion
Sharing code in a module is an important task for developers. Creating a module can be daunting since it requires to set up many tools like Webpack or Rollup, ESLint, Prettier, and many more. Thankfully, there are tools like tsdx and np that supercharge our development and reduce the time taken to set up a Typescript package ready for development. 💻😎
For more up-to-date web development content, follow me on Twitter, and Dev.to! Thanks for reading! 😎
Did you know I have a newsletter? 📬
If you want to get notified when I publish new blog posts and receive an awesome weekly resource to stay ahead in web development, head over to https://jfelix.info/newsletter.


Top comments (0)