
Revolutionize your website by incorporating ChatGPT, OpenAI's impressive language model. In this simple guide, we'll cover the essentials of integrating this AI tool to boost user engagement and elevate your online presence. Ready to take your website to the next level? Let's begin!
How it will work?
Integrating ChatGPT into your website is made simple thanks to OpenAI's API, which allows developers to harness the power of this advanced language model. To streamline the process further, we'll be utilizing the langchain library in combination with Reactjs (Vite), a popular and efficient front-end framework.
The langchain library simplifies the task of connecting to the OpenAI API and managing requests, while Reactjs (Vite) allows us to build a responsive and interactive user interface for seamless communication with ChatGPT.
Here's a brief overview of how it will work:
Obtain your OpenAI API key: You'll need to sign up for an OpenAI account and receive your unique API key. This key will be essential for authenticating and accessing the ChatGPT service.
Set up the Reactjs (Vite) environment: Create a new Reactjs (Vite) project to serve as the foundation for your ChatGPT integration. Vite's fast development server and optimized build system will make the development process smooth and efficient.
Install the langchain library: Add the langchain library to your project, which will facilitate seamless communication with the OpenAI API, manage requests, and handle responses from ChatGPT.
Build a user interface: Develop an interactive UI using Reactjs components that will enable your website's visitors to engage with ChatGPT. This interface will include elements such as input fields for user queries and a display area for ChatGPT's responses.
Connect the UI with the langchain library: Link your user interface components to the langchain library, which will send user queries to the OpenAI API, process the ChatGPT responses, and update the UI accordingly.
By following these steps, you'll create a seamless integration of ChatGPT into your website.
Setting up the project
- Create a Vite project
npx create vite
- Install langchain
npm install langchain
- Get you Open AI API keys
To do this, create an account or sign up to Open AI, and then access this link to retrieve your API KEY.
- Add the Open AI API KEY to your .env file
VITE_OPENAI_API_KEY=...
Adding ChatGPT to your website
Open App.tsx and add some basic React code:
import { useState } from 'react'
import reactLogo from './assets/react.svg'
import openAiLogo from './assets/openai.png'
import './App.css'
import { OpenAI } from 'langchain/llms'

function App() {
  const [question, setQuestion] = useState('')
  const [answer, setAnswer] = useState('')

  const getAnswerFromOpenAI = async () => {
    const model = new OpenAI({
      openAIApiKey: import.meta.env.VITE_OPENAI_API_KEY,
    })

    const res = await model.call(
      question,
    )
    console.log(res)
    setAnswer(res)
  }

  return (
    <div className="App">
      <div>
        <a href="https://chat.openai.com/" target="_blank">
          <img src={openAiLogo} className="logo" alt="Open AI logo" />
        </a>
        <a href="https://reactjs.org" target="_blank">
          <img src={reactLogo} className="logo react" alt="React logo" />
        </a>
      </div>
      <h1>AI Questions & Answers</h1>
      <div className="card">
        <div
          style={{
            display: 'flex',
            flexDirection: 'column',
            justifyContent: 'center',
          }}
        >
          <textarea placeholder='Ask here... ' onChange={(e) => setQuestion(e.target.value)} />
        </div>
        <br />
        <div
          style={{
            display: 'flex',
            flexDirection: 'column',
            justifyContent: 'center',
          }}
        >
          <textarea id="answer-box" placeholder='Here goes the answer... ' onChange={(e) => setQuestion(e.target.value)} disabled value={answer} />
        </div>
        <button id="ask-btn" onClick={getAnswerFromOpenAI}>
          Ask
        </button>
      </div>
    </div>
  )
}

export default App
This code creates an HTML structure that includes an input field for entering a question and a textarea for displaying the response generated by the OpenAI API.
Next, add the following styles to your App.css file:
#root {
  max-width: 1280px;
  margin: 0 auto;
  padding: 2rem;
  text-align: center;
}

.logo {
  height: 6em;
  padding: 1.5em;
  will-change: filter;
  transition: filter 300ms;
}
.logo:hover {
  filter: drop-shadow(0 0 2em #646cffaa);
}
.logo.react:hover {
  filter: drop-shadow(0 0 2em #61dafbaa);
}

@keyframes logo-spin {
  from {
    transform: rotate(0deg);
  }
  to {
    transform: rotate(360deg);
  }
}

@media (prefers-reduced-motion: no-preference) {
  a:nth-of-type(2) .logo {
    animation: logo-spin infinite 20s linear;
  }
}

.card {
  padding: 2em;
  width: 650px;
}

.read-the-docs {
  color: #888;
}

.input-card {
  display: flex;
  align-items: center;
  justify-content: center;
  padding: 2em;
}

.input-card > input {
  flex: 1;
  font-size: 1.5em;
  padding: 0.25em;
  border: 1px solid #ccc;
  border-radius: 6px;
  margin-right: 1em;
  width: 400px;
}

.input-card > input::placeholder {
  color: #b3b3b3;
}

.card > div > textarea {
  height: 70px;
  font-size: 1.5em;
  padding: 0.25em;
  border: 4px solid #756d6d;
  border-radius: 6px;
}

.card > div > textarea#answer-box {
  height: 200px;
  padding: 0em 0.9em;
  background-color: #3f3f3f;
  color: #f5f5f5;
}

.card > #ask-btn {
  background-color: #1a1a1a;
  color: #fff;
  font-size: 1.5em;
  padding: 0.5em 1em;
  border: 1px solid #ccc;
  border-radius: 6px;
  width: 100%;
  margin-top: 0.6em;
}
Additionally, update the index.css file:
:root {
  font-family: Inter, system-ui, Avenir, Helvetica, Arial, sans-serif;
  line-height: 1.5;
  font-weight: 400;

  color-scheme: light dark;
  color: rgba(26, 26, 26, 0.87);
  background-color: #bbbbbb;

  font-synthesis: none;
  text-rendering: optimizeLegibility;
  -webkit-font-smoothing: antialiased;
  -moz-osx-font-smoothing: grayscale;
  -webkit-text-size-adjust: 100%;
}

a {
  font-weight: 500;
  color: #646cff;
  text-decoration: inherit;
}
a:hover {
  color: #535bf2;
}

body {
  margin: 0;
  display: flex;
  place-items: center;
  min-width: 320px;
  min-height: 100vh;
}

h1 {
  font-size: 3.2em;
  line-height: 1.1;
}

button {
  border-radius: 8px;
  border: 1px solid transparent;
  padding: 0.6em 1.2em;
  font-size: 1em;
  font-weight: 500;
  font-family: inherit;
  background-color: #1a1a1a;
  cursor: pointer;
  transition: border-color 0.25s;
}
button:hover {
  border-color: #646cff;
}
button:focus,
button:focus-visible {
  outline: 4px auto -webkit-focus-ring-color;
}

@media (prefers-color-scheme: light) {
  :root {
    color: #213547;
    background-color: #ffffff;
  }
  a:hover {
    color: #747bff;
  }
  button {
    background-color: #f9f9f9;
  }
}
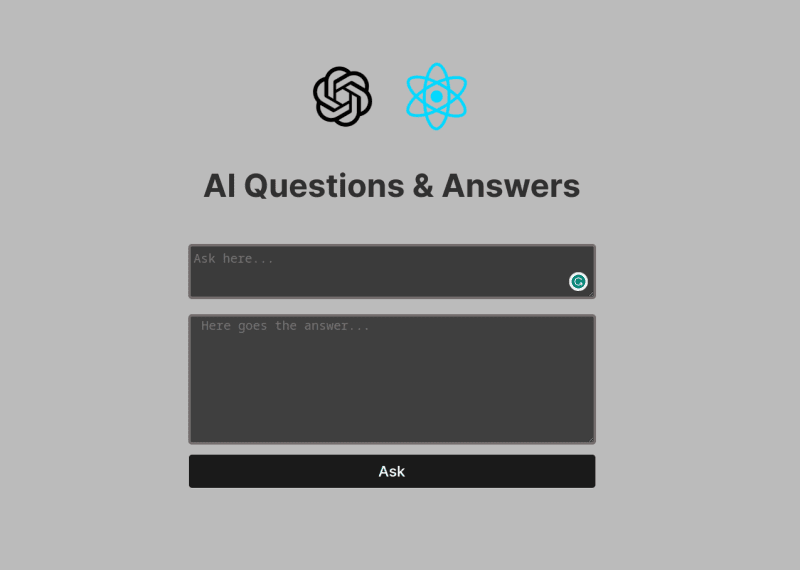
At this point your website should look like this and you can already test your ChatGPT integration! Easy, right? 😄
Conclusion
In this tutorial you learned how to integrate ChatGPT capabilities to your own website, with this you can enhance your business and unlock the best of AI large language models.
Github repository: POC Open AI

Top comments (2)
Awesome! Maybe in a next post can we learn how to integrate ChatGPT on our website with custom knowledge? What do you think?
good idea