
A virtual private cloud (VPC) is a virtual network dedicated to your AWS account. It is logically isolated from other virtual networks in the AWS Cloud. You can specify an IP address range for the VPC, add subnets, add gateways, and associate security groups.
users can avoid underutilizing their resources during periods of low demand or overloading their infrastructure during peak periods. Overall, the advantages of using VPC for your infrastructure include improved security, greater flexibility, and scalability.
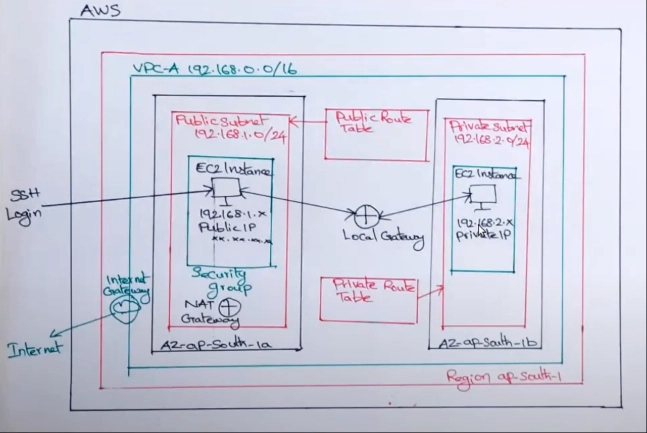
We are going to create a VPC on particular availability zone and differentiate with Public and private subnet/Route table as mentioned in the architect diagram.
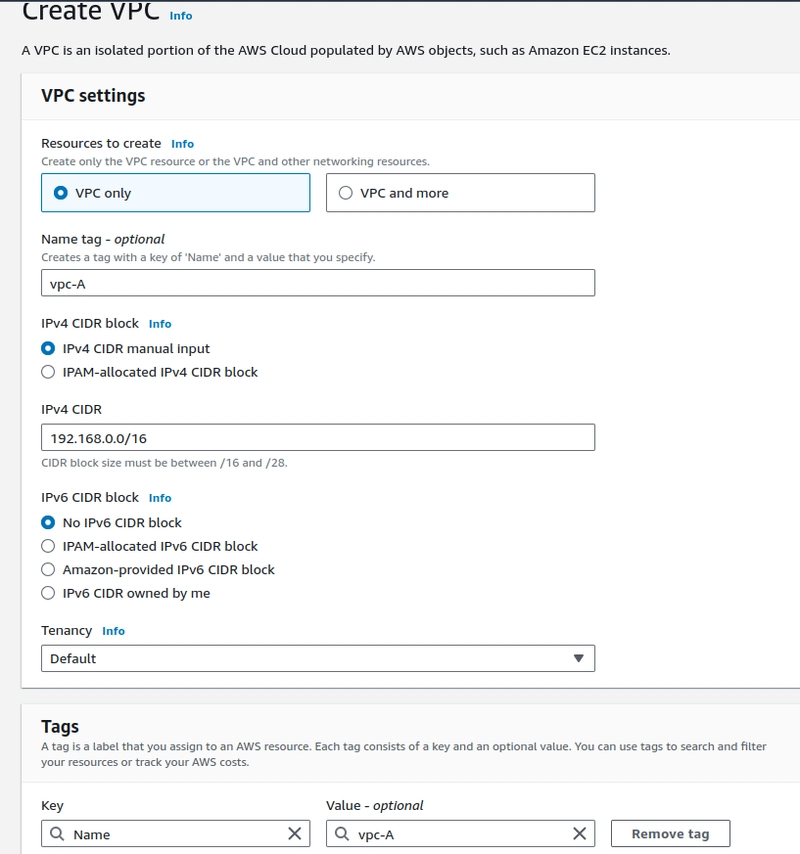
Step-1. Create a VPC with tag of VPC-A
- Select and make range for IPV4 CIDR, select the No IPV6 CIDR Block.
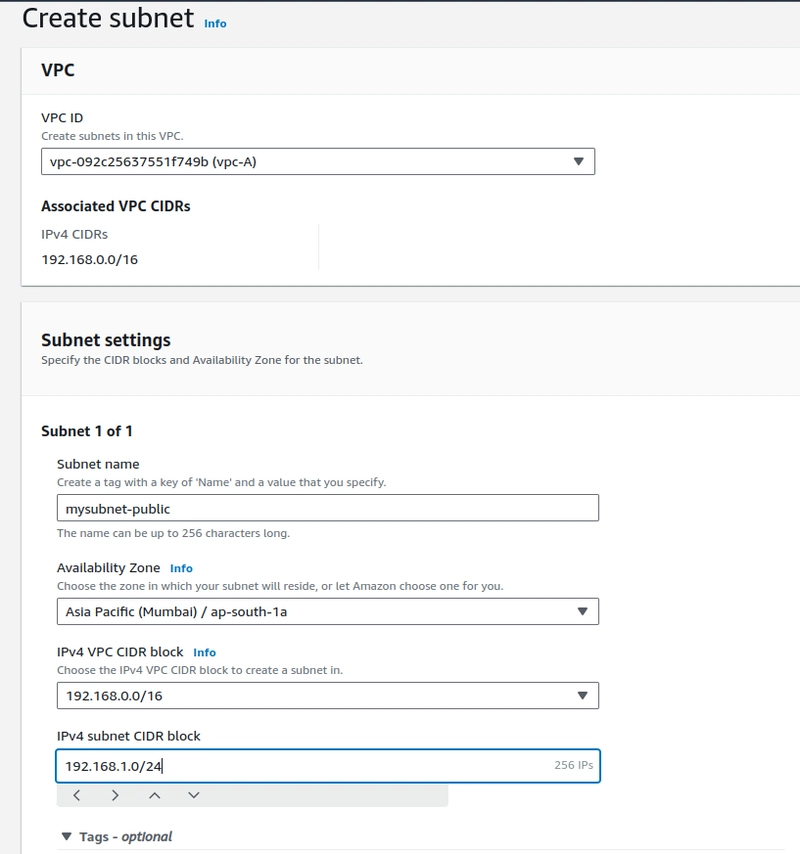
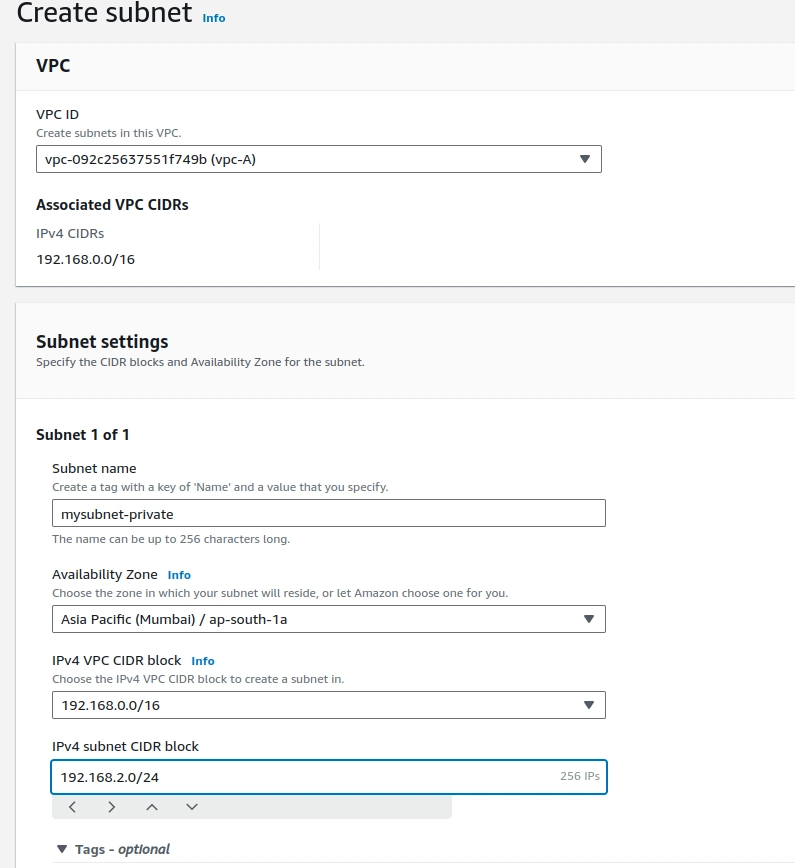
Step-2. Create a Subnet with the VPC ID we created.
- verify the availability zone and IPV4 VPC CIDR and provide the range of subnet on IPV4 subnet CIDR to create the subnet.
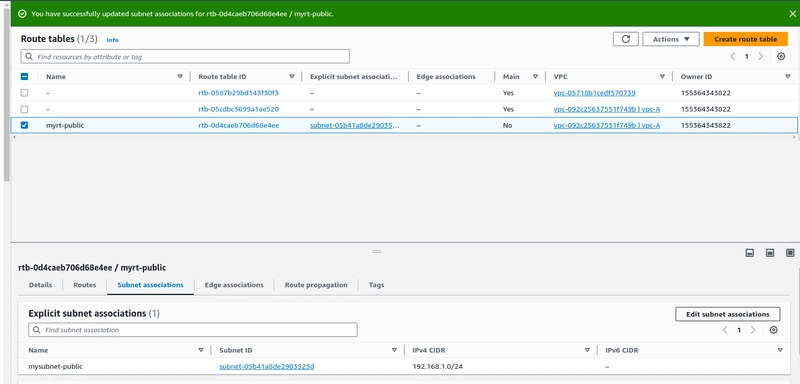
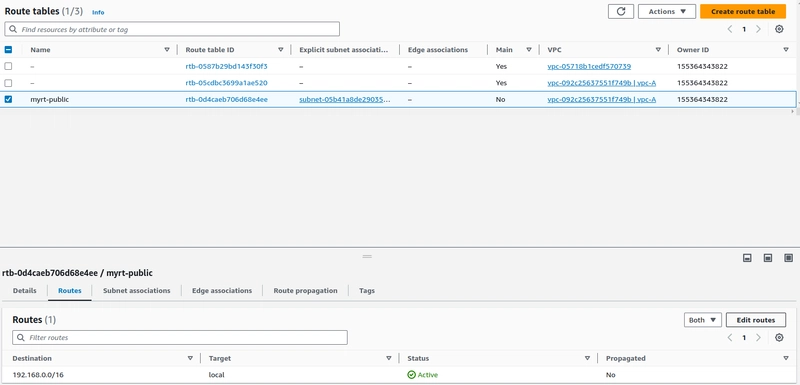
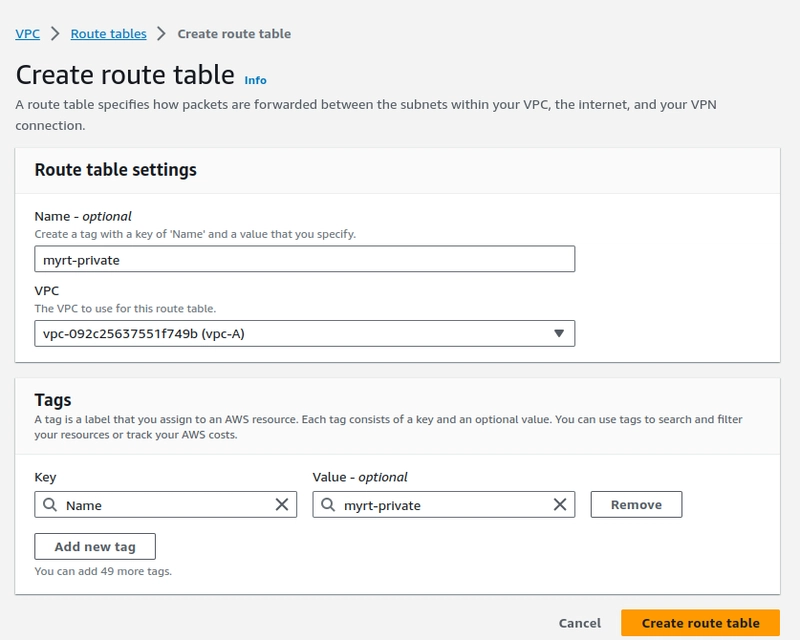
Step-3.Create a Route table
select the VPC and create the route table

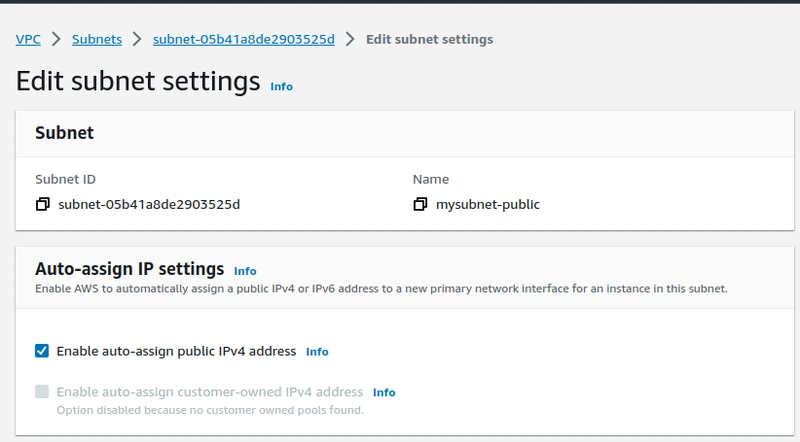
Once route table created associate the subnet with the table. and enable the "Auto assign public IP"
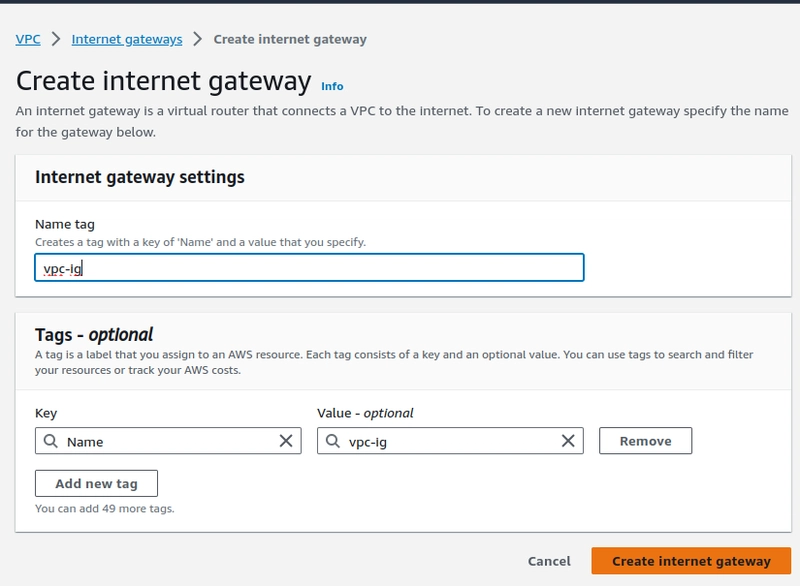
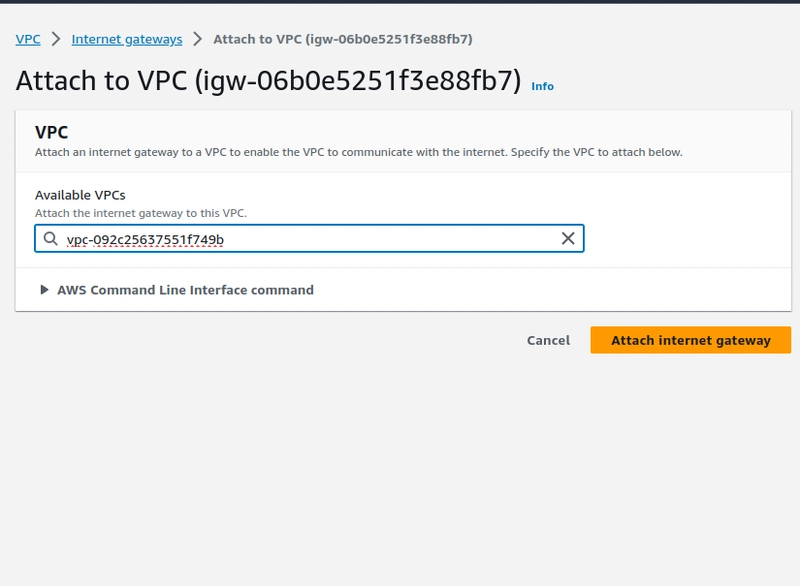
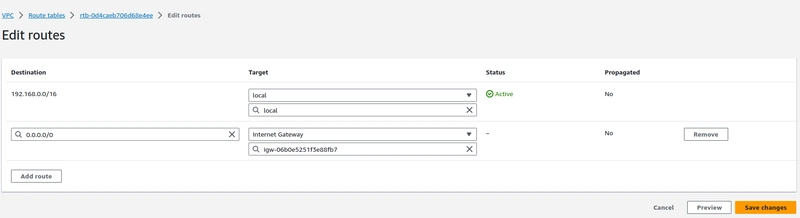
Step-4. Create an Internet gateway and attach it with the VPC which we created.
- Add the Internet gateway on the route table.
Step-5. Create an EC2 instance
- On Network settings select the VPC,subnet,and public IP enable.
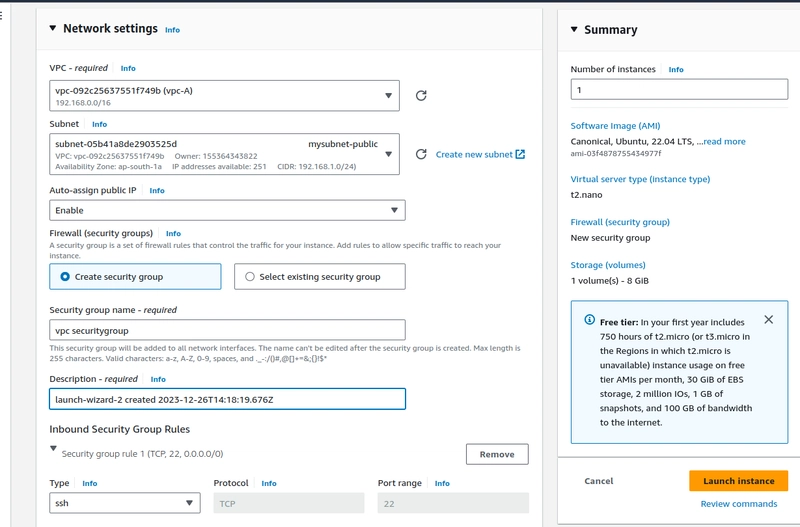
- we are able to access the EC2 instance using public IP via SSH.
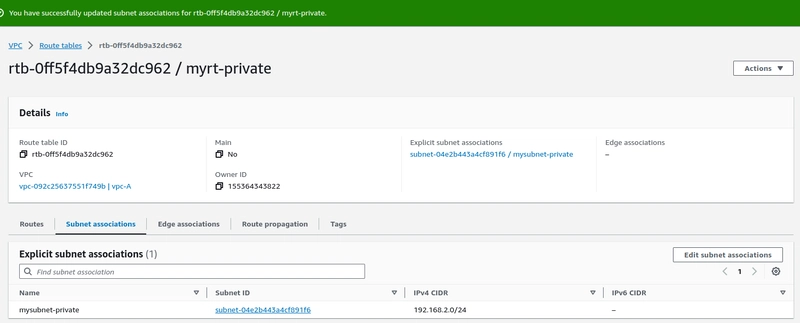
Step-6. Now we need to create the private subnet and route table, associate the private subnet on the route table.
Step-7. Create an EC2 instance
- On Network settings select the VPC,private subnet.

Login to the Public VPC Instance and copy the .pem key from the local to get SSH access for the private instance.
We are able to login public Instance and get connected to Private Instance via Local gateway.
If we need to access internet on private instance to install any application need to create the NAT gateway.
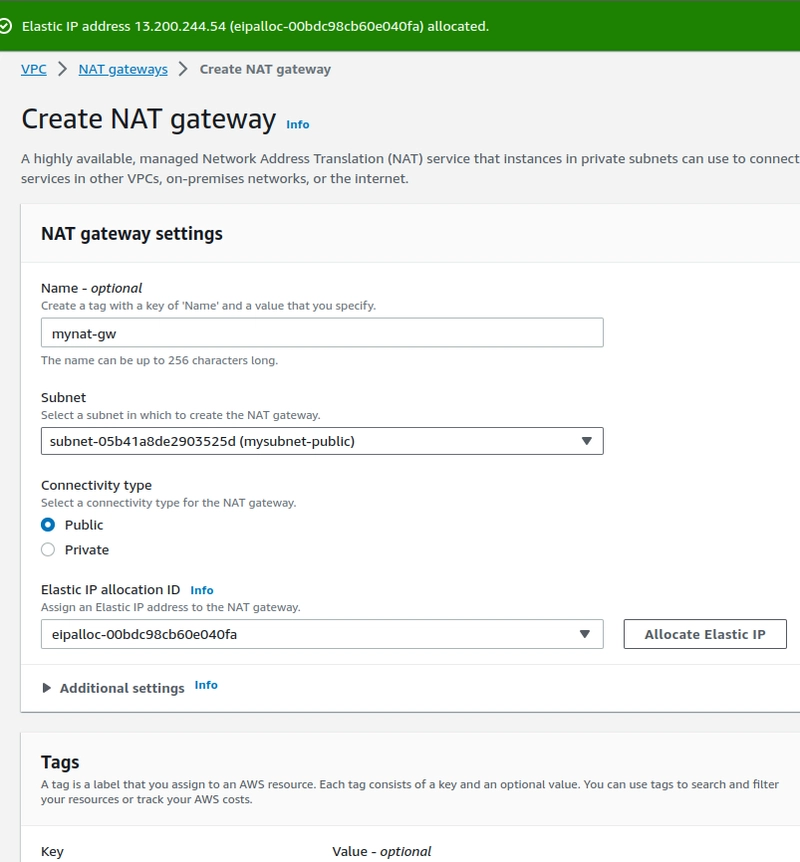
Step-8.Create a NAT Gateway
- select the public instance subnet range and allocate the "Elastic IP".
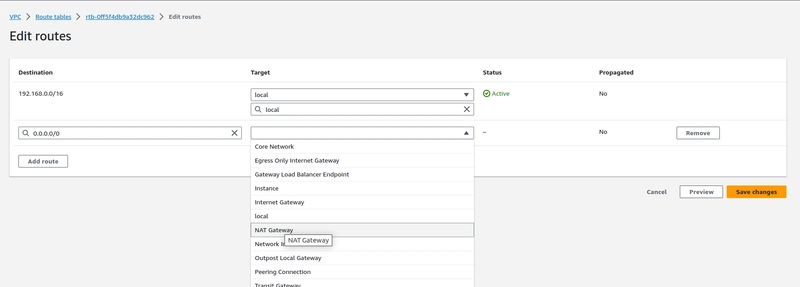
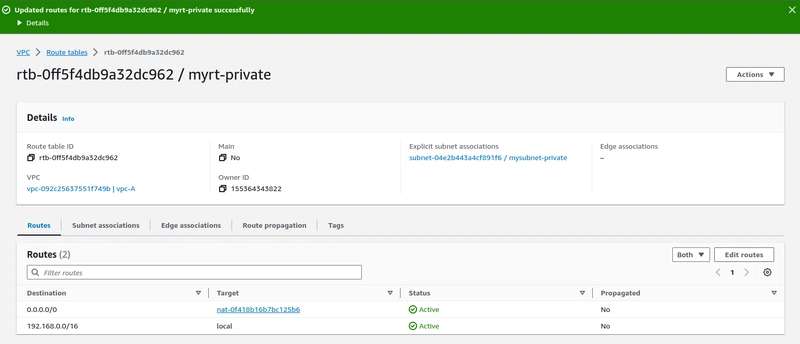
Step-9. Add the NAT gateway on the private Route table to get internet access on the private Instance.
- We are successfully login to the public instance via SSH and from the public-EC2 we are able to login to private and access the internet.
kannan@kannan-PC:~$ ssh -i apache.pem ubuntu@13.201.97.155
Welcome to Ubuntu 22.04.3 LTS (GNU/Linux 6.2.0-1017-aws x86_64)

ubuntu@ip-192-168-1-99:~$ ssh -i apache.pem ubuntu@192.168.2.221
Welcome to Ubuntu 22.04.3 LTS (GNU/Linux 6.2.0-1017-aws x86_64)
ubuntu@ip-192-168-2-221:~$ ping 8.8.8.8
PING 8.8.8.8 (8.8.8.8) 56(84) bytes of data.
64 bytes from 8.8.8.8: icmp_seq=1 ttl=50 time=1.90 ms
64 bytes from 8.8.8.8: icmp_seq=2 ttl=50 time=1.55 ms
64 bytes from 8.8.8.8: icmp_seq=3 ttl=50 time=1.56 ms
^C
--- 8.8.8.8 ping statistics ---
3 packets transmitted, 3 received, 0% packet loss, time 2003ms
rtt min/avg/max/mdev = 1.546/1.671/1.904/0.164 ms
ubuntu@ip-192-168-2-221:~$ ping www.google.com
PING www.google.com (142.251.42.4) 56(84) bytes of data.
64 bytes from bom12s19-in-f4.1e100.net (142.251.42.4): icmp_seq=1 ttl=109 time=1.79 ms
64 bytes from bom12s19-in-f4.1e100.net (142.251.42.4): icmp_seq=2 ttl=109 time=1.58 ms

Top comments (0)