
Kubernetes objects are different types of entities provided by Kubernetes for deploying, maintaining, and scaling applications either on cloud or on-premise infrastructure. In this post we will go through different kubernetes objects that we'll use in our applcation deployment.
Pods
A pod is the most basic object that you can create in an Kubernetes cluster. It usually contains one or more running containers. Containers in a pod share the same network, storage, and lifecycle. What this means is that they can communicate with each other directly, and will both be stopped and started at the same time.
Pod Definition
apiVersion: v1
kind: Pod
metadata:
  name: my-first-pod
  labels:
    name: my-first-pod
    app: nginx-app
spec:
  containers:
     - image: nginx
        name: nginx-app
        ports:
           - containerPort: 80
Let’s break down the yaml definition we've just used, as we will be using similar definition in other objects definitions as well. And also try to understand this definition file will do.
apiVersion: This definies which version of the Kubernetes API you're using to create this object. There are several versions, and several objects are introduced with each version. Some common ones are v1, apps/v1, and extensions/v1beta1.
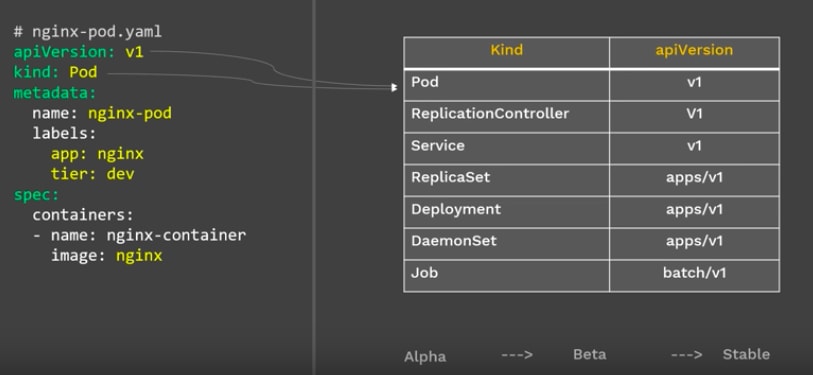
Kind: This is the type of Kubernetes object. In this example we’re creating a pod. (so Pod)
Metadata: The metadata is the information about the object. The metadata usually contains the name you want to give the object , the labels etc. For the labels, you can define as many labels as you want like name, app, owner, group, tier etc,
Spec: The spec section is where you define the specifications of your object (the desired state of the object). In the case of a pod, it’s where you describe the state of your container. Some options you can specify in the spec section are:
Container: Here you specify:
- The image that you want to run in your pod
- The name of the container that you’ll run in your pod.
- The ports
Let's create the Pod with our pod-definition.yaml file:
Now go to your terminal, make sure you’re in the directory where you created your file.
kubectl apply -f pod-definition.yaml
The above command will create the pod with nginx image as defined in the pod-definition file. and you can view the Pods by using kubectl get pods.
ReplicaSet
The ReplicaSet is used to create multiple copies of the same pod in a Kubernetes cluster. It helps ensure that at any given time, the desired number of pods specified are in the running state.
ReplicaSet helps bring up a new instance of a Pod when the existing one fails, scale it up when the running instances are not up to the specified number, and scale down or delete Pods if another instance with the same label is created. A ReplicaSet ensures that a specified number of Pod replicas are running continuously and helps with load-balancing in case of an increase in resource usage.
ReplicaSet Definition
apiVersion: apps/v1
kind: ReplicaSet
metadata:
  name: myapp-replicaset
  labels:
    app: myapp
    tier: frontend
spec:
  replicas: 2
  selector:
    matchLabels:
      tier: frontend
  template:
    metadata:
      labels:
        tier: frontend
    spec:
      containers:
      - name: nginx-app
        image: nginx
To create ReplicaSet, go to your terminal and run the following command with your YAML Definition file.
kubectl apply -f ReplicaSet-definition.yaml
Once the ReplicatSet is running, you can check its status using kubectl get replicaset <your-replicaset-name>
Deployment
Deployments are Kubernetes objects that are used for managing pods. The first thing a Deployment does when it’s created is to create a replicaset. The replicaset creates pods according to the number specified in the replica option. If you look at the YAML definition for the Deployment below, you’ll notice that the spec section of the deployment looks just like the definition for a replicaset.
apiVersion: apps/v1
kind: Deployment
metadata:
  name: myapp-deployment
  labels:
    app: mongo
spec:
  replicas: 2
  selector:
    matchLabels:
      app: mongo
  template:
    metadata:
      labels:
        app: mongo
    spec:
      containers:
      - name: mongo
        image: mongo
So when you create a Deployment, it will create a Replicaset with the pods mentioned in definition.
Deployments can be used to scale your application by increasing the number of running pods, or update the running application.
kubectl apply -f Deployment-definition.yaml
You can view the Deployments with kubectl get deployments
Namespace
Namespaces are used to organize objects in a Kubernetes cluster. They enable you to group resources together and perform actions on those resources.
To see all the namespaces in you environment , use kubectl get namespaces
Creating a Namespace can be done with a single command. If you wanted to create a Namespace called ‘testing’ you would run:
kubectl create namespace testing
Or you can create a namespace using YAML Definition, as follows:
apiVersion: v1
kind: Namespace
metadata:
  name: testing
Now that we have created a namespace, but how do we create the objects in the newly created namespace. For that you need to reference the namespace in the definition file/command.
apiVersion: v1
kind: Pod
metadata:
  name: myPod
  namespace: testing
  labels:
    name: namespaced-pod
spec:
    containers:
      - image: hello-world
         name: firstpod
Service
Kubernetes Service is used to expose an application deployed on a set of pods using a single endpoint. Service enables network access to a set of Pods in Kubernetes.
A service in Kubernetes can be created via an API request by passing in a service definition such as:
apiVersion: v1
kind: Service
metadata:
  name: my-service
spec:
  selector:
    app: myApp
  ports:
    - protocol: TCP
      port: 80
      targetPort: 9376
In this example the service is named my-service and will target TCP port 9376 on any pod with the metadata label "app=MyApp" . Kubernetes constantly evaluates the service’s label selector to determine at any given moment which pods are included in the service. This means that a new service can include existing pods that already match the label selector.
Service Types
The default and simplest service type is ClusterIP . It exposes the service’s ClusterIP address internally to the Kubernetes cluster.
NodePort – exposes the service on the specified port number, on all nodes in the Kubernetes cluster. Meaning that an incoming request to a node’s IP on the specified port will get routed to the service’s ClusterIP .
LoadBalancer – service is exposed like in NodePort but creates a load balancer in the cloud where Kubernetes is running (if supported by the cloud provider) that receives external requests to the service. It then distributes them among the cluster nodes using NodePort. To specify this type add this line to the spec:
type: LoadBalancer

Top comments (0)