I had an opportunity to work on React/Redux application with DevOps. I am C# developer for long time so I am familiar with DevOps process, but it was my first time to play with React/Redux, so I decided to leave note here what I learnt for last couple of weeks.
My current plan is:
- Create simple React application (this article) and unit test
- Add Redux by using Redux Toolkit and unit test
- Simple CI/CD pipeline by using Azure DevOps
- Enhance the pipeline to support multi stage, multi environment
- Add new feature to React application and test with different framework
- Add function test
- Complete the DevOps pipeline
In this article, I write a simple React/Redux application which I use for DevOps later.
React
React is a JavaScript library for building user interfaces which Facebook developed. I was a bit confused at first time as there is ReactJS which I can build node based web application and React Native which I can build mobile native application. In this series, I focus on ReactJS.
Create-React-App
Create React App is a useful utility to create react application which brings several advantages compare to build from scratch, for especially newbie like me. I found the tool in the official React: Create a New React App page, so I trust this one :)
React with TypeScript
I can generate template by using TypeScript with create-react-app.
React+TypeScript Cheatsheets provides great information about how to build react application by using TypeScript.
Redux
Redux is a predictable state container for JavaScript application which many people seems to use it. Even though this is not mandatory for React application, it seems to be quite popular choice when it comes to state management. My friend told me there are other technologies to manage state, such as React Context, but as my project uses Redux, I stick with it this time.
Sample application
Okay, let's start developing a sample application.
Create new React App
The create-react-app is the easiest way to build new app. This is my environment.
- Node.js v12.16.0
- Windows 10
- Visual Studio Code v1.42.1
1. Run the following command to scaffold template. This takes 3-5 minutes. I used TypeScript template as I love strong type language.
npx create-react-app my-react-redux-app --template typescript
code my-react-redux-app
2. Run the application from terminal in VSCode.
npm start
3. Then you see the application is up and running on port 3000.

4. To debug the application in VSCode, I added following settings in launch.json. The first configuration is to debug the application. The second one is to debug the test.
{
  // Use IntelliSense to learn about possible attributes.
  // Hover to view descriptions of existing attributes.
  // For more information, visit: https://go.microsoft.com/fwlink/?linkid=830387
  "version": "0.2.0",
  "configurations": [
    {
      "name": "Chrome",
      "type": "chrome",
      "request": "launch",
      "url": "http://localhost:3000",
      "webRoot": "${workspaceFolder}/src",
      "sourceMapPathOverrides": {
        "webpack:///src/*": "${webRoot}/*"
      }
    },
    {
      "name": "Debug CRA Tests",
      "type": "node",
      "request": "launch",
      "runtimeExecutable": "${workspaceRoot}/node_modules/.bin/react-scripts",
      "args": [
        "test",
        "--runInBand",
        "--no-cache",
        "--watchAll=false"
      ],
      "cwd": "${workspaceRoot}",
      "protocol": "inspector",
      "console": "integratedTerminal",
      "internalConsoleOptions": "neverOpen",
      "env": {
        "CI": "true"
      },
      "disableOptimisticBPs": true
    }
  ]
}
That's it to create new application and I am ready to develop my app.
What I got
Create React App gives enough dependencies and source code to start building the application.
Dependencies
- react, react-dom: npm packages to build the application
- @testing-xxx: testing libraries
- @types/xxx: type libraries
- react-scripts: The building tool which build, start or test the application
- typescript
Source
There are handful of files generated, but I mainly work with following files.
- index.tsx: The container for entire app
- App.tsx: Function component which renders the main page
- setupTests.ts: Global setup location for all tests.
Replace App.tsx
Before start writing code, I just update the App.tsx to use class component rather than function component.
1. Replace the code in App.tsx.
import React from 'react';
import logo from './logo.svg';
import './App.css';

type MyProps = {
  message: string;
};

type MyState = {
  count: number;
};

class App extends React.Component<MyProps, MyState> {
  state: MyState = {
    count: 0
  };
  render() {
    return (
      <div className="App">
        <header className="App-header">
          <p>
            {this.props.message}: {this.state.count}
          </p>
          <button onClick={this.increment}>Increment</button>
          <img src={logo} className="App-logo" alt="logo" />
          <a
            className="App-link"
            href="https://reactjs.org"
            target="_blank"
            rel="noopener noreferrer"
          >
            Learn React
          </a>
        </header>
      </div>
    );
  }

  increment = () => {
    this.setState(state => ({
      count: state.count + 1
    }));
  };
}

export default App;
2. Add breakpoint in increment function and press F5 to start debug. Make sure to select Chrome configuration.

3. Click [Increment] button and confirm you can live debug the application.

Write Tests
App.test.tsx contains test code from the template. There are many libraries to test react application. I start writing test by using following libraries.
- React Testing Library: This is part of template and it works as assertion
- Jest: This is used by create-react-app and it works as test runner
I will add addional libraries later depends on my needs.
1. First test is to check if "Hello React: 0" is rendered as expected. I used getByText to query the DOM object. You can see more query here. Then I use toBeInTheDocument to assert the existence of the element, which comes from @testing-library/jest-dom. There are so many other matches for assertion.
it('should render hello message', () => {
  const message: string = "Hello React";
  const { getByText } = render(<App message={message}/>);
  const linkElement = getByText(`${message}: 0`);
  expect(linkElement).toBeInTheDocument();
});
2. Run npm test in console to see the test result. The test keeps running and auto update the result, so let it run for now.

3. The second test is to check if clicking increment button will update count state. There are several ways to test this but I take easy route this time. First, import fireEvent and waitForElement in addition to render from @testing-library/react.
import { render, fireEvent, waitForElement } from '@testing-library/react';
4. Add second test. This is an async test as I use waitForElement function. See here for async test detail.
it('should increment count and render the message', async () => {
  const message: string = "Hello React";
  const { getByText } = render(<App message={message} />);
  // Get Increment Button and fire click event
  fireEvent.click(getByText(/Increment/));
  // Get updated text
  const greetingTextNode = await waitForElement(() =>
    // getByText throws an error if it cannot find an element
    getByText(`${message}: 1`)
  );
  expect(greetingTextNode).toBeInTheDocument();
});
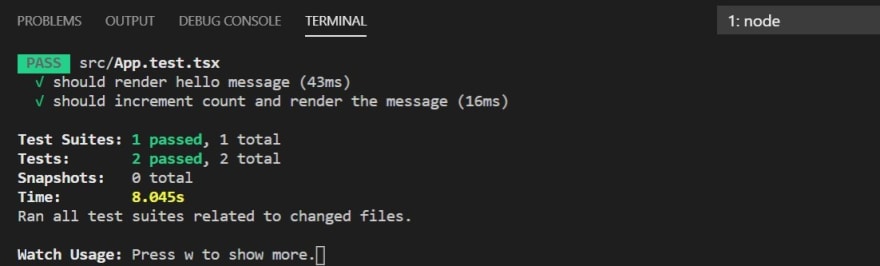
5. See the updated test result.
Think about what to test
I usually don't test the framework itself. Even though I tested increment function above, it's not pure function test, but I observe the updated UI, which is caused by setState.
There are two ways I can test in different way.
- Test if the setState function is called exactly once
- Test if the state.count value is updated
I can use enzyme to write these test but this time, I stick with what I got at the moment.
Summary
I have an application as a starting point now. In the next article, I will add redux to my app.

Top comments (0)