In this post, I explain how to use App Role for Azure AD App Role to secure your C# Web API.
This is an official document which explains app role in general.
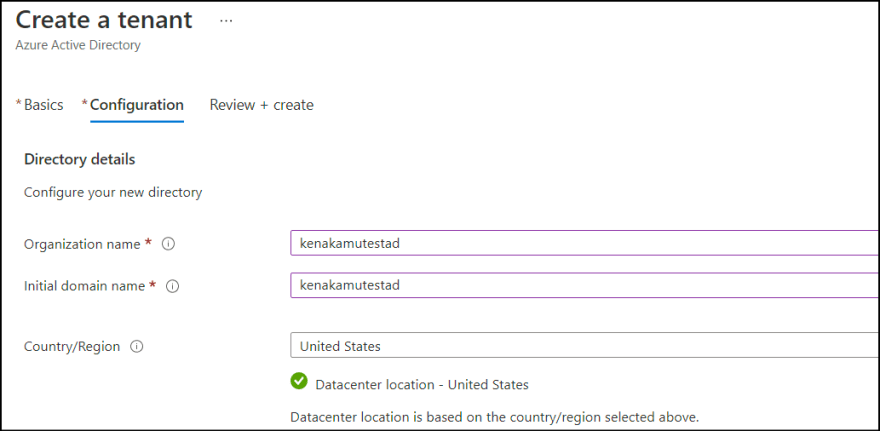
Create Azure AD
If you already have Azure AD to register your app, you can use it, otherwise create new one.
You can add several users for test.
Register an application
Once you provision Azure AD, register an application for the WebAPI.
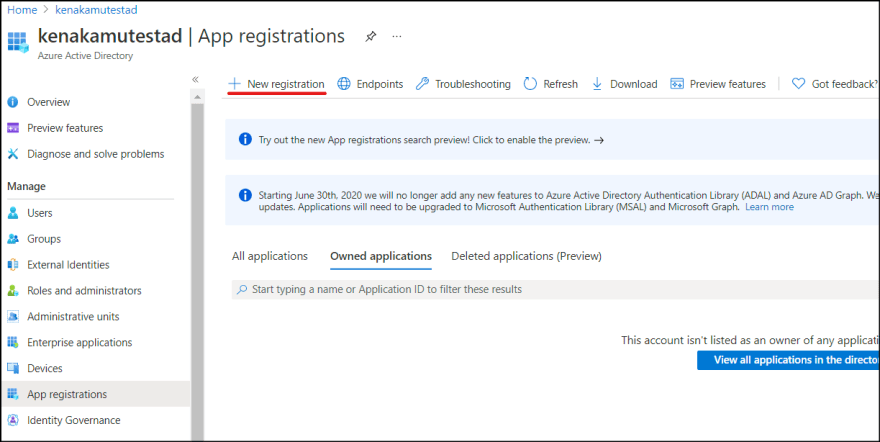
1. Go to Azure AD resource and select "App registrations". Click "New registration".
2. Enter any Name click "Register" with default settings.
3. Take a note for "Application (client) ID" and "Directory (tenant) ID"
Create Web API
Let's create web api project by using registered application information. I use .NET 5 in this example.
1. Create web api project. Replace name, client/tenant Ids and domain name to your own.
dotnet new webapi --name mywebapi --auth SingleOrg --client-id 957d4202-5e73-47d9-9fcf-554112c3746c --tenant-id 92b10440-c6cc-4cb3-97e1-7ff05bc6bc8e --domain kenakamutestad.onmicrosoft.com
2. Open created project via any IDE. I use Visual Studio 2019. Confirm appsettings.json has correct information about the registered application.
3. Also open Startup.cs to confirm Azure AD auth is setup.
4. Hit F5 to make sure it runs as expected.
5. Check the URI. In my case, I use port 44384 for my localhost.
Update registered application
Now it's time to update registered application.
1. Go back to the registered application and select "Authentication". Click "Add a platform" to configure web authentication.
2. Select "Web".
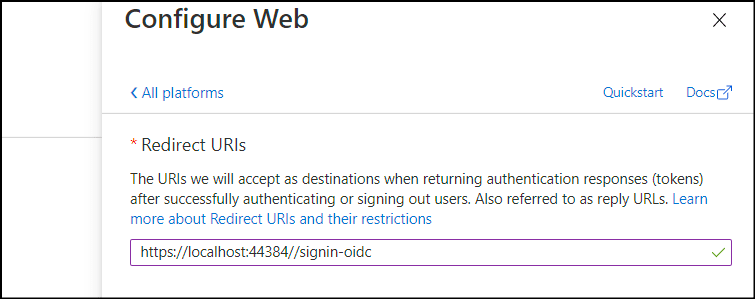
3. Enter Redirect Uri by using localhost address followed by "/signin-oidc". Click "Configure".
4. Next, go to "Expose an API" and click "Add a scope".
5. Click "Save and continue" without changing Application ID URI.
6. Create scope like below. "access_as_user" is expected default scope name. Click "Add scope". You can check it by running dotnet new webapi -h and check --default-scope parameter.
This scope is also hard-coded in "WeatherForecastController.cs" and use HttpContext.VerifyUserHasAnyAcceptedScope method.
You just updated authentication method as well as a scope for the application.
Check Endpoints
You need endpoints information later on.
1. Select overview and click "Endpoints".
2. Take a note for "OAuth 2.0 authorization endpoint (V2)" and "OAuth 2.0 token endpoint (V2)".
Obtain Client Secret
1. Select "Certificates & secrets". Click "New client secret".
2. Create a secret and take a note for Value.
Add App Role
In this application, I use two application roles, "Admin" and "User".
1. Click "App roles" and click "Create app role".
2. Enter "Admin" as display name and value. Click "Apply".
3. Repeat the steps to create User role as well.
Add Azure AD security group
Although it's not mandatory, it's recommended to use Azure AD security group to manage users. So, let's create corresponding groups.
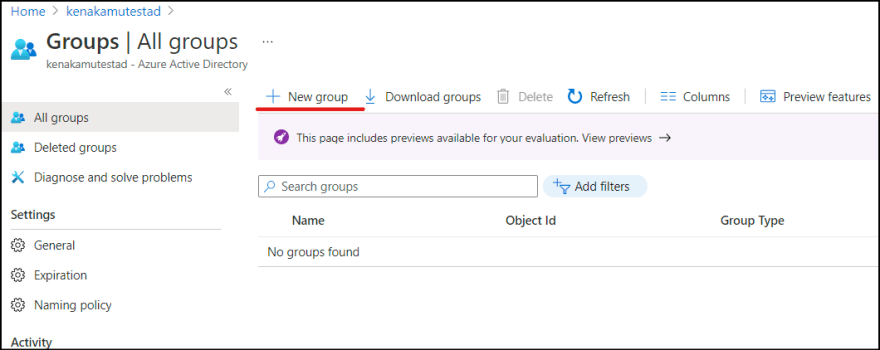
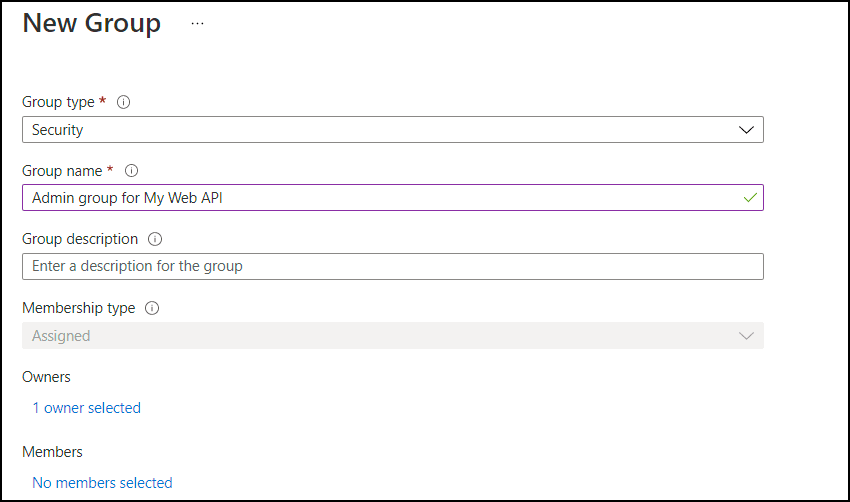
1. Go back to Azure AD portal and select "Groups". Click "New group".
2. Enter any name to the group and make yourself as owners. You can add members now or later.
3. Repeat the steps to create user groups.
Map App Role to Azure AD security group
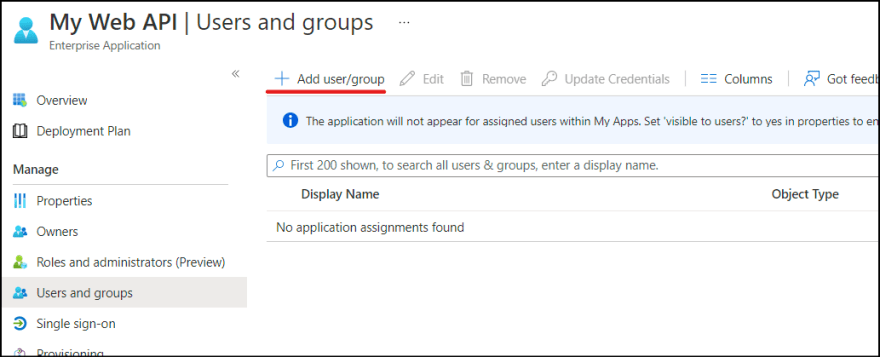
There is no mappings between App role and security group yet, so let's configure it. We can do so via "Enterprise application" menu.
1. Go back to Azure AD portal and select "Enterprise applications". Search for the registered application and select it.
2. Go to "Users and groups". Click "Add user/group". This menu let us create a mapping between app role and user/group.
If you see warning like below, you can upgrade your Azure AD plan to Azure AD P2, or you can simply assign each user to role.
I upgraded my Azure AD plan from free to P2 free trial.
3. Select created security group and role for Admin. Click "Assign".
4. Repeat the steps for User role.
Use the role in Web API
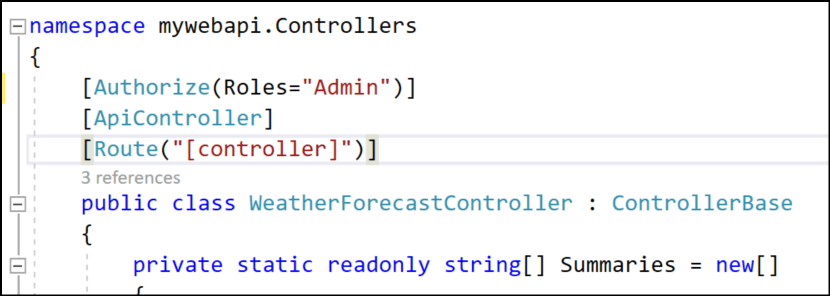
Finally, we can use the role in Web API.
1. Go back to web api solution and open "WeatherForecastController". Update "Authorize" attribute to include role name.
Test the API
Time to test the configuration.
1. Run the web api by hitting F5.
2. Open Postman and select "Authorization" tab. Select "OAuth 2.0" from drop down.
3. Enter following information.
- Callback URL: https://localhost:44384//signin-oidc (change port to match your configuration)
- Auth URL: The one you confirm in the endpoint for authorization.
- Access Token URL: The one you confirm in the endpoint for token.
- Client ID: The client Id of the registered application.
- Client secret: The one you created for the registered application.
- Scope: The one you created for the registered application in Exposer API section. It should looks like "api://957d4202-5e73-47d9-9fcf-554112c3746c/access_as_user"
4. Click "Get new access token" and complete the sign-in process. Use a user who belongs to Admin role.
5. Once you obtain the token, click "Use Token".
6. Enter the WeatherForcast api address and hit "Send". You should see the result. If you use different user who doesn't belong to "Admin" role, then you will get an error.
Parse JWT
You can also parse JWT in the web service like https://jwt.io/. Do so with your own risk please. I can see that my token contains "Admin" role and "access_as_user" as expected.
Summary
It's a bit tricky that you need to use both "app registration" as well as "Enterprise application" menus to configure App role, but I hope you get some idea.











Oldest comments (0)