Migrated
For Proximity Voice Chat Setup, click here
TCP Exposer Settings
Configure this to use a fixed Room ID for Minecraft's /connect or VC connections.
How to


SkyWay Settings
This allows you to use features like SkyWay noise canceling.
How to


How to Maintain a Constant Connection
You can keep the proximity voice chat connected at all times.
You can also change proximity VC settings using functions or command blocks.
Before You Start
- This is only available for Minecraft Bedrock Server. You must set up your own server. We do not provide support for server setup.
- Download
proximity_vc.zipandServer_Proximity_Voice_Chat.mcpackfrom GitHub.Setup
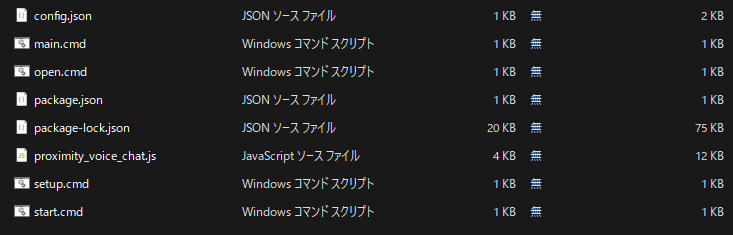
① Unzip proximity_vc.zip
You will find files like the ones in the image.

② Register on SkyWay & Create a Project and Application
Register on SkyWay
After registering, log in and create an application following the on-screen guide.
A page like the one in the screenshot will appear.
※ You will need the Application ID and Secret Key later.

③ Prepare to expose localhost
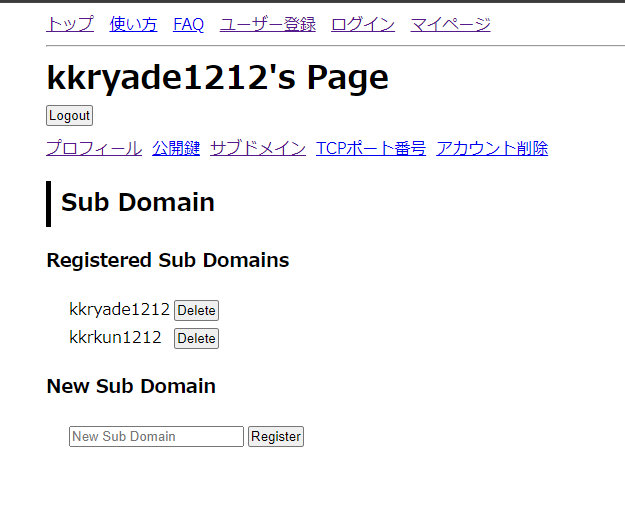
- Register and log in to the TCP Exposer site (Remember your password, as you will need it later).
- Go to My Page(マイページ) → Subdomains(サブドメイン).
- From "New Sub Domain," acquire two subdomains of your choice.
※ If the proximity VC and Minecraft server are on the same device, one subdomain is sufficient.

④ Option 1: Edit config.json
Open
config.json.
Enter the two Skyway items on lines 2-3.
Enter the TCP Exposer username and subdomain on lines 5-8.
※ If the proximity VC and Minecraft server are on the same device,sub_domain2is not used, so you can leave it blank.
You can also change to your preferred settings at this time.

④ Option 2: Edit on the website
Go to this site, choose your preferred settings, download the configuration file, and overwrite
config.json.
※ Be sure to fill in the advanced settings as well.

⑤ Run setup.cmd
Run
setup.cmdas administrator privileges.
※ The window will close immediately; this is normal behavior.

⑥ Apply Server_Proximity_Voice_Chat to the desired server

⑦ Modify Server Settings
Open
config/default/permissions.jsonand add"@minecraft/server-net".

This completes the setup.


Top comments (2)
nice
I didn't open the advanced settings