This is a beginner-friendly guide to the official Django Rest Framework tutorial. If you have struggled to complete the official tutorial on your own, consider this guide a good place to start instead.
The final code is exactly the same and is available on Github. However I provide more detailed explanations of each step, use the Django admin rather than the Django shell for populating the models, emphasize class-based views over function-based views, and so on.
After completing this tutorial, the official tutorial should make a lot more sense and help you take full advantage of the awesomeness that is Django REST Framework.
NOTE: If you'd like to learn even more about APIs in Django, I've written an entire book on the subject, Django for APIs. The first few chapters are available for free.
Initial Setup
Go to InstallPython3.com for a step-by-step guide to properly installing Python 3.7 and pipenv on a Mac, Windows, or Linux computer.
Once that's done, create a dedicated directory for our code. This can live anywhere on your computer but in a location that is easily accessible. One option, if you're on a Mac computer, is to create a drf directory on your Desktop. That's what we'll do here.
Enter the following commands in your terminal:
$ cd ~/Desktop
$ mkdir drf && cd drf
Then within the new directory, install django, djangorestframework, and pygments (which is used for code highlighting). Make sure to activate the virtual environment shell once all three packages are installed.
$ pipenv install django==3.0.3
$ pipenv install djangorestframework==3.11.0
$ pipenv install pygments==2.5.2
$ pipenv shell
(drf) $
Note: The name of your virtual environment is listed as (drf) here for convenience. In practice, the name will be your current directory name. To exit the virtual environment at any time, type exit.
Our new project is called tutorial and within it there is an app called snippets for our web API. Adding a period . at the end of the command is optional but recommended as otherwise Django will create a redundant additional directory with the startproject command.
(drf) $ django-admin.py startproject tutorial .
(drf) $ python manage.py startapp snippets
Now add the snippets app and rest_framework to the INSTALLED_APPS config in our tutorial/settings.py file. It's not enough to simply create new apps; they must also be explicitly added to INSTALLED_APPS.
# tutorial/settings.py
INSTALLED_APPS = [
    'django.contrib.admin',
    'django.contrib.auth',
    'django.contrib.contenttypes',
    'django.contrib.sessions',
    'django.contrib.messages',
    'django.contrib.staticfiles',
    'rest_framework', # new
    'snippets.apps.SnippetsConfig', # new
]
Models
The model is a good place to start any new project. In the snippets/models.py file, create a new model called Snippet.
# snippets/models.py
from django.db import models
from pygments.lexers import get_all_lexers
from pygments.styles import get_all_styles

LEXERS = [item for item in get_all_lexers() if item[1]]
LANGUAGE_CHOICES = sorted([(item[1][0], item[0]) for item in LEXERS])
STYLE_CHOICES = sorted([(item, item) for item in get_all_styles()])


class Snippet(models.Model):
    created = models.DateTimeField(auto_now_add=True)
    title = models.CharField(max_length=100, blank=True, default='')
    code = models.TextField()
    linenos = models.BooleanField(default=False)
    language = models.CharField(choices=LANGUAGE_CHOICES, default='python', max_length=100)
    style = models.CharField(choices=STYLE_CHOICES, default='friendly', max_length=100)

    class Meta:
        ordering = ['created']

    def __str__(self):
        return self.title
Then create an initial migration file and sync the database for the first time.
(drf) $ python manage.py makemigrations snippets
(drf) $ python manage.py migrate
We need to add some data into our model to make it "real" now. The official tutorial goes on a lengthy tangent into the Django shell at this point. However to beginners--and even professional programmers--the graphical Django admin is a more intuitive approach. That's what we'll use here.
But first we need to update snippets/admin.py so the app will actually appear! Just as with the INSTALLED_APPS setting, apps must be explicitly added to the admin.
# snippets/admin.py
from django.contrib import admin
from .models import Snippet

admin.site.register(Snippet)
Now create a superuser account for log in. Follow all the prompts for setting a username, email, and password. I've used admin, admin@email.com, and testpass123.
(drf) $ python manage.py createsuperuser
And start our local web server for the first time.
(drf) $ python manage.py runserver
Navigate over to the Django homepage at http://127.0.0.1:8000/ to confirm everything is working.

Then switch over to the Django admin at http://127.0.0.1:8000/admin/. Log in with your superuser account.

Click on the "+ Add" button next to Snippets. And create two new snippets.


Click the "Save" button in the lower right for each snippet. Both will be visible on the main Snippets page.

Serialization
A Serializer transforms model instances into JSON. This the real "magic" that Django Rest Framework provides for us. Consider that the end result of a traditional website is a page of HTML, CSS, and content from the database. But an API doesn't care about that: it's only raw data at endpoints, which means JSON, and accompanying HTTP verbs that tell the API what actions can be taken (more on this shortly).
Create a snippets/serializers.py file.
(drf) $ touch snippets/serializers.py
And update it as follows. We can extend DRF's ModelSerializer to create a SnippetSerializer class that uses our model and outputs the table fields.
# snippets/serializers
from rest_framework import serializers
from .models import Snippet, LANGUAGE_CHOICES, STYLE_CHOICES


class SnippetSerializer(serializers.ModelSerializer):

    class Meta:
        model = Snippet
        fields = ('id', 'title', 'code', 'linenos',
                  'language', 'style', )
Next we need a view that handles the logic of combining a model, serializer, and eventually URL together. Just as traditional Django ships with several class-based generic views to handle common functionality, so too Django Rest Framework has its own set of powerful class-based generic views we can use.
Specifically we will use ListCreateAPIView to create a read-write endpoint that lists all available Snippet instances and then RetrieveUpdateDestroyAPIView for a read-write-delete endpoint for each individual Snippet.
# snippets/views.py
from rest_framework import generics
from .models import Snippet
from .serializers import SnippetSerializer

class SnippetList(generics.ListCreateAPIView):
    queryset = Snippet.objects.all()
    serializer_class = SnippetSerializer


class SnippetDetail(generics.RetrieveUpdateDestroyAPIView):
    queryset = Snippet.objects.all()
    serializer_class = SnippetSerializer
URLs
The final step is to configure our URLs. In the topmost, project-level tutorial/urls.py file add include as an import for the snippets app urls which will appear at the empty string ''.
# tutorial/urls.py
from django.contrib import admin
from django.urls import include, path # new

urlpatterns = [
    path('admin/', admin.site.urls),
    path('', include('snippets.urls')), # new
]
Then create a urls.py file with our snippets app.
(drf) $ touch snippets/urls.py
And add the following code.
# snippets/urls.py
from django.urls import path
from rest_framework.urlpatterns import format_suffix_patterns
from snippets import views

urlpatterns = [
    path('snippets/', views.SnippetList.as_view()),
    path('snippets/<int:pk>/', views.SnippetDetail.as_view()),
]

urlpatterns = format_suffix_patterns(urlpatterns)
Including format_suffix_patterns is an optional choice that provides a simple, DRY way to refer to a specific file format for a URL endpoint. It means our API will be able to handle URls such as http://example.com/api/items/4.json rather than just http://example.com/api/items/4.
Browsable API
Django Rest Framework ships with a browsable API that we can now use. Make sure the local server is running.
(drf) $ python manage.py runserver
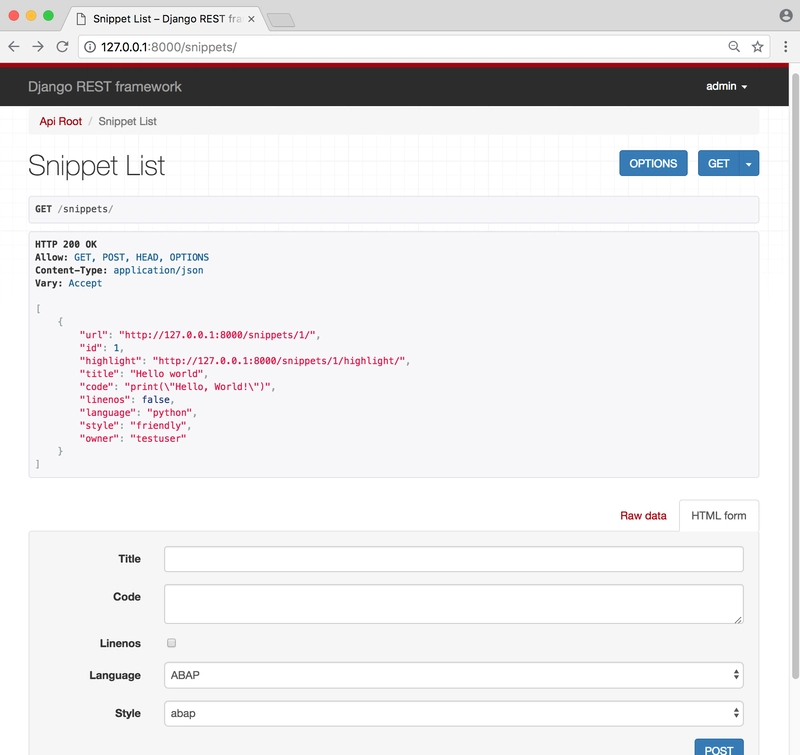
Navigate to the Snippets List endpoint at http://127.0.0.1:8000/snippets/.

We can also go to the detail view for each snippet. For example, the first snippet is at http://127.0.0.1:8000/snippets/1/.

As a reminder, the id is automatically set by Django on each database entry.
Requests and Responses
Currently our API has no restrictions on who can edit or delete code snippets. In this section we will make sure that:
- Code snippets are always associated with a creator
- Only authenticated users may create snippets
- Only the creator of a snippet may update or delete it
- Unauthenticated requests should have full read-only access
Adding information to our model
First up let's add two fields to our existing Snippet model class: owner which will represent the user who created the code snippet and highlighted to store the highlighted HTML representation of the code.
We also want to ensure that when the model is saved, we use the pygments code highlighting library to populate our highlighted field. So we'll need some additional imports as well as a .save() method.
# snippets/models.py
from django.db import models
from pygments import highlight # new
from pygments.formatters.html import HtmlFormatter # new
from pygments.lexers import get_all_lexers, get_lexer_by_name # new
from pygments.styles import get_all_styles

LEXERS = [item for item in get_all_lexers() if item[1]]
LANGUAGE_CHOICES = sorted([(item[1][0], item[0]) for item in LEXERS])
STYLE_CHOICES = sorted((item, item) for item in get_all_styles())


class Snippet(models.Model):
    created = models.DateTimeField(auto_now_add=True)
    title = models.CharField(max_length=100, blank=True, default='')
    code = models.TextField()
    linenos = models.BooleanField(default=False)
    language = models.CharField(choices=LANGUAGE_CHOICES, default='python', max_length=100)
    style = models.CharField(choices=STYLE_CHOICES, default='friendly', max_length=100)
    owner = models.ForeignKey('auth.User', related_name='snippets', on_delete=models.CASCADE) # new
    highlighted = models.TextField() # new

    class Meta:
        ordering = ('created',)

    def save(self, *args, **kwargs): # new
        """
        Use the `pygments` library to create a highlighted HTML
        representation of the code snippet.
        """
        lexer = get_lexer_by_name(self.language)
        linenos = 'table' if self.linenos else False
        options = {'title': self.title} if self.title else {}
        formatter = HtmlFormatter(style=self.style, linenos=linenos,
                                  full=True, **options)
        self.highlighted = highlight(self.code, lexer, formatter)
        super(Snippet, self).save(*args, **kwargs)

    def __str__(self):
        return self.title
Normally we would create a migration and sync it to update our database tables. However since we have added an owner here and have existing content, it's simpler to just delete the database and start again. Make sure you have stopped the local server with Control+c.
(drf) $ rm db.sqlite3
(drf) $ rm -r snippets/migrations
(drf) $ python manage.py makemigrations snippets
(drf) $ python manage.py migrate
Re-create our steps from earlier to create a new superuser account. We'll want a second superuser account which is simplest to setup from the command line too. So run createsuperuser twice. I've called my users admin and testuser. Then start up the local server.
(drf) $ python manage.py createsuperuser
(drf) $ python manage.py createsuperuser
(drf) $ python manage.py runserver
Go back into the Django admin at http://127.0.0.1:8000/admin/ and login with the admin account.
If you click on the Users link you will be redirected to the Users page which should show both users.
Once complete, you should see the two users on the Users page.

We need to recreate our snippets too since the initial database was just destroyed. Create a new snippet and specify the Owner as one of our users. I've chosen testuser here.
But there's a problem when we try to "Save".

We are getting a ValidationError here. In the official tutorial the Django shell is used to input data, but we are using the admin here. So the existing code doesn't work as is. Recall that the highlighted field is automatically set by our custom save() method on the model, but the admin doesn't know this. It expects us to enter in a value here. To solve the problem update our admin.py file and set highlighted as a read-only field.
# snippets/admin.py
from django.contrib import admin
from . models import Snippet


class SnippetAdmin(admin.ModelAdmin):
    readonly_fields = ('highlighted',)


admin.site.register(Snippet, SnippetAdmin)
Try clicking the "Save" button again. It should work.
The final step is to click the Log out link in the upper right corner of the admin page.

We will shortly be adding permissions to our API so that only authenticated (logged-in) users have access.

Adding endpoints to our User models
Now that we have some users to work with, let's add endpoints for them to our API. Add a new UserSerializer class to the snippets/serializers.py file.
# snippets/serializers.py
from django.contrib.auth.models import User
from rest_framework import serializers
from snippets.models import Snippet, LANGUAGE_CHOICES, STYLE_CHOICES


class SnippetSerializer(serializers.ModelSerializer):

    class Meta:
        model = Snippet
        fields = ('id', 'title', 'code', 'linenos',
                  'language', 'style', )


class UserSerializer(serializers.ModelSerializer):
    snippets = serializers.PrimaryKeyRelatedField(
        many=True, queryset=Snippet.objects.all())

    class Meta:
        model = User
        fields = ('id', 'username', 'snippets')
Because snippets is a reverse relationship on the default Django User model, it will not be included by default using the ModelSerializer class, we need to add an explicit field for it.
We also need to add two new read-only views for a list of all users and a detail view of individual users. Note that we use the generic class-based RetrieveAPIView for the read-only detail view. And that we import both User and UserSerializer at the top.
# snippets/views.py
from django.contrib.auth.models import User # new
from rest_framework import generics

from .models import Snippet
from .serializers import SnippetSerializer, UserSerializer # new


class SnippetList(generics.ListCreateAPIView):
    queryset = Snippet.objects.all()
    serializer_class = SnippetSerializer


class SnippetDetail(generics.RetrieveUpdateDestroyAPIView):
    queryset = Snippet.objects.all()
    serializer_class = SnippetSerializer


class UserList(generics.ListAPIView): # new
    queryset = User.objects.all()
    serializer_class = UserSerializer


class UserDetail(generics.RetrieveAPIView): # new
    queryset = User.objects.all()
    serializer_class = UserSerializer
Finally we need to add the new views to the API by configuring their URL routes. Add the following pattern to snippets/urls.py.
# snippets/urls.py
from django.urls import path
from rest_framework.urlpatterns import format_suffix_patterns
from snippets import views

urlpatterns = [
    path('snippets/', views.SnippetList.as_view()),
    path('snippets/<int:pk>/', views.SnippetDetail.as_view()),
    path('users/', views.UserList.as_view()), # new
    path('users/<int:pk>/', views.UserDetail.as_view()), # new
]

urlpatterns = format_suffix_patterns(urlpatterns)
Associating Snippets with Users
Currently there is no way to automatically associate the logged-in user that created a snippet with the snippet instance. We can set this automatically by overriding .perform_create() method on our snippet views that lets us modify how an instance is saved.
Add the following method to our existing SnippetList view class.
# snippets/views.py
class SnippetList(generics.ListCreateAPIView):
    queryset = Snippet.objects.all()
    serializer_class = SnippetSerializer

    def perform_create(self, serializer): # new
        serializer.save(owner=self.request.user)
Updating Our Serializer
Now that snippets are associated with the user that created them, let's update SnippetSerializer with an owner to reflect that. Make sure to also include owner in the list of fields too.
# snippets/serializers.py
from django.contrib.auth.models import User
from rest_framework import serializers
from snippets.models import Snippet, LANGUAGE_CHOICES, STYLE_CHOICES


class SnippetSerializer(serializers.ModelSerializer):
    owner = serializers.ReadOnlyField(source='owner.username') # new

    class Meta:
        model = Snippet
        fields = ('id', 'title', 'code', 'linenos',
                  'language', 'style', 'owner',) # new


class UserSerializer(serializers.ModelSerializer):
    snippets = serializers.PrimaryKeyRelatedField(many=True, queryset=Snippet.objects.all())

    class Meta:
        model = User
        fields = ('id', 'username', 'snippets')
The source argument used here controls which attribute is used to populate a field and can point to any attribute on the serialized instance. Also note that we're using ReadOnlyField which is always read-only; it can not be used for updating model instances when they are serialized. We could have also used CharField(read_only=True) here to accomplish the same thing.
Adding Required Permissions To Views
Now that code snippets are associated with users, we want to make sure that only authenticated users are able to create, update, and delete code snippets.
Django Rest Framework ships with a number of permission classes we could use to restrict access to a given view. Here we will use IsAuthenticatedOrReadOnly to ensure that authenticated requests have read-write access and unauthenticated requests only have read-only access.
# snippets/views.py
from django.contrib.auth.models import User
from rest_framework import generics, permissions # new

from .models import Snippet
from .serializers import SnippetSerializer, UserSerializer


class SnippetList(generics.ListCreateAPIView):
    queryset = Snippet.objects.all()
    serializer_class = SnippetSerializer
    permission_classes = (permissions.IsAuthenticatedOrReadOnly,) # new

    def perform_create(self, serializer):
        serializer.save(owner=self.request.user)


class SnippetDetail(generics.RetrieveUpdateDestroyAPIView):
    queryset = Snippet.objects.all()
    serializer_class = SnippetSerializer
    permission_classes = (permissions.IsAuthenticatedOrReadOnly,) # new

...
Adding Log In To The Browsable API
Now navigate to our browsable API at http://127.0.0.1:8000/snippets/.

Since we are logged out, notice that you are no longer able to create new code snippets. In order to do so you need to be logged in as a user.
We can add a login view to the browsable API by editing the URLconf in our project-level tutorial/urls.py file. Add rest_framework.urls to the route api-auth/.
# tutorial/urls.py
from django.contrib import admin
from django.urls import include, path

urlpatterns = [
    path('admin/', admin.site.urls),
    path('api-auth/', include('rest_framework.urls')), # new
    path('', include('snippets.urls')),
]
Note that the actual route used does not matter. Instead of api-auth/ we could also have used something-else/. The important thing is that rest_framework.urls was included.
Now open up the browser again and refresh the page. You will see a Log in link in the top right of the page.

Log in with your testuser account. Then navigate to our http://127.0.0.1:8000/users/ endpoint and notice that snipped ids are associated with each user, as desired.

We only have one snippet, made with our testuser account and containing the primary id of 1. If we added additional snippets for each user, they'd appear here as well. So things are working.
Object Level Permissions
Really what we'd like is for all code snippets to be visible to anyone, but only the user that created a code snippet can update or delete it.
Django Rest Framework gives us several options for setting permissions: at a project-level, view level, or object level. In this case we will implement the last option and create a custom permission we can add to our SnippetDetail view class.
Create a new permissions.py file.
(drf) $ touch snippets/permissions.py
Then add the following code which extends Django Rest Framework's existing permissions classes.
# snippets/permissions.py
from rest_framework import permissions


class IsOwnerOrReadOnly(permissions.BasePermission):
    """
    Custom permission to only allow owners of an object to edit it.
    """

    def has_object_permission(self, request, view, obj):
        # Read permissions are allowed to any request,
        # so we'll always allow GET, HEAD or OPTIONS requests.
        if request.method in permissions.SAFE_METHODS:
            return True

        # Write permissions are only allowed to the owner of the snippet.
        return obj.owner == request.user
Next add the new custom permission to SnippetDetail by importing it at the top and including it in permission_classes.
# snippets/views.py
from django.contrib.auth.models import User
from rest_framework import generics, permissions

from .models import Snippet
from .permissions import IsOwnerOrReadOnly # new
from .serializers import SnippetSerializer, UserSerializer

class SnippetDetail(generics.RetrieveUpdateDestroyAPIView):
    queryset = Snippet.objects.all()
    serializer_class = SnippetSerializer
    permission_classes = (permissions.IsAuthenticatedOrReadOnly,
                          IsOwnerOrReadOnly,) # new

...
If you open the browser again to http://127.0.0.1:8000/snippets/1/ you will find that the 'DELETE' and 'PUT' actions appear on the snippet instance endpoint because we're logged in as testuser, the owner of the snippet.

Now log out and log in with the admin account. The DELETE and PUT options are not available. Good, as expected.

Root API Endpoint
Currently there are endpoints for snippets and users, but we don't have a single entry point to our API. To create one, we'll use a regular function-based view and Django REST Framework's built-in @api_view decorator.
In snippets/views.py import api_view, Response, and reverse. Then use @api_view to set a GET for api_root.
# snippets/views.py
from django.contrib.auth.models import User
from rest_framework import generics, permissions
from rest_framework.decorators import api_view # new
from rest_framework.response import Response # new
from rest_framework.reverse import reverse # new

from .models import Snippet
from .permissions import IsOwnerOrReadOnly
from .serializers import SnippetSerializer, UserSerializer


@api_view(['GET']) # new
def api_root(request, format=None):
    return Response({
        'users': reverse('user-list', request=request, format=format),
        'snippets': reverse('snippet-list', request=request, format=format)
    })

...
Next we need to add a URL at the empty string '' for api_root. And since we're using reverse we also must add named urls to each existing view.
# snippets/urls.py
from django.urls import path
from rest_framework.urlpatterns import format_suffix_patterns
from snippets import views

urlpatterns = [
    path('snippets/', views.SnippetList.as_view(), name='snippet-list'),
    path('snippets/<int:pk>/', views.SnippetDetail.as_view(), name='snippet-detail'),
    path('users/', views.UserList.as_view(), name='user-list'),
    path('users/<int:pk>/', views.UserDetail.as_view(), name='user-detail'),
    path('', views.api_root),
]

urlpatterns = format_suffix_patterns(urlpatterns)
Now navigate to http://127.0.0.1:8000/ to see our new API Root page.

It lists both users and snippets as well as their respective API endpoints which can be clicked on.
Highlighted Snippets Endpoint
The other obvious thing that's still missing from our pastebin API is the code highlighting endpoints.
Unlike all our other API endpoints, we don't want to use JSON, but instead just present an HTML representation. REST framework has two HTML renderers: one for dealing with HTML rendered using templates and one for pre-rendered HTML (which is our case here).
Also, there's no existing generic view that will work so we'll need to create our own .get() method.
In your snippets/views.py import renderers at the top and then create a new class for SnippetHighlight.
# snippets/views.py
from django.contrib.auth.models import User
from rest_framework import generics, permissions, renderers # new
from rest_framework.decorators import api_view
from rest_framework.response import Response
from rest_framework.reverse import reverse

from .models import Snippet
from .permissions import IsOwnerOrReadOnly
from .serializers import SnippetSerializer, UserSerializer

class SnippetHighlight(generics.GenericAPIView): # new
    queryset = Snippet.objects.all()
    renderer_classes = (renderers.StaticHTMLRenderer,)

    def get(self, request, *args, **kwargs):
        snippet = self.get_object()
        return Response(snippet.highlighted)

...
Add the new view to the urls file. Make sure to include the name snippet-highlight!
# snippets/urls.py
from django.urls import path
from rest_framework.urlpatterns import format_suffix_patterns
from snippets import views

urlpatterns = [
    path('snippets/', views.SnippetList.as_view(), name='snippet-list'),
    path('snippets/<int:pk>/', views.SnippetDetail.as_view(), name='snippet-detail'),
    path('snippets/<int:pk>/highlight/',
         views.SnippetHighlight.as_view(), name='snippet-highlight'), # new
    path('users/', views.UserList.as_view(), name='user-list'),
    path('users/<int:pk>/', views.UserDetail.as_view(), name='user-detail'),
    path('', views.api_root),
]

urlpatterns = format_suffix_patterns(urlpatterns)
We only have one snippet in our database so the highlight will be located at http://127.0.0.1:8000/snippets/1/highlight/.

Hyperlinking our API
One of the more challenging aspects of web API design is dealing with the relationships between entities. We could use primary key, hyperlinks, slugs, strings, nesting, or a custom representation.
REST framework supports all of these styles but here we'll use a hyperlinked style between entities. In order to do so, we'll modify our serializers to extend HyperlinkedModelSerializer instead of the existing ModelSerializer.
The HyperlinkedModelSerializer has the following differences from ModelSerializer:
- It does not include the
idfield by default. - It includes a
urlfield, usingHyperlinkedIdentityField. - Relationships use
HyperlinkedRelatedField, instead ofPrimaryKeyRelatedField.
Let's rewrite our existing serializers to use hyperlinks.
# snippets/serializers.py
from django.contrib.auth.models import User
from rest_framework import serializers
from snippets.models import Snippet, LANGUAGE_CHOICES, STYLE_CHOICES


class SnippetSerializer(serializers.HyperlinkedModelSerializer): # new
    owner = serializers.ReadOnlyField(source='owner.username')
    highlight = serializers.HyperlinkedIdentityField( # new
        view_name='snippet-highlight', format='html')

    class Meta:
        model = Snippet
        fields = ('url', 'id', 'highlight', 'title', 'code', 'linenos',
                  'language', 'style', 'owner',) # new


class UserSerializer(serializers.HyperlinkedModelSerializer): # new
    snippets = serializers.HyperlinkedRelatedField( # new
        many=True, view_name='snippet-detail', read_only=True)

    class Meta:
        model = User
        fields = ('url', 'id', 'username', 'snippets') # new
Aside from swapping in HyperlinkedModelSerializer there is a new highlight field for snippets that points to the snippet-highlight url pattern, instead of the snippet-detail url pattern.
Also for the fields we add url to both and highlight to the snippet serializer.

Pagination
Currently we only have the one code snippet but as others are added it makes sense to limit the number of snippets displayed per API endpoint. Let's paginate the results so that API clients can step through each of the individual pages.
REST Framework ships with a number of default settings which can be easily customized. We'll set a DEFAULT_PAGINATION_CLASS and PAGE_SIZE to 10 although we could easily customize things further as desired.
At the bottom of the tutorial/settings.py file add the following:
# tutorial/settings.py
REST_FRAMEWORK = {
    'DEFAULT_PAGINATION_CLASS': 'rest_framework.pagination.PageNumberPagination',
    'PAGE_SIZE': 10
}
At this point it's possible to click around the entire API just via links. Success!
Viewsets and Routers
Section 6 of the official tutorial has us switch over from views and URLs to viewsets and routers. This is an optional choice that is, in my opinion, better suited to larger API projects and for developers already comfortable with REST framework. Since neither applies here we will not update our code. The resulting API endpoints will still be exactly the same!
Conclusion
With an incredibly small amount of code, we've now got a complete pastebin Web API, which is fully web browsable, includes a schema-driven client library, and comes complete with authentication, per-object permissions, and multiple renderer formats.
We've walked through each step of the design process, and seen how if we need to customize anything we can gradually work our way down to simply using regular Django views.
You can review the final tutorial code on Github.
And if you'd like to learn even more about APIs in Django, check out my book Django for APIs.

Top comments (2)
Hi can I create a custom user model in django-rest so that I doesn't requires password to do so?
This is how to do a custom user model: learndjango.com/tutorials/django-c...
If you use django-allauth you can use only email if desired. Here's more on that: learndjango.com/tutorials/django-a...
Also take a look DjangoX which is a starter project with email-only auth: github.com/wsvincent/djangox