
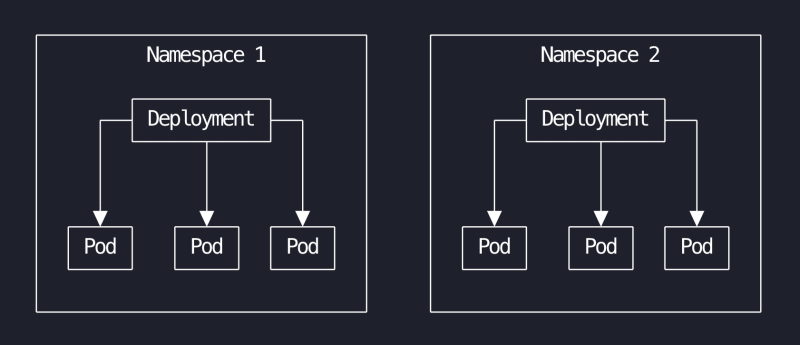
So far on our journey into the world of Kubernetes we have created resources in our cluster without knowing anything about Namespaces. What is a Namespace? The short answer is that it is a logical compartment in our Kubernetes cluster where we can deploy our Kubernetes objects. In the following illustration we have two Namespaces, Namespace 1 and Namespace 2, each containing a Deployment with three Pods.
You could think about Namespaces like cubicles in an office. Each cubicle contains its own desk and computer. The inhabitants of each cubicle can still see and interact with inhabitants of other cubicles, but each desk and computer stays within its own cubicle boundary. It is not a perfect analogy, but it is the one I went with right here and now!
We will explore the topic of Namespaces a bit closer in the following sections.
Namespaces
Most resources are scoped to a Namespace. The default Namespace is named default. When we create resources, such as Pods, Deployments, Services, they are placed into the default Namespace unless we explicitly specify a different Namespace. We can create Namespaces using kubectl like any other resource. In the following sections we will explore how this is done using an imperative approach as well as a declarative approach.
Imperatively working with Namespaces
Before we create a new Namespace, let's see what Namespaces are available in our cluster. We can list existing Namespaces with kubectl get:
$ kubectl get namespaces

NAME              STATUS   AGE
default           Active   7d
kube-node-lease   Active   7d
kube-public       Active   7d
kube-system       Active   7d
Apparently I have four existing Namespaces in my cluster. The number of Namespaces you see in this list could vary depending on what type of Kubernetes Cluster you are using. In my case I use a local Minikube cluster that has been running for a week. Namespaces with names starting with kube- are generally for internal use by Kubernetes, so you should avoid placing your own resources into these Namespaces.
As usual we could shorten the previous command a bit by using the short form of namespaces which is ns, so the previous command can be written as kubectl get ns.
Time for a brief kubectl intermission: Is there a way to list all available short names for objects, such as ns for namespaces and po for pods? Yes there is! Run the kubectl api-resources command:
$ kubectl api-resources

NAME                              SHORTNAMES   APIVERSION                             NAMESPACED   KIND
configmaps                        cm           v1                                     true         ConfigMap
namespaces                        ns           v1                                     false        Namespace
nodes                             no           v1                                     false        Node
persistentvolumeclaims            pvc          v1                                     true         PersistentVolumeClaim
persistentvolumes                 pv           v1                                     false        PersistentVolume
pods                              po           v1                                     true         Pod
secrets                                        v1                                     true         Secret
serviceaccounts                   sa           v1                                     true         ServiceAccount
services                          svc          v1                                     true         Service
daemonsets                        ds           apps/v1                                true         DaemonSet
deployments                       deploy       apps/v1                                true         Deployment
replicasets                       rs           apps/v1                                true         ReplicaSet
statefulsets                      sts          apps/v1                                true         StatefulSet
horizontalpodautoscalers          hpa          autoscaling/v2                         true         HorizontalPodAutoscaler
cronjobs                          cj           batch/v1                               true         CronJob
jobs                                           batch/v1                               true         Job
ingresses                         ing          networking.k8s.io/v1                   true         Ingress
roles                                          rbac.authorization.k8s.io/v1           true         Role
I have removed some of the output rows because there were a lot of them. We can see that there is a column named SHORTNAMES that shows what the short form for a given resource type is. We can also see that some resources (e.g. secrets and jobs) do not have a short form. Another interesting output from this command is the column named NAMESPACED. This column indicates whether the resource is scoped to a Namespace or not. Many resources are scoped to a Namespace, but a few are not, most obviously the Namespace resource itself.
It should be noted that the output from kubectl api-resources shows what resource types are available in the current cluster. The output could be different for two different clusters, depending on what resource types are available.
Now it is time to create our first Namespace. The imperative way to create a Namespace is to run kubectl create:
$ kubectl create namespace custom-namespace

namespace/custom-namespace created
If we list all our Namespaces again we can see that our new Namespace named custom-namespace was indeed created:
$ kubectl get namespaces

NAME               STATUS   AGE
custom-namespace   Active   57s
default            Active   7d
kube-node-lease    Active   7d
kube-public        Active   7d
kube-system        Active   7d
We can get more details about a specific Namespace with kubectl describe:
$ kubectl describe namespace custom-namespace

Name:         custom-namespace
Labels:       kubernetes.io/metadata.name=custom-namespace
Annotations:  <none>
Status:       Active

No resource quota.

No LimitRange resource.
The output hints that we could apply resource quotas and LimitRanges to a Namespace. Both of those control resources (CPU, memory) that can be allocated and consumed by resources in the Namespace. We won't go into those details in this article, but we might revisit it in a future article.
We can delete a Namespace using kubectl delete:
$ kubectl delete namespace custom-namespace

namespace "custom-namespace" deleted
What happens if we delete a Namespace that contains resources? All of those resources will be deleted as well.
Declaratively creating a Namespace
A Namespace is just a resource in Kubernetes like any other resource we have seen so far1, so of course we can write a Kubernetes manifest for our Namespace:
# namespace.yaml
apiVersion: v1
kind: Namespace
metadata:
  name: custom-namespace
Short and simple! As usual we can apply this manifest with kubectl apply:
$ kubectl apply -f namespace.yaml

namespace/custom-namespace created
And we can delete the Namespace again using kubectl delete:
$ kubectl delete -f namespace.yaml

namespace "custom-namespace" deleted
Creating resources in a custom Namespace
How do we use our Namespace for our other resources? How can we run kubectl get, kubectl describe, kubectl apply and other kubectl commands in our custom Namespace? This is where the --namespace or -n flag comes in handy. We'll see some examples of how it is used in this section.
To demonstrate how to create a Deployment in a custom Namespace we will use the following Deployment manifest:
# deployment.yaml
apiVersion: apps/v1
kind: Deployment
metadata:
  name: nginx-deployment
  labels:
    app: nginx
spec:
  replicas: 3
  selector:
    matchLabels:
      app: nginx
  template:
    metadata:
      labels:
        app: nginx
    spec:
      containers:
        - name: nginx
          image: nginx:latest
          ports:
            - containerPort: 80
First I create a new Namespace with kubectl create:
$ kubectl create namespace web

namespace/web created
Then I run kubectl apply to create my Deployment in this Namespace, and I remember to add the -n flag:
$ kubectl apply -n web -f deployment.yaml

deployment.apps/nginx-deployment created
If I want to list Deployments in this Namespace I likewise add the -n flag to the kubectl get command:
$ kubectl get deployments -n web

NAME               READY   UP-TO-DATE   AVAILABLE   AGE
nginx-deployment   3/3     3            3           60s
To demonstrate what happens if I delete the Namespace that contains resources I will do just that:
$ kubectl delete namespace web

namespace "web" deleted

$ kubectl get deployments -n web

No resources found in web namespace.
As a last example in this section, let's see if we can create our Namespace along with our Deployment using what we saw in the previous article. Let us first create a composite manifest file for our Namespace and our Deployment2:
# application.yaml
---
apiVersion: v1
kind: Namespace
metadata:
  name: web
---
apiVersion: apps/v1
kind: Deployment
metadata:
  name: nginx-deployment
  namespace: web # <--- added this
  labels:
    app: nginx
spec:
  replicas: 3
  selector:
    matchLabels:
      app: nginx
  template:
    metadata:
      labels:
        app: nginx
    spec:
      containers:
        - name: nginx
          image: nginx:latest
          ports:
            - containerPort: 80
Note how I have added .metadata.namespace to my Deployment manifest. This is important because otherwise it will be deployed to the default Namespace.
We create both resources using kubectl apply:
$ kubectl apply -f application.yaml

namespace/web created
deployment.apps/nginx-deployment created
It worked! Now we are starting to see how we can define everything we need as one cohesive package of YAML files. We are building up to eventually packaging our application using a tool such as Helm3.
Listing resources for all Namespaces
What if we have hundreds of Namespaces and we wish to view all Pods in all of these Namespaces in one giant list? To do that you can add the --all-namespaces or -A flag. An example of this is shown below:
$ kubectl get pods -A

NAMESPACE     NAME                                READY   STATUS    RESTARTS     AGE
default       nginx-deployment-6fdcdfb74d-hjp7m   1/1     Running   2 (9h ago)   33h
default       nginx-deployment-6fdcdfb74d-lm6z6   1/1     Running   2 (9h ago)   33h
default       nginx-deployment-6fdcdfb74d-s77pg   1/1     Running   2 (9h ago)   33h
kube-system   coredns-565d847f94-nllvw            1/1     Running   4 (9h ago)   7d6h
kube-system   etcd-minikube                       1/1     Running   5 (9h ago)   7d6h
kube-system   kube-apiserver-minikube             1/1     Running   5 (9h ago)   7d6h
kube-system   kube-controller-manager-minikube    1/1     Running   5 (9h ago)   7d6h
kube-system   kube-proxy-2jcqr                    1/1     Running   4 (9h ago)   7d6h
kube-system   kube-scheduler-minikube             1/1     Running   5 (9h ago)   7d6h
kube-system   storage-provisioner                 1/1     Running   8 (9h ago)   7d6h
The output shows a mix of my own Pods (in the default Namespace) and a few system Pods (in the kube-system Namespace).
Summary
We now know what a Namespace is, and we know how to work with our Namespaces using kubectl. Namespaces are very useful when there are many applications that will run in the same cluster. There are additional things we can do with Namespaces that we have not seen in this article, including restricting network traffic between Namespaces and applying resource quotas to a Namespace. But what we have seen in this article is enough to get us far!
In the next article we will take a look at ConfigMaps and Secrets. These resources can be used to provide configuration (e.g. environment variables) and secret values to Pods.
-
In previous articles I classified Deployments/ReplicaSets/Jobs/etc as workload resources, and I classified a Service as a network resource. How should we classify a Namespace? In the official documentation a Namespace is listed under cluster resources. See https://kubernetes.io/docs/reference/kubernetes-api/cluster-resources/namespace-v1/ for the API-reference for Namespaces. ↩
-
In case you missed it, in the previous article I showed that we could add all our manifests in a single file as long as we separate each manifest by a line containing three dashes (
---). ↩ -
Helm is a package manager for Kubernetes applications. In Helm you package your application in the form of a Helm Chart, that consists of templated versions of your Kubernetes manifests. We will see Helm in future articles, but for now you can check out the official Helm page at https://helm.sh/. ↩

Top comments (0)