
Did you know you can use Google Sheets as a database? Well, you can use this service practically as if it were a headless CMS (with some limitations) through the API offered by Google. If you need to make a static page with dynamic content in a simple way, without complex implementations and with a low consumption of resources, I believe that Google Sheets, along with Gatsby, should be an alternative to consider. In this post I will show you how to build a gallery of products with these two technologies, and eventually use the Netlify service as hosting and CD service (Continuous Deployment).
Knowing the protagonists
- Gatsby.js: Gatsby is a free and open source framework based on React that helps developers build static websites. In addition, is a JAMstack technology, a modern web development architecture based on client-side JavaScript, reusable APIs, and prebuilt Markup.
- Google Sheets: Free browser-based Google service for creating spreadsheets.
- Netlify: Netlify offers serverless hosting and backend services for static websites, among other things.
Building our gallery
In this small project, we will build a simple product gallery with Gatsby, using a Google Sheets spreadsheet as a database. Finally, we will use the Netlify service to build and deploy our application in a simple and fast way. 👌
As you already know, Gatsby.js builds your site as "static" files (html, css and js), this means that our application will only query our spreadsheet in the build process, and not every time a new user enters the page. Wait... what?
This image will help you understand it better:

As JAMstack architecture, we can find advantages and disadvantages, the main advantages are obviously the loading speed and low consumption of resources on our server, as we simply return to the user static files previously generated, while avoiding multiple calls to the database. On the other hand, we will lose some dynamism, as our website will not reflect the status of our database immediately, but we must previously make a new build to re-generate our static files.
You'll need to analyze your project and the nature of your data beforehand to see if Gatsby is the best solution.
Having clarified this, let's start!
🗂️ Create your Spreadsheet
First of all, we must create our spreadsheet:
1- Log in to Google Drive with your Google Account
2- Click on "New", and add a new spreadsheet
3- Depending on the information you want to store, create the appropriate columns.
4- Add a new row for each element you want to store.
5- Click on the "Share" button, and save the id of your spreadsheet. You will find this id in the url that will be generated to share your project: https://docs.google.com/spreadsheets/d/id. This id will be used later to connect from Gatsby.
This is an example of my spreadsheet:

👨🏻💻 Create your project with Gatsby
We already have our spreadsheet, it's time to create our project.
1- Install the Gatsby CLI
$ npm install -g gatsby-cli
2- Create a new project.
$ gatsby new my-gallery
3- Change directories into site folder.
$ cd my-gallery
4- Start development server (localhost:8000). By the way, Gatsby has hot-reloading.
$ gatsby develop
🔑 Get your Google Drive API Key
To be able to query our spreadsheet, we must first get a Google Drive API Key. It's quite simple, just follow these steps:
1- Go to the Google Cloud Platform
2- Create a new project.
3- Click “Enable API”. Search for and enable the “Google Drive API”.
4- Create credentials for a “Web Server” to access application data.
5- Name the service account and grant it a project role of “Editor”.
6- Download the JSON file and rename it to client_secret.json.
7- Create a new /credentials directory into your Gatsby project and move inside the JSON file.
⚙️ Configure your project
Once our API Key is obtained, we will have to configure our project so that it can run it.
Install the gatsby-source-google-sheets package
$ npm install gatsby-source-google-sheets
Once installed, open the file gatsby-config.js and add the following information for its correct configuration:
// gatsby-config.js
// ...
{
    resolve: "gatsby-source-google-sheets",
    options: {
        spreadsheetId: "we got this id in the first step",
        worksheetTitle: "worksheet tab name",
        credentials: require("./credentials/client_secret.json")
    }
},
// ...
🔍 Make your query
Congratulations! If you have reached this point it means we are now ready to make our query 🥳.
Before we continue, you should know that Gatsby uses GraphQL for data management, it is a very interesting query and data manipulation language that has reached some popularity in recent years, if you wish, you can learn a little more about data management in Gatsby in this link: Data in Gatsby
By much simplification, this would be our index.js
// index.js
import React from "react";
import { graphql } from "gatsby";
import { get } from "lodash"; // Optional

// Item Component
const Item = ({title, imageSrc}) => (
  <div>
    <h1>{title}</h1>
    <img src={imageSrc} alt={title} />
  </div>
)

// Index Page Component
const IndexPage = ({ data }) => {
  const nodes = get(data, "allGoogleSheetProjectsRow.edges", [])

  return (<div>{nodes.map(node => <Item key={node.id} {...node} />)}</div>)
}


export default IndexPage;

// GraphQL query to our spreadsheet
export const query = graphql`
  query {
    allGoogleSheetProjectsRow {
      edges {
        node {
          id
          title
          imageSrc
        }
      }
    }
  }
`;
If everything went well, you should be looking at the product listing at localhost:8000. The style is now up to you 😊
🚀 Build & Deploy with Netlify
In my opinion, Netlify is a great platform, not only will it serve us as hosting, but it will also serve us as a CD tool (Continuous Deployment).
1- Create a new repository in Github, Gitlab or Bitbucket and push your code.
2- Create a new Netlify user account. It's free.
3- Log in to your account, and click on the "New site from Git" button.
4- Follow the steps of the form:
- Connect your Git provider
- Select your repository and branch
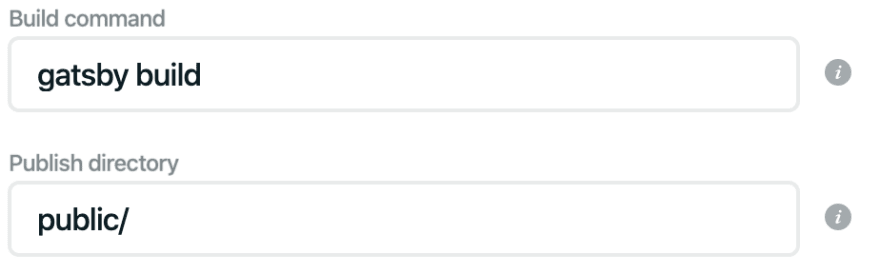
- Verify that the command to make the build and the public folder are correct:
 5- Click on the "Deploy" button, and that's it! 🚀
So... what next?
Once this is done, Netlify will proceed with the build and deploy of the application (it may take a few minutes). The process may be summarized in the following steps:
1- Netlify will pull your project.
2- Run $ gatsby build to build the application. This is where the query is made and the static files are generated.
3- The generated static files are stored in the /public folder.
4- A deploy of the /public folder is made on the Netlify hosting.
Simple, isn't it?
Keep learning!
I hope you enjoyed this article!
If you want to learn more about Gatsby, React or GraphQL and keep up to date with the latest trends, I recommend you take a look at my last project, CodeTalks TV, a video platform for developers that brings together the best dev talks given around the world.
React Talks
JAMstack Talks
GraphQL Talks


Top comments (5)
Hi Miguel, very clear and interesting tutorial, I have a question, I get this error message:
======================================================
ERROR #11321 PLUGIN
"gatsby-source-google-sheets" threw an error while running the sourceNodes lifecycle:
value must be an array of bytes
======================================================
The data is not available so I google for an answer but I didn't get any specific information about the plugin error or issue.
Do you, or any one in the community have any clue about this error...?
My setup is the same as the tutorial.
Regards!
** UPDATE ** - Fixed
Turns out that the value of cell A1 in my case was 'id". When I change that to something else like "sup",
It worked!
I get this exact error as well.
In my case, I can confirm that the proper worksheet was opened and at the time of the error, the function is looking at the data in Cell A1 and it reading it correctly
console.log({r}).The problem occurs while trying to make the call to
createNodeusing the contents ofrPerhaps, Miguel you will have some time to rerun your code and confirm it still works for you?
Great article.
I have two questions.
Very interesting post. A very easy way to get your dynamic content into your webpage.
Thanks for sharing.
Nice post. You should make a post about creating pages with gatsby and google sheets API.