Animation is a design tool we can use to lend physicality and tangibility to our abstract digital creations by making them feel more familiar and friendly. A lot of components library take full advantage of animations to make their components more relatable to audiences. The good news is, as an Angular developer, we can have great components almost out of the box. The bad news is, that we almost solely rely on those libraries to do the animations. To the point where the Angular animation API is one of the most, if not the most underused Angular API.
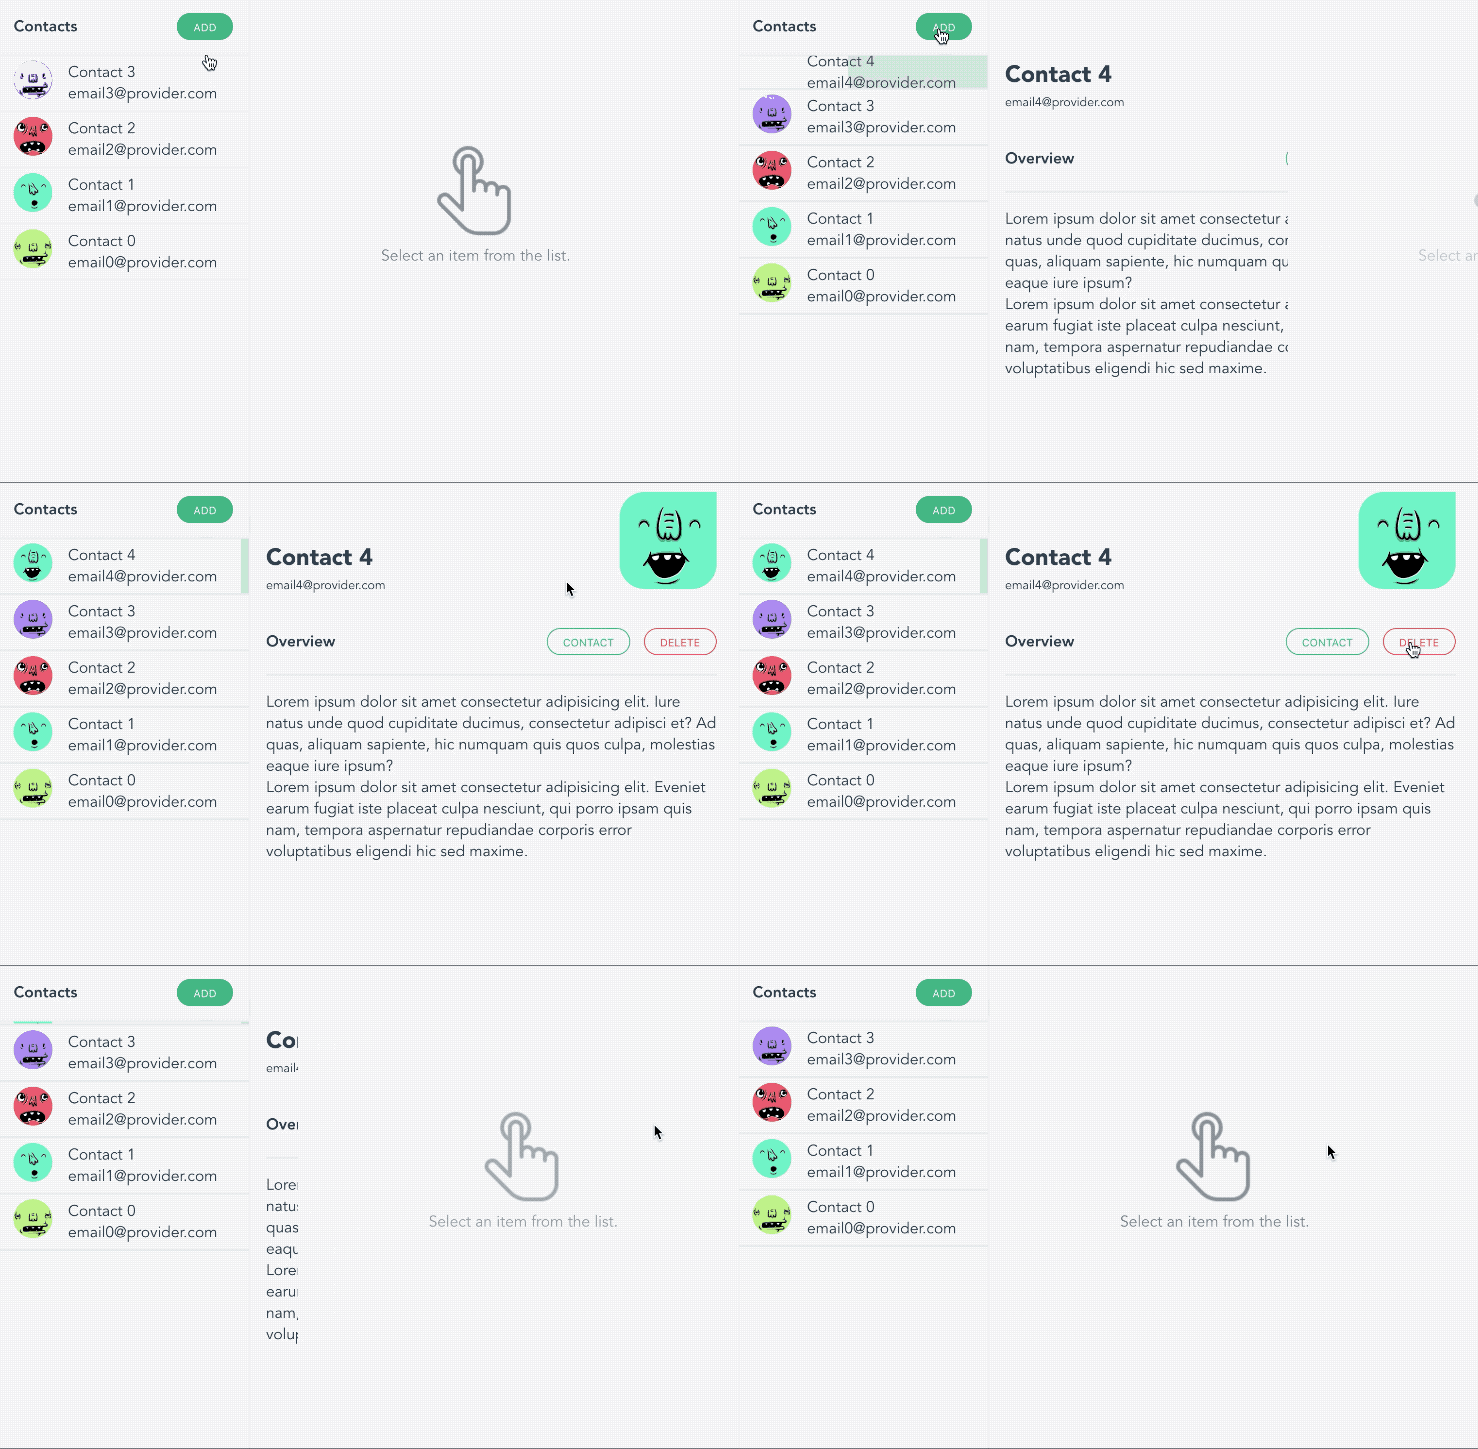
To change that, I'll try my best, in this post, to show you all you need to know about Angular animations to get you started. To do that, we will build together this awesome component:
As they say, practice makes perfect, so if you feel like it, you can follow along by cloning this repository and get rolling (each section of this post represents a git branch of the repository).
Note -> If you are not interested in following along, you could jump right to the section 3, where you will find about the superpowers Angular animation API offers you.
1. Creating the main component 📦
Let's do this. After making sure you have Node, NPM, and the Angular CLI installed on your machine, create a new project and call it "awesomeContacts" or any other clever name you have in mind, then create a "list" component:
ng new awesomeContacts --minimal=true --style=scss --routing=false --skip-install
cd awesomeContacts && yarn # or npm i
# wait for the install to finish, then create the 'list' component
ng g c components/list --spec=false && ng serve -o
Once this is done, remove everything in the AppComponent's template and replaced with our ListComponent (<app-list></app-list>).
One more thing before we jump right to the next section, we have one last thing to do. For the animations to work we need to import the BrowserAnimationModule in our AppModule imports. So you should have something like this:
import { BrowserAnimationsModule } from '@angular/platform-browser/animations';
//...

@NgModule({
  declarations: [AppComponent, ListComponent],
  imports: [BrowserModule, BrowserAnimationsModule],
  providers: [],
  bootstrap: [AppComponent],
})
export class AppModule {}
2. Implementing the list component (without animations for the moment)
Now that we have our application and our list component up and running, let's implement the component quickly.
Since this post is about animation we won't focus much on this implementation.
First, we create an interface of a Contact object, then we create a set of contacts to play with:
interface Contact {
  id: number;
  name: string;
  email: string;
  avatarUrl: string;
}

const CONTACTS_MOCK: Contact[] = new Array(5)
  .fill({})
  .map(
    (c: Contact, i: number) =>
      ({
        id: i,
        name: `Contact ${i}`,
        email: `email${i}@provider.com`,
        avatarUrl: `https://api.adorable.io/avatars/100/${~~(Math.random() * 100)}`,
      } as Contact),
  )
  .reverse(); // * to have them sorted in DESC order
ℹ️ adorable io is a great public API that serves placeholder avatars.
ℹ️ ~~ (two Bitwise NOT operators) is equivalent to Math.floor :)
Once that's done, the implementation for list.component.ts should look something like this:
@Component({
  selector: 'app-list',
  templateUrl: './list.component.html',
  styleUrls: ['./list.component.scss'],
})
export class ListComponent {
  contactList: Contact[] = CONTACTS_MOCK;
  selectedContact: Contact;

  onSelectItem(contact: Contact) {
    // * selecting a contact to focus on
    this.selectedContact = contact ? { ...contact } : null;
  }

  onAddItem() {
    const rndNum = Date.now();
    const newContact: Contact = {
      id: this.contactList.length * rndNum,
      name: `Contact ${this.contactList.length}`,
      email: `email${this.contactList.length}@provider.com`,
      avatarUrl: `https://api.adorable.io/avatars/285/${rndNum}`,
    };
    // * adding a new contact to the list
    this.contactList = [newContact, ...this.contactList];
    // * selecting the newly created contact
    this.onSelectItem(newContact);
  }

  onDeleteItem(contact: Contact) {
    // * removing a contact from the list
    this.contactList = this.contactList.filter(c => c.id != contact.id);
    if (this.selectedContact && this.selectedContact.id == contact.id) {
      // * if the removed contact is beaing focused on, then we remove the focus
      this.onSelectItem(null);
    }
  }
}
The HTML file:
<!-- * side list -->
<aside class="side-list">
  <!-- * side list toolbar -->
  <div class="side-list-toolbar">
    <span class="title">Contacts</span>
    <button class="btn" (click)="onAddItem()">Add</button>
  </div>
  <!-- * side list items-->
  <div class="side-list-items">
    <div
      class="side-list-item"
      *ngFor="let contact of contactList; trackBy: contact?.id"
      [ngClass]="{ 'side-list-item-selected': contact.id == selectedContact?.id }"
      (click)="onSelectItem(contact)"
    >
      <div class="side-list-item-avatar">
        <img [src]="contact.avatarUrl" loading="lazy" alt="profile picture" />
      </div>
      <div class="side-list-item-info">
        <p class="side-list-item-info-name">{{ contact.name }}</p>
        <p class="side-list-item-info-email">{{ contact.email }}</p>
      </div>
    </div>
  </div>
</aside>
<!-- * content wrapper -->
<section class="side-list-content">
  <!-- * content -->
  <div class="side-list-content-data" *ngIf="!!selectedContact">
    <div class="side-list-content-data-inner">
      <div class="side-list-content-data-overview">
        <div class="side-list-content-data-overview-info">
          <h3>{{ selectedContact.name }}</h3>
          <span>{{ selectedContact.email }}</span>
        </div>
        <div class="side-list-content-data-overview-avatar">
          <img [src]="selectedContact.avatarUrl" loading="lazy" alt="profile picture" />
        </div>
      </div>
      <div class="side-list-content-data-separator">
        <h4>Overview</h4>
        <div>
          <button class="btn danger outline" (click)="onDeleteItem(selectedContact)">
            Delete
          </button>
        </div>
      </div>
      <p>Lorem</p>
    </div>
  </div>
  <!-- * empty selection -->
  <div class="side-list-content-empty" *ngIf="!selectedContact">
    <div>
      <img alt="empty-selection" loading="lazy" src="https://img.icons8.com/ios/100/000000/nui2.png" />
      <p>Select an item from the list.</p>
    </div>
  </div>
</section>
Now, let's quickly copy some CSS so our component looks pretty:
Great, we are ready to tackle the animations!
3. Animating 🧙♂️
Animating elements of the list
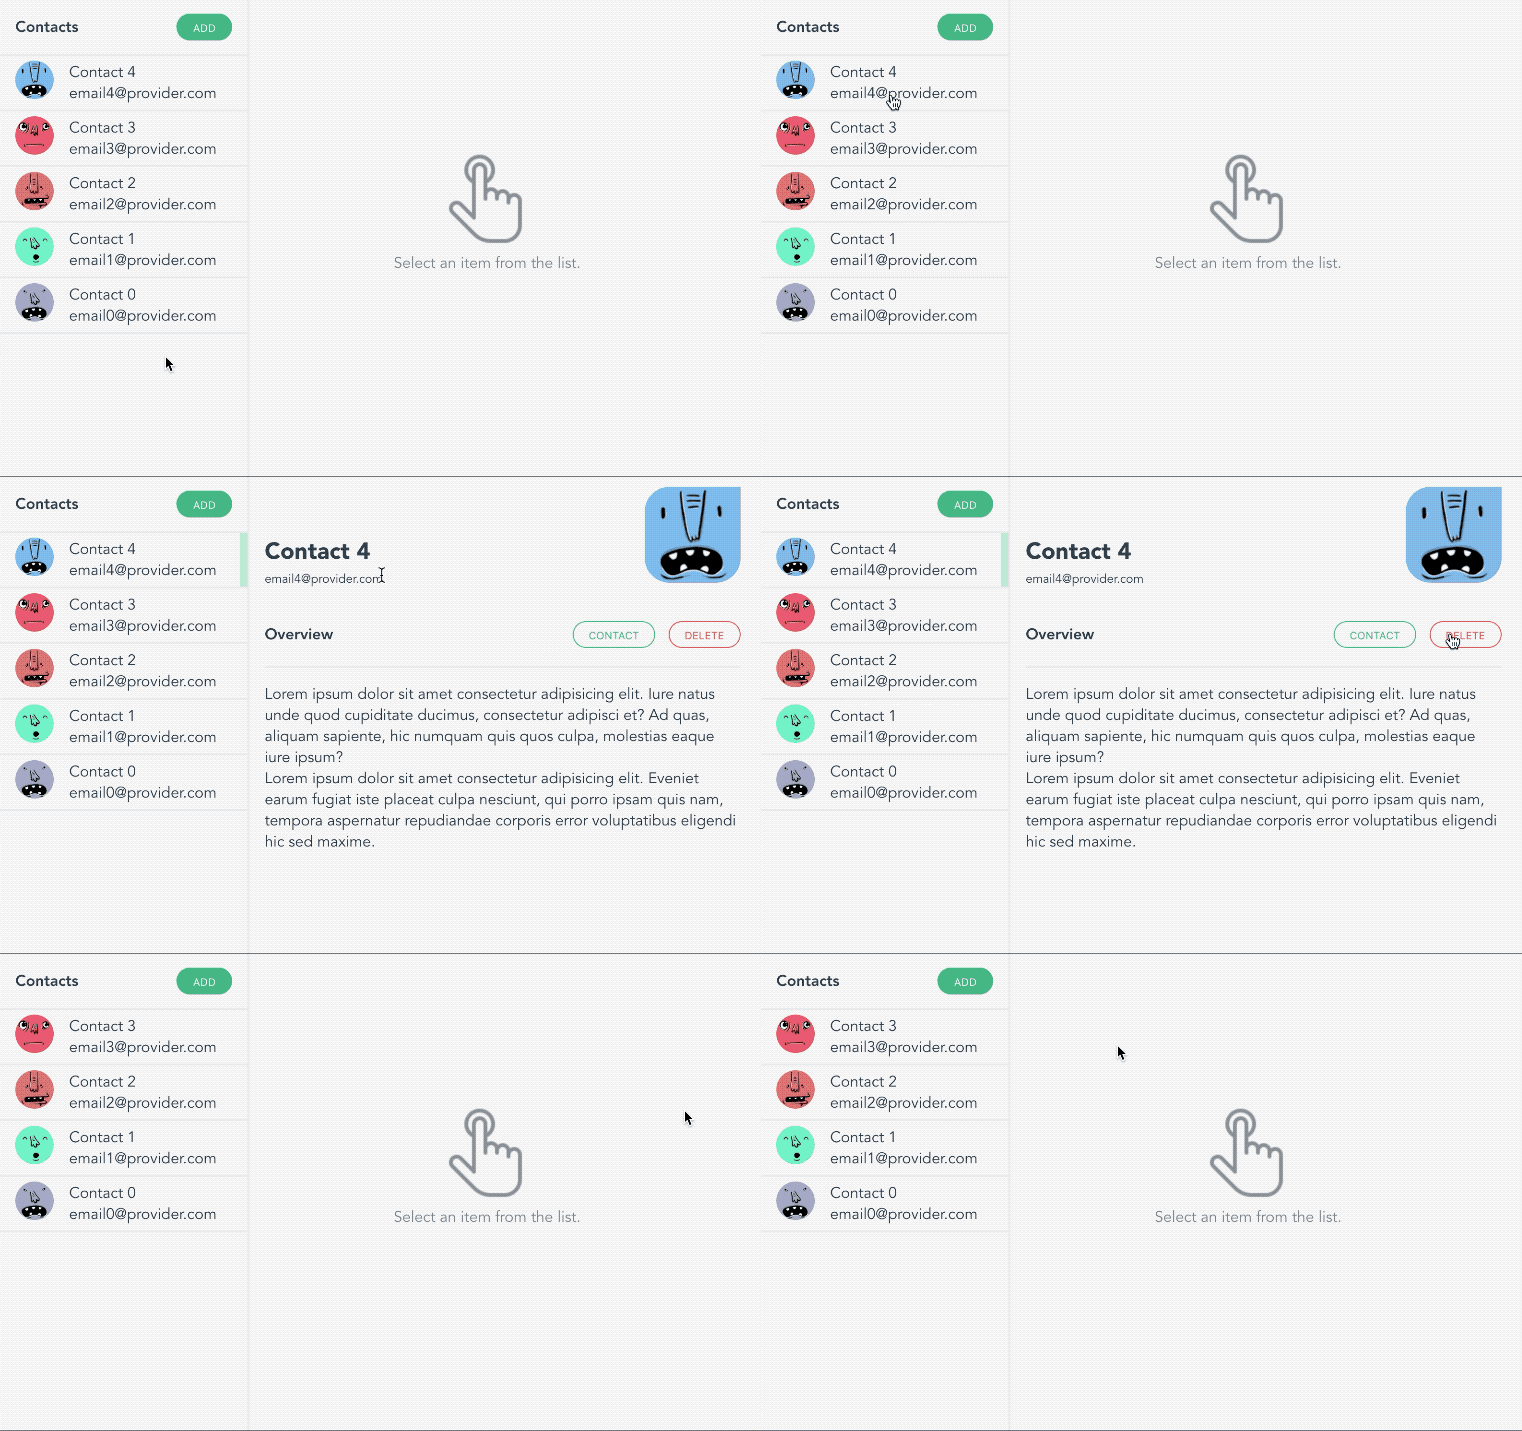
First, we will start by animation the addition and suppression of elements of the list. Right now we have this:
and we want this (focus on the list at the left):
In the component file, we need to import animation functions and add a metadata property called animations: within the @Component() decorator:
import { animate, style, group, query, transition, trigger } from '@angular/animations';

@Component({
  selector: 'app-root',
  templateUrl: 'app.component.html',
  styleUrls: ['app.component.css'],
  animations: [
    // we will implement the animations here
  ]
})
Let's look at the animations APIs we'll use here:
| function | what does it do? |
|---|---|
| trigger() | Kicks off the animation and serves as a container for all other animation function calls. HTML template binds to triggerName. Use the first argument to declare a unique trigger name. |
| transition() | Defines the animation sequence between two named states. Special values :enter and :leave initiate a transition on the entry and exit states |
| style() | Defines one or more CSS styles to use in animations. Controls the visual appearance of HTML elements during animations. |
| animate() | Specifies the timing information for a transition. Optional values for delay and easing. Can contain style() calls within. |
| group() | Specifies a group of animation steps (inner animations) to be run in parallel. Animation continues only after all inner animation steps have completed. |
We will use trigger() to bind our animation to an animation name, we will call it "listItemAnimation". Then we will defines the animation sequence on the addition and suppression with transition(':enter') and transition(':leave'). After that we will define the starting style with style() and finally wi will animate the height with animate().
It should look like this:
animations: [
   trigger('listItemAnimation', [
      transition(':enter', [
        style({ height: '0px', overflow: 'hidden' }),
        group([animate('250ms ease-out', style({ height: '!' }))]),
// although group is useless here (since we have only one animation)
// i like to leave it anyway just in case i want to add another
// parallel animation in the future
      ]),
      transition(':leave', [
        style({ height: '!', overflow: 'hidden' }),
        group([animate('250ms ease-out', style({ height: '0px' }))]),
      ]),
    ]),
]
ℹ️ '!' is a special token used to use auto-styling, where styles are derived from the element being animated and applied to the animation when it starts. In simpler words, it's the state before the animation is applied.
Now that we have our animation implemented, let's bind it to the HTML element. Add @listItemAnimation to the "side-list-item" element:
    <div
      class="side-list-item"
      @listItemAnimation
      ...
    >
...
</div>
It's great we are almost done, and we have our contact list animated 💪!
PS: If you want to disable this animation on the first print, you need to add an empty :enter animation like this trigger('noEnterAnimation', [transition(':enter', [])]) to the parent element (the list element). When you place an :enter animations on a component it will disable all it's children :enter animations, while it is triggered.
Animating the content
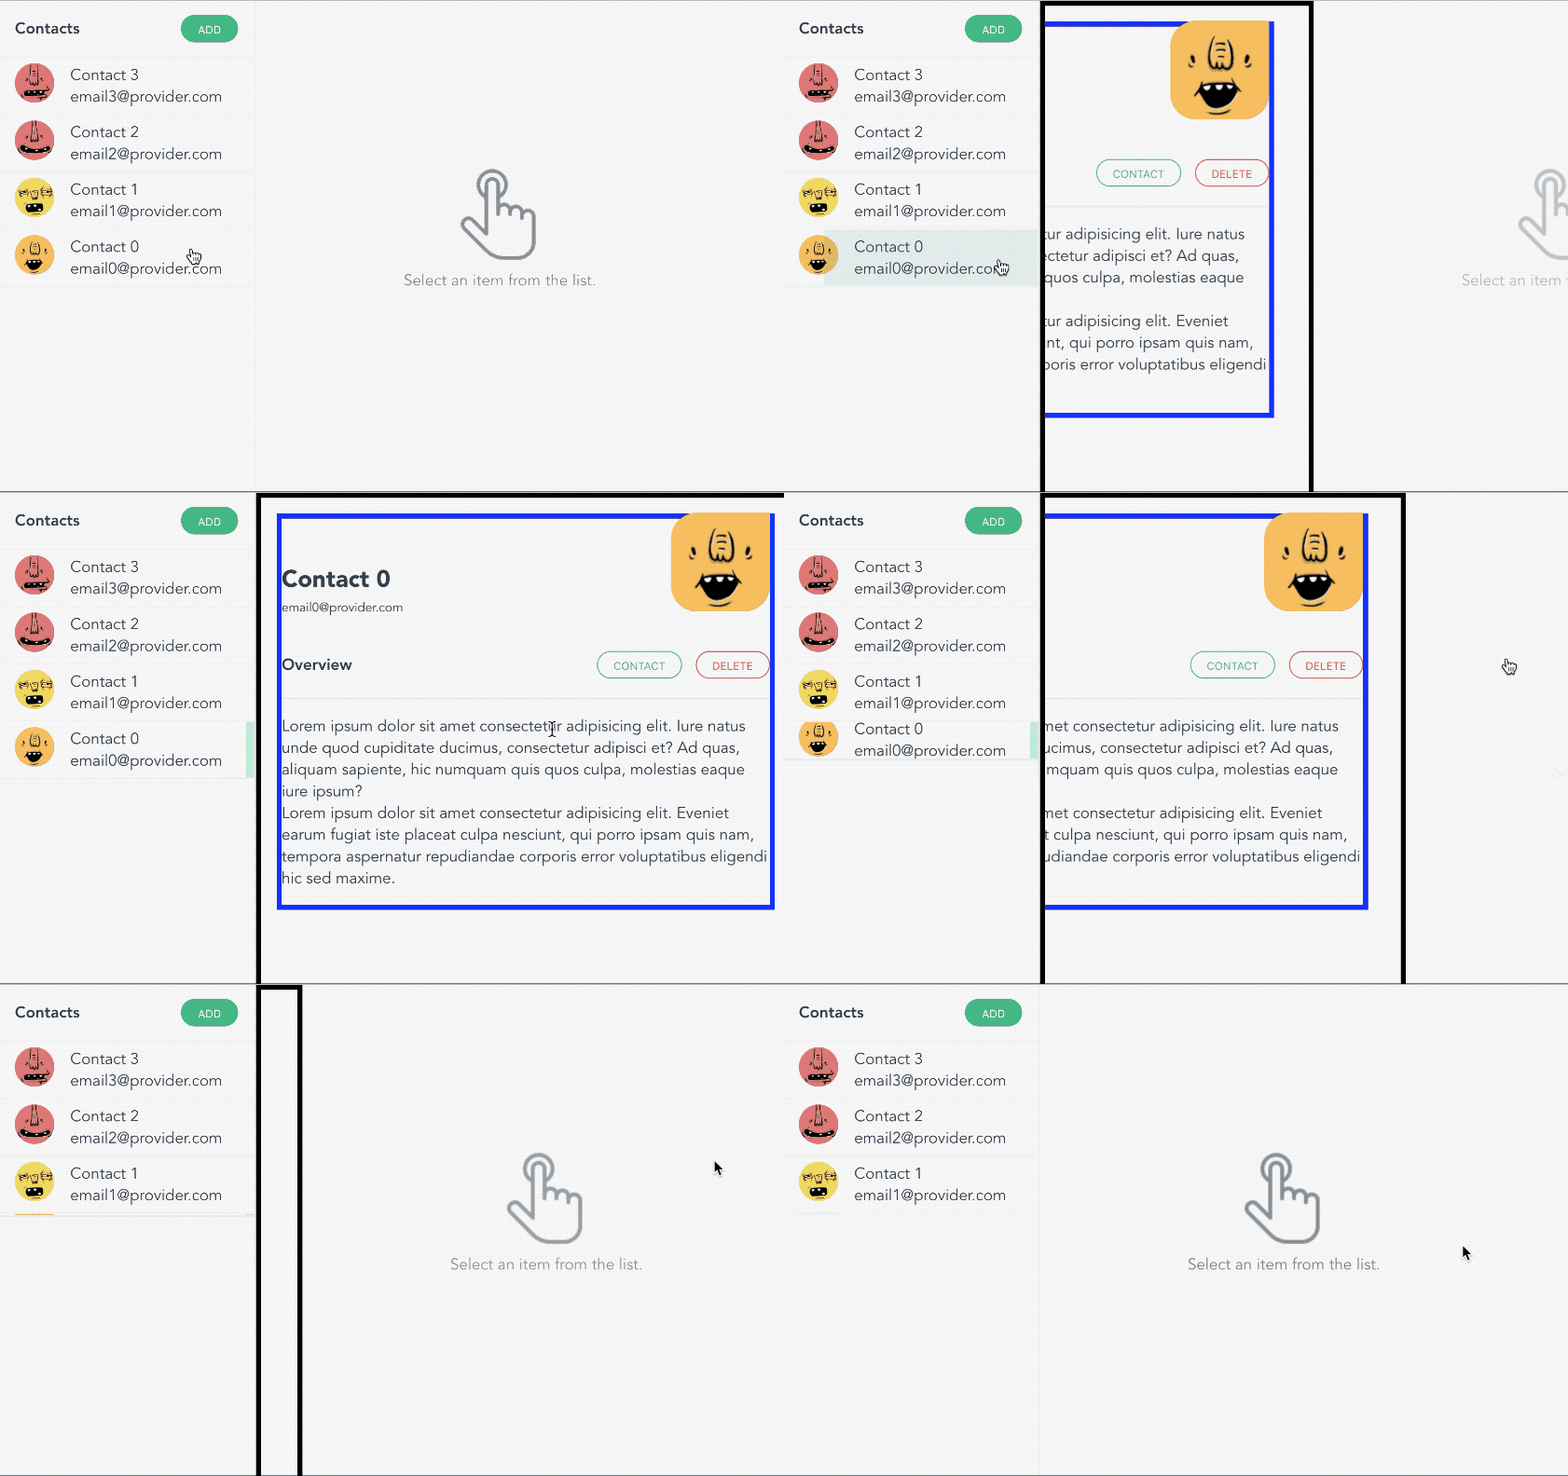
The content animation is a little bit trickier. If we animate the content container from left to right we have two options: either we animate the width or we translate the element. Sadly none of those solutions works. If we manipulate the width we will have this:
The content appears as the width grows, but it doesn't feel right because the content is not sliding from left to right. To fix it, we can try to translate the content from left to right, but look at what happens:
It creates a flash effect (of the empty selection component) because while we are translating the content element, we are not animating its width, so it will go from its current value to 0 in a blink of an eye. The solution then is that we have to translate the content while animating the width.
In the figure below, we have an outer container in black and the inner container in blue:
So we will animate the width of the black container while we are translating the blue one. That should look like this:
To do this, we need to animate the content element (black container: "side-list-content-data") and its child element (blue container: "side-list-content-data-inner"). For that we need to use another angular animation API:
| function | what does it do? |
|---|---|
| query() | Use to find one or more inner HTML elements within the current element. |
With the help of this API the implementation should look like this:
   trigger('sideContentAnimation', [
      transition(':enter', [
        // we set the width of the outer container to 0, and hide the
        // overflow (so the inner container won't be visible)
        style({ width: '0px', overflow: 'hidden' }),
        group([
          // we animate the outer container width to it's original value
          animate('250ms ease-out', style({ width: '!' })),
          // in the same time we translate the inner element all the
          // way from left to right
          query('.side-list-content-data-inner', [
            style({ transform: 'translateX(-110%)' }),
            group([animate('250ms ease-out', style({ transform: 'translateX(-0%)' }))]),
          ]),
        ]),
      ]),
      transition(':leave', [
        style({ overflow: 'hidden' }),
        group([
          animate('250ms ease-out', style({ width: '0' })),
          query('.side-list-content-data-inner', [
            style({ transform: 'translateX(-0%)' }),
            group([animate('250ms ease-out', style({ transform: 'translateX(-110%)' }))]),
          ]),
        ]),
      ]),
    ])
You can find the complete source file here.
The HTML file updated with the sideContentAnimation animation:
  <!-- * content -->
  <div
      class="side-list-content-data"
      *ngIf="!!selectedContact"
      @sideContentAnimation
  >
  ...
  </div>
That's it, we've completed the desired behavior, and we learned how to use Angular animation API to do these pretty complex animations.
Conclusion
To conclude, we learned how to use trigger() to define animations names, then we used transition() to define animations between different states (example :enter and :leave). After that, we used style() to define the style at the beginning of the animation, we used animate() to change that style, and we also saw that we could do multiple animations at the same time with group(). Finally, we used query() to attach an animation to a child element of the one we were animating.
I hope you liked this post, and i'll see you in the next one.
Happy coding!
That's it for this post. I hope you liked it. If you did, please share it with your friends and colleagues. Also you can follow me on twitter at @theAngularGuy as it would greatly help me.
Have a good day !


Top comments (4)
Math.flour undefined, should be
Thanks, I made the change
this does not work
Please have a look at the Github repository and compare with your code to find out what you did wrong.
Some comments have been hidden by the post's author - find out more