
Previously I've written two articles about building desktop applications with Vue framework: one for Vuido library and one for Electron. I've had some comments requesting an article about NW.js and I promised to write one... and here we go! Better late than never 😅
NW.js (previosly known as node-webkit) is a framework for building desktop applications with HTML, CSS, and JavaScript. It's based on Chromium and Node.js. NW.js lets you call Node.js code and modules directly from browser and also use Web technologies in your app. Further, you can easily package a web application to a native application.
⚛️ Differences from Electron
Electron and NW.js share many features: they are both built on top of Chromium and Node.js and use HTML, CSS and JS for building a desktop app. But they also have some notable differences:
- In NW.js the main entry point of an application is a web page or a JS script. You specify this entry via
package.jsonmainproperty. In Electron, the entry point is a JavaScript script. Instead of providing a URL directly, you manually create a browser window and load an HTML file using the API. - On build process NW.js builds all Chromium; Electron uses libchromiumcontent to access Chromium's Content API
- NW.js has built-in support for compiling your source code to protected binaries. Electron is packaging its applications with asar, which contains the applications' unprotected source code.
💻 What are we going to build
Now when we understand differences with Electron, we're going to build the same application as in the previous article: an app to check the weather in the city of user's choice built on top of OpenWeatherMap API. This project will be built with Vue CLI and I recommend this way to scaffold any Vue application.
If you want just to check the final NW.js app code, it's here.
🛠️ Installation
Creating an app with Vue CLI
First, let's scaffold an app with Vue CLI. Please make sure you have installed it with typing the following command in your console:
vue --version
If you don't have a version or it's less than 3.x, please run
npm install -g @vue/cli
Now you can create a Vue project from the console! To do so, please run
vue create <<YOUR-PROJECT-NAME>>
and select options you need. I will use the default setup for this project.
Great, now we're ready to add some desktop magic 🧙
Adding NW.js
NW.js official documentation recommends to use one of two builders to package your application:
I chose nwjs-builder-phoenix and I will describe further steps assuming you will use it as well 😅
So, first you need to add it as a dependency to your project:
npm install --save-dev nwjs-builder-phoenix
## OR
yarn add --dev nwjs-builder-phoenix
Now you need to modify your package.json file to provide a correct entry for the packager.
Tip: you can find
package.jsonin the root folder of your application.
Packager entry should be specified under the main property. We're going to run a development environment on the desktop so let's extend our package.json with the following:
"main": "http://localhost:8080"
It's the port where our scaffolded web application is running locally. Usually main is index.html but now we want to have a hot reload on every application change. That's why we're pointing main to a Vue application with hot reload module.
Running an application
Now let's run our web application:
npm run serve
## OR
yarn serve
You can check http://localhost:8080 in your browser to make sure an app is actually running. There should be something like this:

And finally we're ready to start a desktop app:
./node_modules/.bin/run .
This will fetch a specified version of NW.js (by default it's
sdk) and run a development environment.
runis a command added bynwjs-builder-phoenixand dot means we're usind thepackage.jsonfrom the root directory.
Now you should have an application running on desktop

Let's automate running dev environment a bit. Close your desktop app and install the NW.js SDK flavor:
npm install --save-dev nw@sdk
## OR
yarn add --dev nw@sdk
Now, add a new task to package.json scripts section:
"scripts": {
  "serve": "vue-cli-service serve",
  "build": "vue-cli-service build",
  "nw-serve": "nw ." /* <--- here is your new npm task */
},
Let's try to run it:
npm run nw-serve
## OR
yarn nw-serve
You should have your app running on desktop again but no downloading step now 🎉
Good news: you can simply open devtools like you do in the browser and use them to debug your application! Just click Window -> Devtools

🕹️ Scaffolding an app
Similarly to Electron, NW.js-powered application is built like a usual web application, so we're going to create a web app, style it with some CSS and let nwjs-builder-phoenix to care about packaging it to desktop application.
NOTE: Same as for Electron app, I didn't install any CSS framework or component library on purpose: I wanted to compare package size without adding any different dependencies. The only library used for all desktop projects is axios.
Open App.vue file and replace its content with the following code:
<template>
  <div id="app">
    <p>Enter the city name to check current weather in it</p>
    <section class="weather-input">
      <input type="text" v-model="query">
      <button :disabled="!query.length">Check</button>
    </section>
  </div>
</template>

<script>
export default {
  data() {
    return {
      query: "",
    };
  }
};
</script>

<style>
#app {
  font-family: "Avenir", Helvetica, Arial, sans-serif;
  -webkit-font-smoothing: antialiased;
  -moz-osx-font-smoothing: grayscale;
  text-align: center;
  color: #2c3e50;
  margin-top: 60px;
}

.button {
  color: #000;
}
</style>
Now our application looks this way:

🔗 Making an API call
I used the OpenWeatherMap current weather API. It gives you a lot of different information, you can check an example of JSON response here.
We're going to use axios to make API calls. Obviously, we need to install it:
npm install axios
## OR
yarn add axios
To be able to use axios inside any Vue component we will import it to main.js, set the base URL and then create a property in Vue prototype for it:
//main.js

import axios from 'axios'

axios.defaults.baseURL = 'http://api.openweathermap.org/data/2.5';
Vue.http = Vue.prototype.$http = axios;
Now in the App.vue we will create a bunch of data properties to display different weather data:
// App.vue

data() {
    return {
      query: '',
      error: false,
      city: '',
      country: '',
      weatherDescription: '',
      temp: null,
      tempMin: null,
      tempMax: null,
      humidity: null,
      icon: '',
    };
},
Similarly to Electron, I've added one additional property comparing to Vuido version and it's an icon. API provides a weather icon but we couldn't use it in Vuido app because currently there is no support for displaying images.
Let's also create a method to fetch our data:
methods: {
  showWeather() {
    this.$http
      .get(`/weather?q=${this.query}&units=metric&&appid=${API_KEY}`)
      .then(response => {
        this.city = response.data.name;
        this.country = response.data.sys.country;
        this.weatherDescription = response.data.weather[0].description;
        this.temp = response.data.main.temp;
        this.tempMin = response.data.main.temp_min;
        this.tempMax = response.data.main.temp_max;
        this.humidity = response.data.main.humidity;
        this.icon = `http://openweathermap.org/img/w/${
          response.data.weather[0].icon
        }.png`;
        this.error = false;
      })
      .catch(() => {
        this.error = true;
        this.city = '';
      });
  },
},
Don't forget to create a const
API_KEYwith your OpenWeather API key!
and add it to the click callback of our button:
<button :disabled="!query.length" @click="showWeather">Check</button>
Now if you enter the text into an input field and click the button, you can observe the API call in the Network tab:

💅 Displaying weather data
Let's add this data to the template:
<template>
<main id="app">
<p>Enter the city name to check current weather in it</p>
<section class="weather-input">
<input type="text" v-model="query">
<button :disabled="!query.length" @click="showWeather">Check</button>
</section>
<section v-if="error" class="weather-error">
There is no such city in the database
</section>
<section v-if="city.length" class="weather-result">
<h1>{{city}}, {{country}}</h1>
<p><em>{{weatherDescription}}</em></p>
<div class="weather-result__main">
<img :src="icon" alt="Weather icon">
<div class="weather-result__temp">
{{temp}}°C
</div>
</div>
<div class="weather-result__details">
<p>Min: {{tempMin}}°C</p>
<p>Max: {{tempMax}}°C</p>
<p>Humidity: {{humidity}}%</p>
</div>
</section>
</main>
</template>
Our application view:

It still looks too basic, so it's time to add some CSS. Let's replace the whole style section of App.vue with the following code:
<style>
* {
  margin: 0;
  padding: 0;
}
html,
body,
#app {
  height: 100%;
}

#app {
  font-family: Arial, Helvetica, sans-serif;
  font-size: 16px;
  padding: 10px;
  background: rgb(212, 228, 239);
  background: radial-gradient(
    ellipse at center,
    rgba(212, 228, 239, 1) 0%,
    rgba(134, 174, 204, 1) 100%
  );
  filter: progid:DXImageTransform.Microsoft.gradient( startColorstr='#d4e4ef', endColorstr='#86aecc',GradientType=1 ); /* IE6-9 fallback on horizontal gradient */
}

.weather-input {
  display: flex;
  align-items: center;
  padding: 20px 0;
}

.weather-result {
  text-align: center;
}

.weather-result__main {
  display: flex;
  align-items: center;
  justify-content: center;
  padding-top: 5px;
  font-size: 1.3rem;
  font-weight: bold;
}

.weather-result__details {
  display: flex;
  align-items: center;
  justify-content: space-around;
  color: dimgray;
}

.weather-error {
  color: red;
  font-weight: bold;
}

input {
  width: 75%;
  outline: none;
  height: 20px;
  font-size: 0.8rem;
}

button {
  display: block;
  width: 25%;
  height: 25px;
  outline: none;
  border-radius: 5px;
  white-space: nowrap;
  margin: 0 10px;
  font-size: 0.8rem;
}
</style>
And finally we have a beautiful fully-functional app:

The last thing to do before packaging it is to reduce a window size. To do so, we need to add a window property to package.json:
"window": {
  "width": 600,
  "height": 400
},
📦 Packaging
To package a NW.js app with nwjs-builder-phoenix you need to run a build command with a proper set of parameters. I am going to build it on for Mac to compare its size with Electron and Vuido apps.
First, we need to specify a NW.js version to be used on build process. We can do it via build property of package.json
"build": {
  "nwVersion": "0.35.3"
},
And then let's run a build command in the terminal:
./node_modules/.bin/build --tasks mac-x64 .
Again, dot in the command means we're using a
package.jsonfile located in the root project folder
Let's check a package size... 233 MB 😱!

Wow, that's a lot. It's even bigger than Electron application!
🌟 Conclusions
Pros:
- really easy to start
- can be customized via CSS styling
- good docs
- has a support for protected binaries
Cons
- very big package size
- not-so-good naming (maybe it's just me but Electron/Vuido is way more memorable than NW.js)
- small ecosystem.
💖 Special thanks
I want to thank Jared Wilcurt who helped me with answers on my NW.js questions. Jared is an author for NW.js Vue devtools to debug a Vue application right on the desktop.
UPDATE: If you wonder how to reduce the size of the package significantly, here is an article by Jared Wilcurt.

Latest comments (42)
Hello, author, packing is very slow
npm run nw-serve
error:
Connection to localhost was declined
Very nice article Natalia, thanks.
I've noticed that when the native app is pointing to localhost to get the content, the
nwobject (a global injected by nw.js) is undefined – you can only access when the actual build script is run. Do you have any workaround? Thanks!When I run
npm run nw-serveI don't get a server on 8080 - I still have to runnpm run servebeforenpm run nw-serve. What's going wrong?Great post, just what I wanted in my next project, 😂
./node_modules/.bin/run . is error -4058
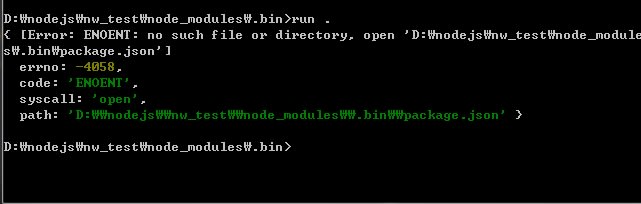
i use windows7 64bit..
what can i do???
thanks so good explain .
hi im use window7 64bit
i have error
what can i do???
i added error picture
i guess the fallback isn't needed /* IE6-9 fallback on horizontal gradient */
Thanks for spotting this! Will remove ;)
Thank you for the comment! I am really happy you liked an article
Compiled app works only when
npm run serverunning. How to fix that?You will need to take following steps:
1) add
vue.config.jsfile with the following content:(if you use vue-cli below 3.3.0, replace
publicPathwithbaseUrl)2) build the project with
yarn build;3) change
maininpackage.jsonto4) copy
package.jsontodist5) run
./node_modules/.bin/build --tasks mac-x64 dist(assuming you're on OSX)You will have your app in
dist/distfolderThis works but we can find the source file under js folder. If NW.js keep source file then why I'am use it? It will be better to use Electron. Please tell me if there is a way to build a desktop app with compiled source code from vue.
Is not working...
Add file vue.config.js in root, make command:
npm run nw-serve
compiled app works, more vue is not work