Introduction
Kaggle notebooks are excellent for developing machine learning models, but deploying them into production environments requires a structured approach. In this guide, I will walk through the process of deploying a Kaggle-developed model as a scalable, serverless API using Google Cloud Functions that I took. The guide covers deployment and maintenance, ensuring best practices for creating a reliable, production-ready service.
Step 1: Preparing the Kaggle Notebook
Model Training and Saving
Before deployment, you need to ensure that the trained model and necessary components are properly structured, reusable, and portable.
- Ensure your notebook completes the model training process.
- Download the saved files.
- Your Notebook will be in
.ipynbformat
Dependency Management
List all Python libraries used in your notebook and create a requirements.txt file to ensure that the deployed environment has all the necessary dependencies.
- Identify all Python libraries used in your notebook.
- Create a
requirements.txtfile listing these dependencies: - Example
requirements.txt:
torch
scikit-learn
pandas
numpy
flask
Step 2: Converting the Notebook to Python Scripts
Kaggle notebooks contain inline execution history and debugging cells that are not suitable for production. Convert your notebook into Python scripts for cleaner, more maintainable code.
Extract Model Logic
- Convert your notebook to a Python script: When you download your notebook from kaggle it will in the .ipynb format
jupyter nbconvert --to script your_notebook_name.ipynb
For more information on jupyter nbconvert, see the Jupyter nbconvert documentation.
Create a dedicated script for model logic, such as deploy_model.py, which will contain:
- Model Definition
- Model Loading
- Preprocessing Functions
- Prediction Logic
Example Python Code:
import torch
import torch.nn as nn
import numpy as np
import pandas as pd
from sklearn.preprocessing import StandardScaler, LabelEncoder

class StudentModel(nn.Module):
    def __init__(self, input_dim, output_dim):
        super(StudentModel, self).__init__()
        self.fc = nn.Linear(input_dim, output_dim)

    def forward(self, x):
        return self.fc(x)

def load_model(model_path, input_dim, output_dim):
    model = StudentModel(input_dim, output_dim)
    model.load_state_dict(torch.load(model_path))
    model.eval()
    return model
Create Main Application (Flask)
Flask is a lightweight web framework that allows us to quickly build an API to handle HTTP requests.
- Create
main.py: This file will serve as the entry point for your Google Cloud Function. - Set Up a Flask Route: Handle POST requests to make predictions based on incoming data.
- CORS Handling: Ensure external clients can make requests to the function.
Example:
from flask import Flask, request, jsonify
import deploy_model

app = Flask(__name__)

@app.route('/', methods=['POST'])
def predict():
    data = request.json.get("features")
    prediction = deploy_model.predict_crop(data)
    return jsonify({"prediction": prediction})

if __name__ == "__main__":
    app.run(host='0.0.0.0', port=8080)
This API allows external applications to send input data and receive model predictions in real-time.
Step 3: Setting Up Google Cloud Functions
Google Cloud Project
- Create or select a project.
- Enable Cloud Functions, Cloud Build, and Cloud Run APIs:
gcloud services enable cloudfunctions.googleapis.com cloudbuild.googleapis.com run.googleapis.com
Enabling these APIs ensures your project can deploy and execute serverless functions.
- For more information on
gcloud services enable, see the gcloud documentation.
Google Cloud SDK (gcloud CLI)
Google Cloud SDK provides CLI tools to deploy and manage cloud functions.
- Install and configure the SDK.
- Authenticate:
gcloud auth login
- Ensure your project has a billing account.
- For more information on
gcloud auth login, see the gcloud documentation.
Step 4: Deploying to Google Cloud Functions
Create a deploy.sh script to automate deployment
#!/bin/bash
gcloud functions deploy predict-handler-v2 \
--runtime python311 \
--trigger-http \
--allow-unauthenticated \
--memory 512MB \
--timeout 3600s \
--region us-central1
- For more information on
gcloud functions deploy, see the gcloud documentation.
Deploy: Make the script executable and run it:
chmod +x deploy.sh
./deploy.sh
- The function will be deployed, and you will receive a URL to access it.
- Note the function URL.
Step 5: Testing the Deployed Function
Using curl:
curl -X POST -H "Content-Type: application/json" -d '{"features": [...]}' YOUR_FUNCTION_URL
Using Postman:
- Create a POST request to your function URL.
- Set
Content-Type: application/json. - Set up a POST request to the deployed function URL.
- Add Content-Type:
application/jsonand include input features in the body.
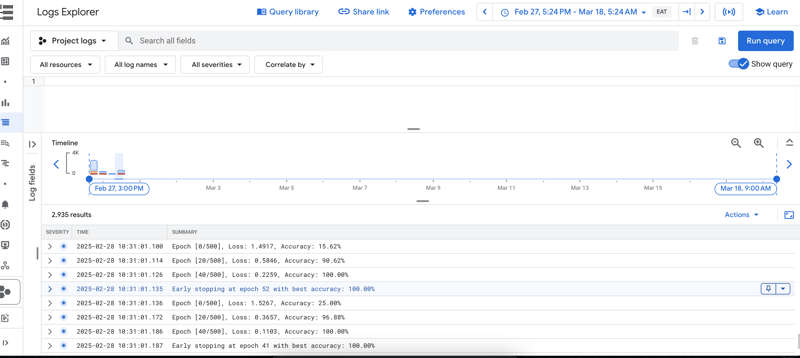
Check Cloud Run Logs:
In the Google Cloud Console, check Log Explorer for errors.
Step 6: Monitoring and Maintenance
Google Cloud Logging
Monitor function performance and errors.
Version Control (Git)
Track code and model changes.
CI/CD
Automate retraining and redeployment.
Conclusion
Successfully deploying machine learning models from Kaggle to production requires a structured approach. Key considerations include:
- Modular Code Structure: Organize code for easier maintenance and integration.
- Dependency Management: Ensure all necessary libraries are included.
- API Development: Use Flask to build an API that serves model predictions.
- Serverless Deployment: Leverage Google Cloud Functions for a scalable, serverless solution.
- Monitoring and Maintenance: Implement proper logging, version control, and CI/CD pipelines for ongoing updates.
By following these steps and best practices, you can seamlessly transition your Kaggle notebook models into a reliable, production-ready API on Google Cloud Functions.

Top comments (1)
Great article, very elaborate!