
So far you would have used pods as a dependency in your project.
Do you want to create your own pod and help others?
Let's do it by below easy steps -
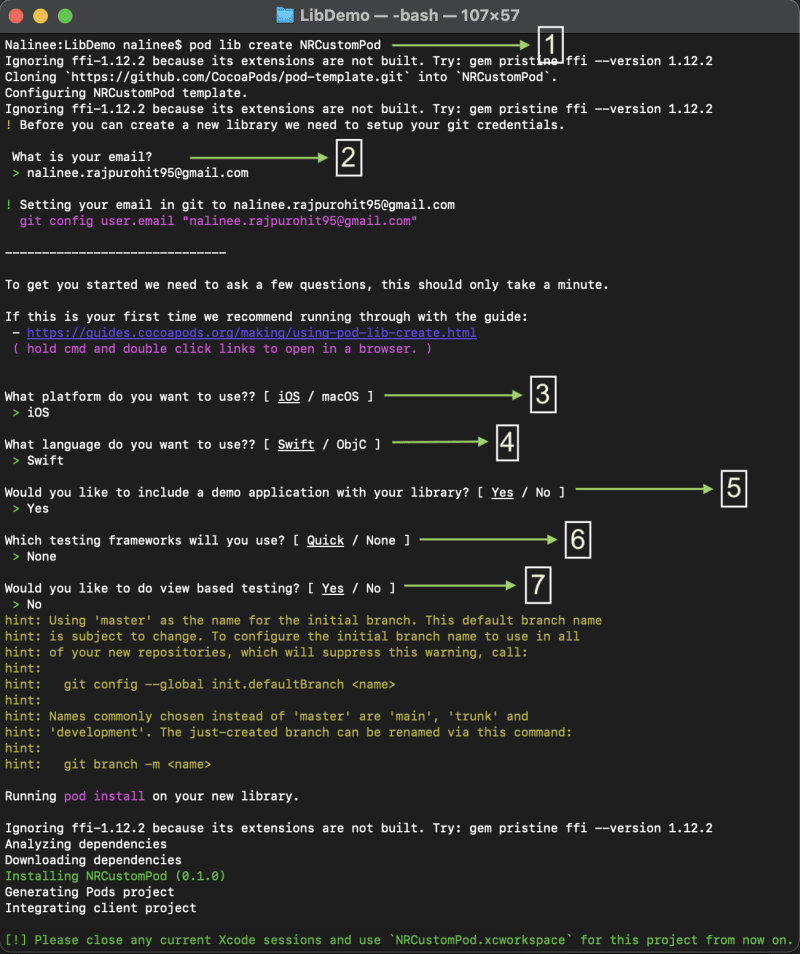
Open terminal and type the command ->
pod lib create Your_Pod_Name
-
It will ask you some questions and then will create an XCode project for you. This Xcode project will contain some files added for you
- .podspec -> will contain the details/specifications about your library
- README.md -> the README file in markdown format.
- License -> this will hold the default MIT license. You can replace with your own if required.
- ReplaceMe.swift -> A default swift file to guide where to add your files.
Lets setup the project now -
- README.md - Open this file and add/edit the details relevant to you. You can remove the details which are not required.
-
Addling classes -
- Delete the Replace Me file.
- Click on MyFirstPod under Pods and Create a folder with name Sources
- Now add your library files to this folder.

-
Adding Resources - You need to add the resources like xib,asset,icons etc to a separate folder. If you don’t have any then you can skip this step.
- Create a folder named Resources on the same level as we did for Sources.
- Now add your resource files to it here
-
Update folder path in podspec file - Open you podspec file and set the following keys one by one
- set s.source_files to this
s.source_files = 'Sources/**/*.swift' - s.resources to below. You can add the extension of files you have added to your project.
s.resources = "Resources/**/*.{png,xib}" - Add the description and summary for your project

- set s.source_files to this
-
Deploy your library -
-
Push to your Git Repo -
- Create a repository for this project and push your project to it.
- Now we need to add a tag to the last commit. This tag should be the one mentioned in podspec file on
s.version. This tag is becomes the version of your pod.
-
Validate -
- Open terminal
- Traverse to the folder where the podspec file exists.
- Run
pod lib lint --allow-warnings. This will validate your library.
-
Push to your Git Repo -

3. Deploy to public - Run pod trunk push --allow-warnings. If everything goes right then you will see as below -

That's it. Now you can install this pod in any other project.🎉
You can find the demo project on below link -
https://github.com/NalineeR/NRCustomPod

Top comments (0)