Table of contents
- Introduction
- Create an Azure Linux VM
- Setting Up Nginx on an Azure Linux VM Using SSH
- Create an Azure IISVm
- Install the IIS web server role via Powershell.
Conclusion.
INTRODUCTION
Setting up your virtual machine (VM) to host web applications is essential for delivering content efficiently and reliably. This guide provides a step-by-step approach to installing key solutions, such as Nginx, a high-performance web server, and the IIS Web Server role on your VM. Whether you're deploying a Linux-based or Windows-based server, this introduction ensures you’re prepared to configure your environment effectively.
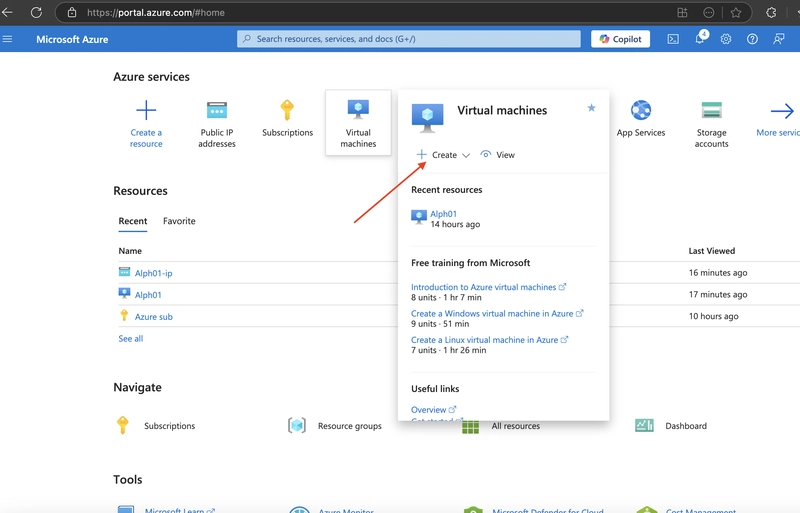
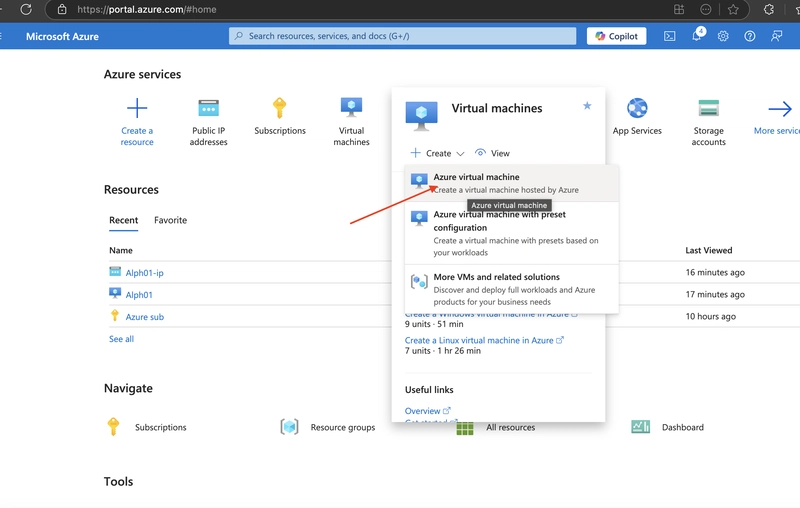
2.0 Create an 'Azure Linux VM'
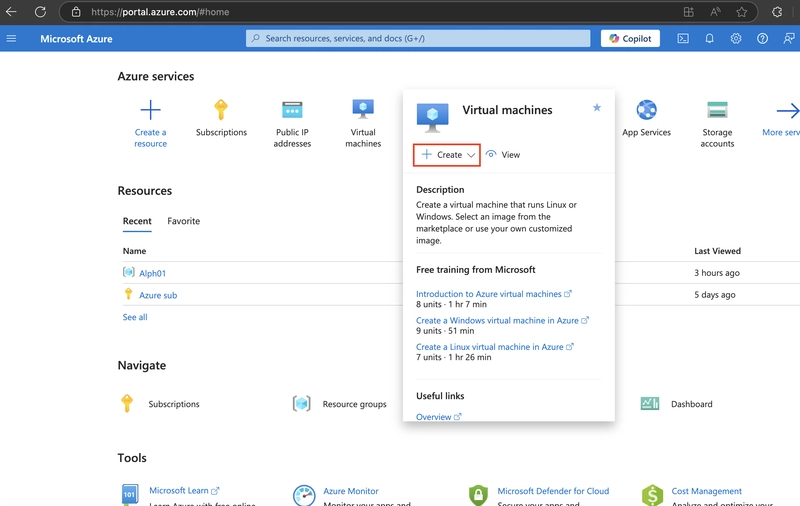
Login to your Azure account, navigate or search Virtual machines, and then click on Create and click on Azure Virtual Machine
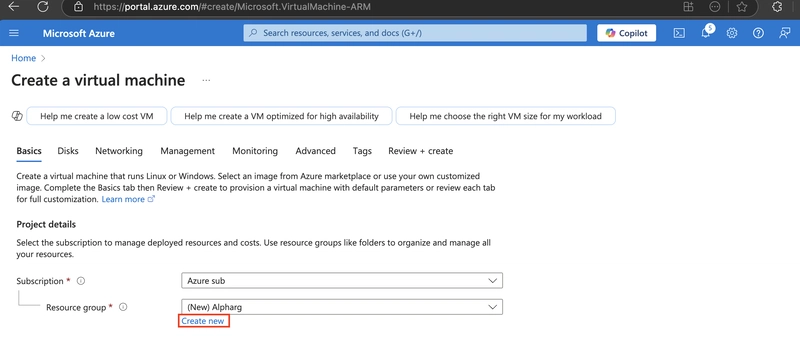
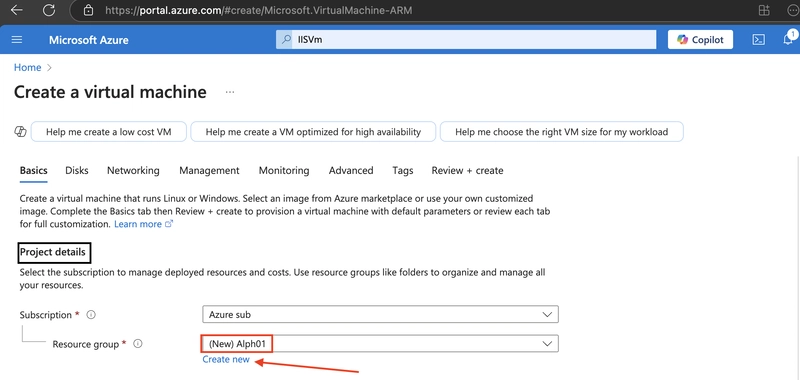
2.1 Please, ensure you are on the right subscription and then create a new Resource group name.
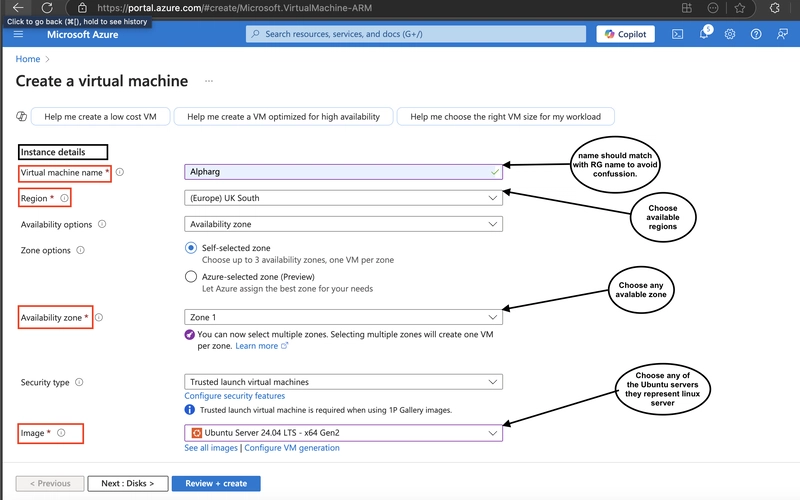
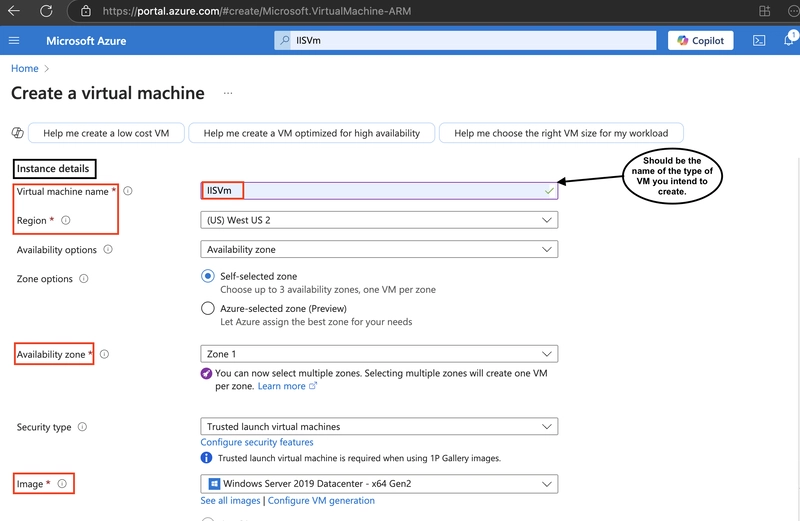
2.2. Fill in the Instance details as shown in the images below;
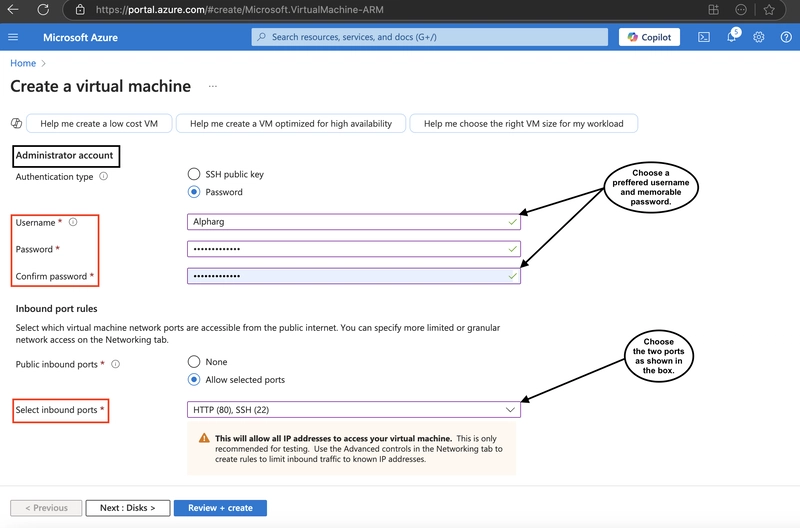
2.3. Navigate to the administrator account as shown in the image below;
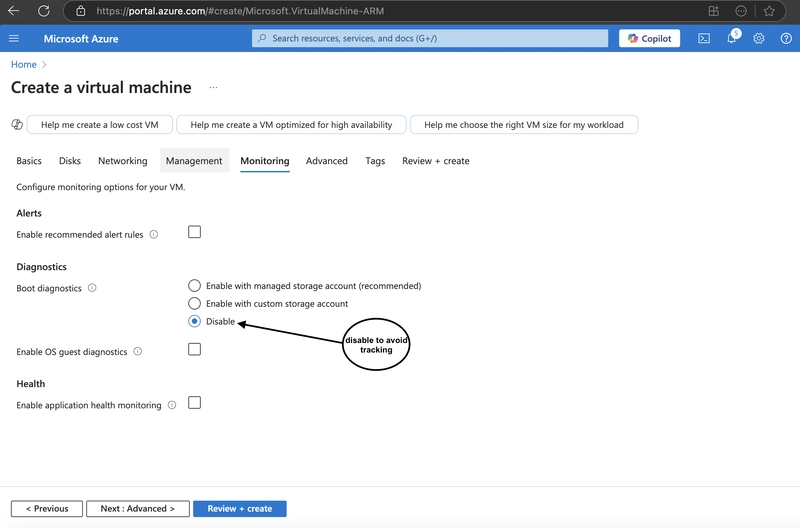
2.4. Go to the monitoring section and disable boot diagnostics.
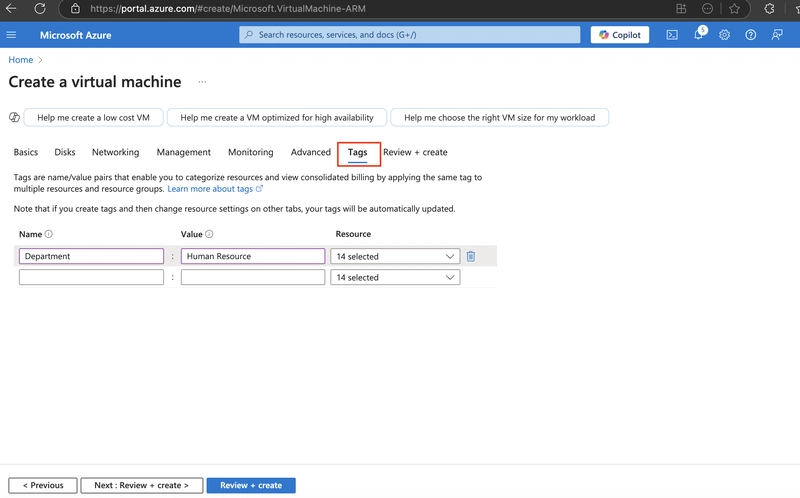
2.5. Navigate to Tags and add your preferred tags.
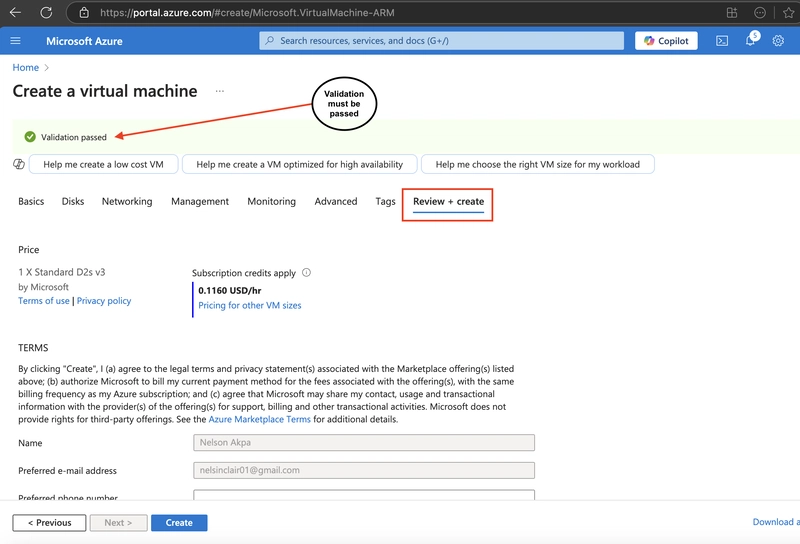
2.6. Go to Review and Create and ensure validation is passed.
2.7. Click Create
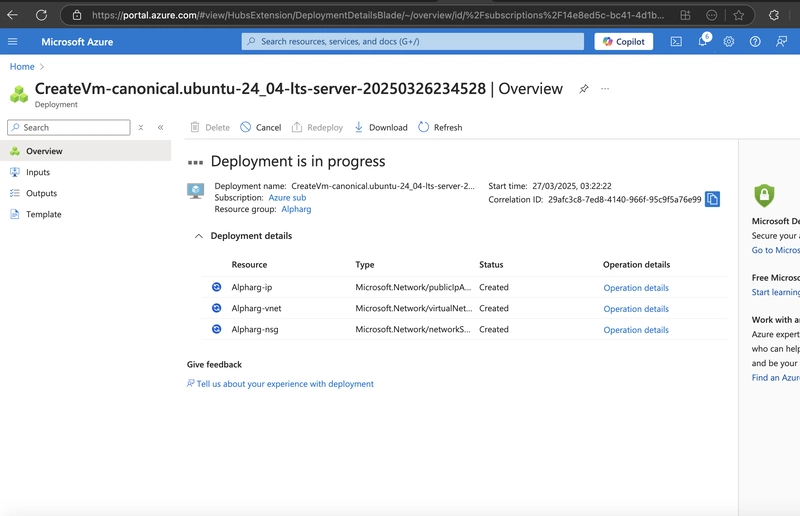
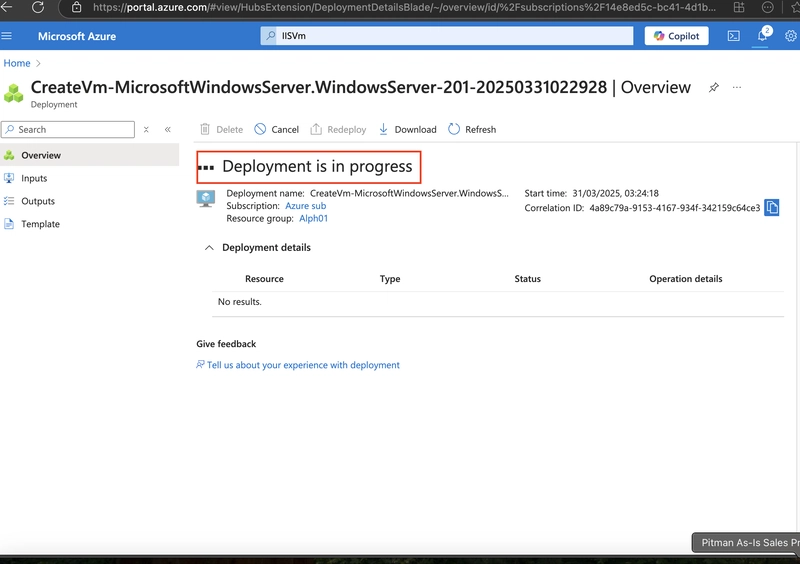
2.8. Once deployment is complete, click "Go to Resource"

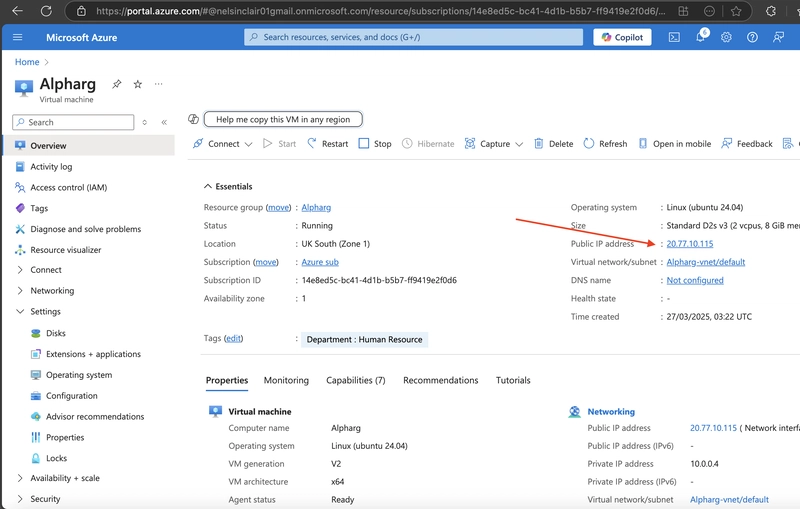
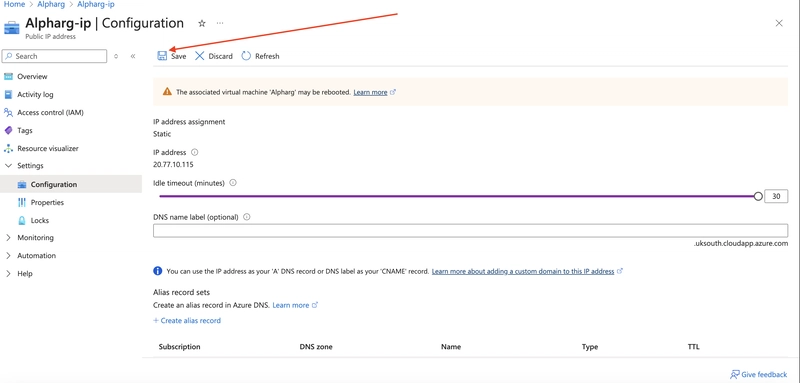
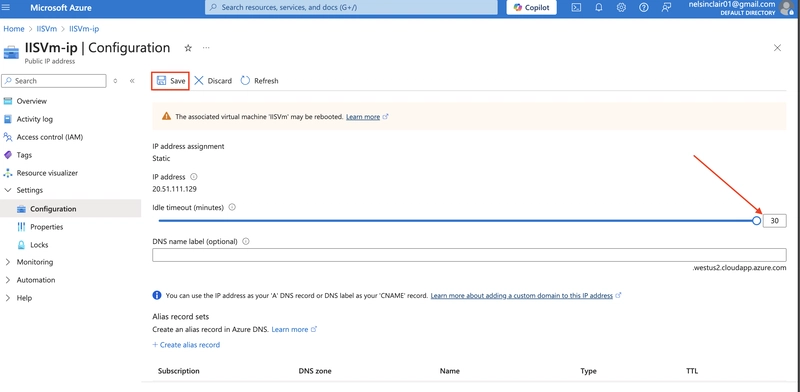
2.9. Linux VM successfully created. Click on public address, extend the idle timeout, and save.
 .
.
3.0 Setting Up Nginx on an Azure Linux VM Using SSH
Open the terminal on your laptop and follow these steps;
ssh username@hostname_or_ip
🔹 username → The account you want to log in with.
🔹 hostname_or_ip → The IP address or domain name of the VM.
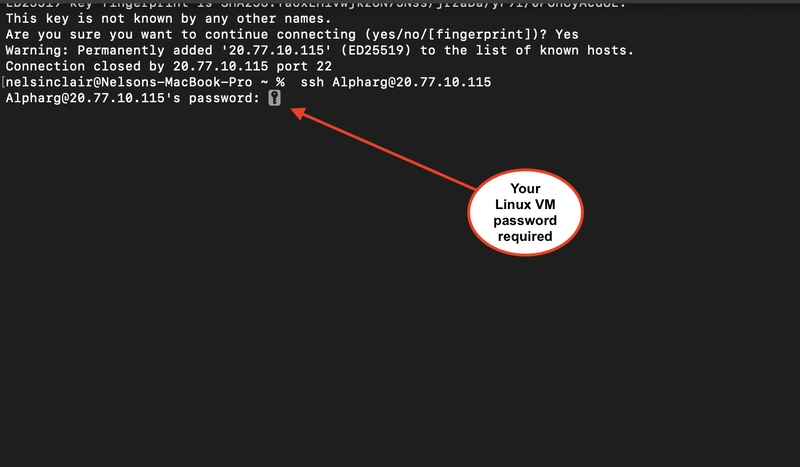
Which is ssh Alpharg@20.77.10.115
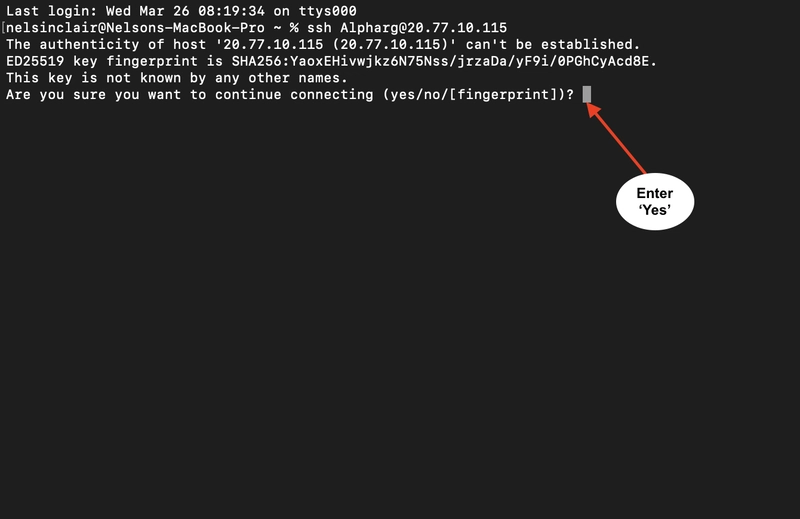
3.1 Enter "Yes"
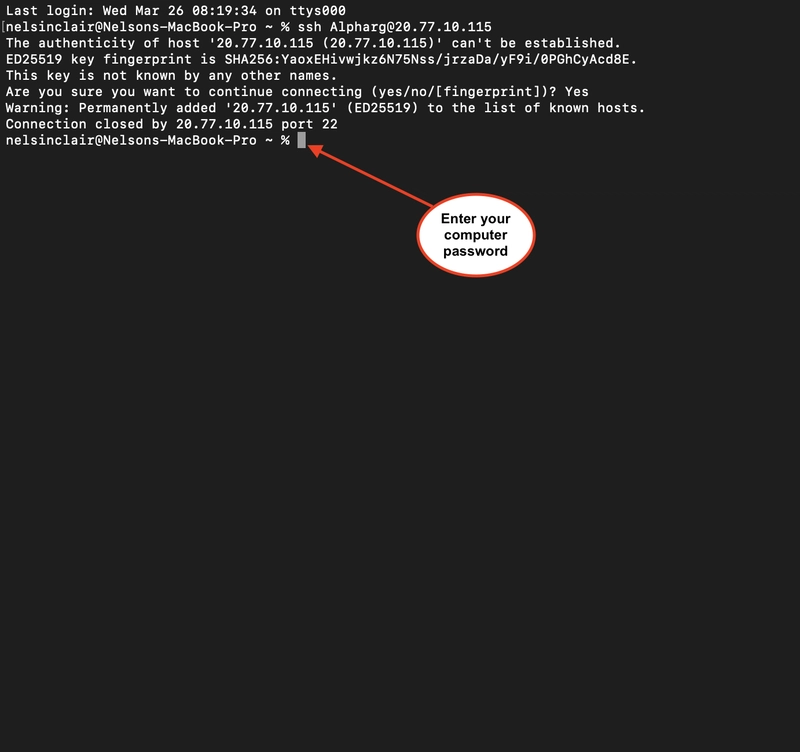
3.2 Enter your Linux VM password
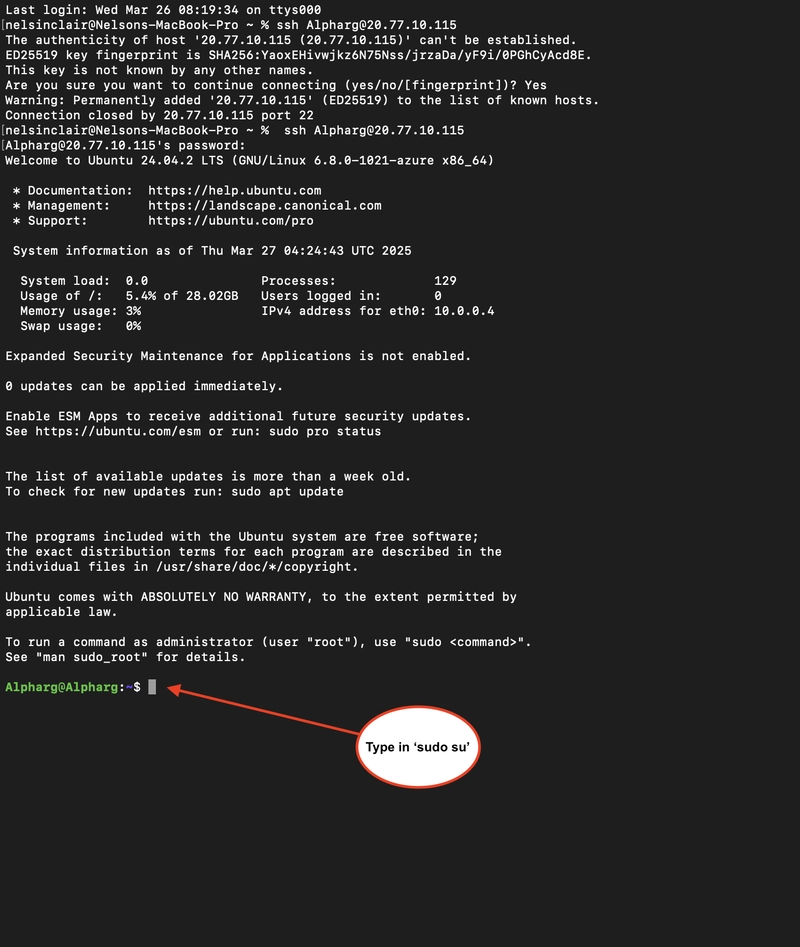
3.3. Type in "sudo su" and click enter
3.4 Type in apt update and click enter
It loads up the image below;
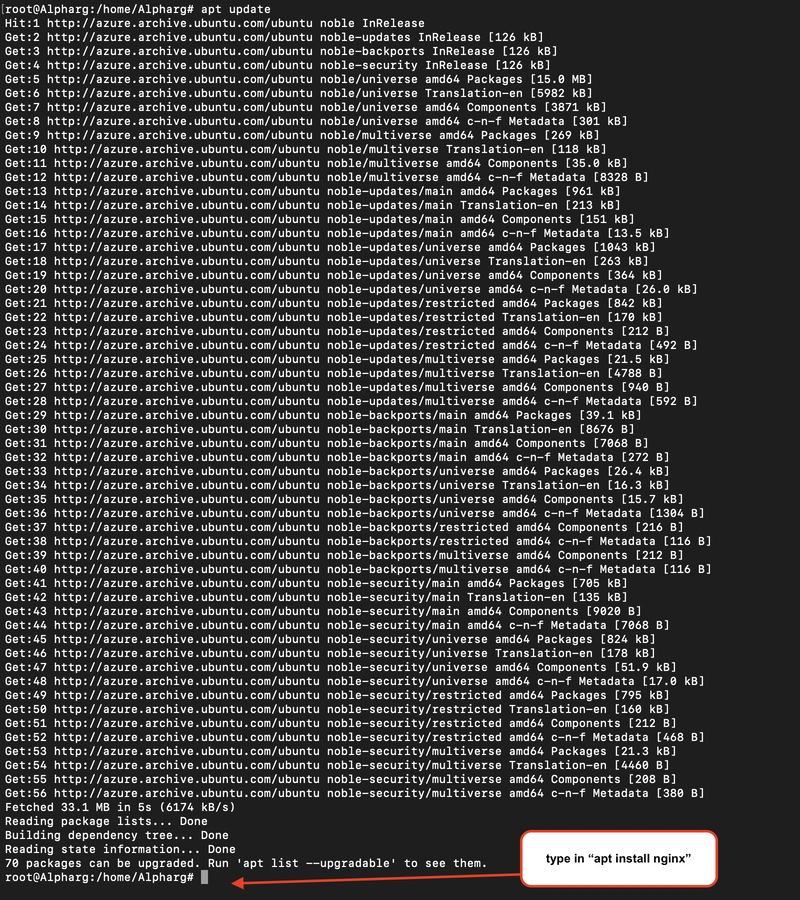
3.5. Type in apt install nginx and click enter.
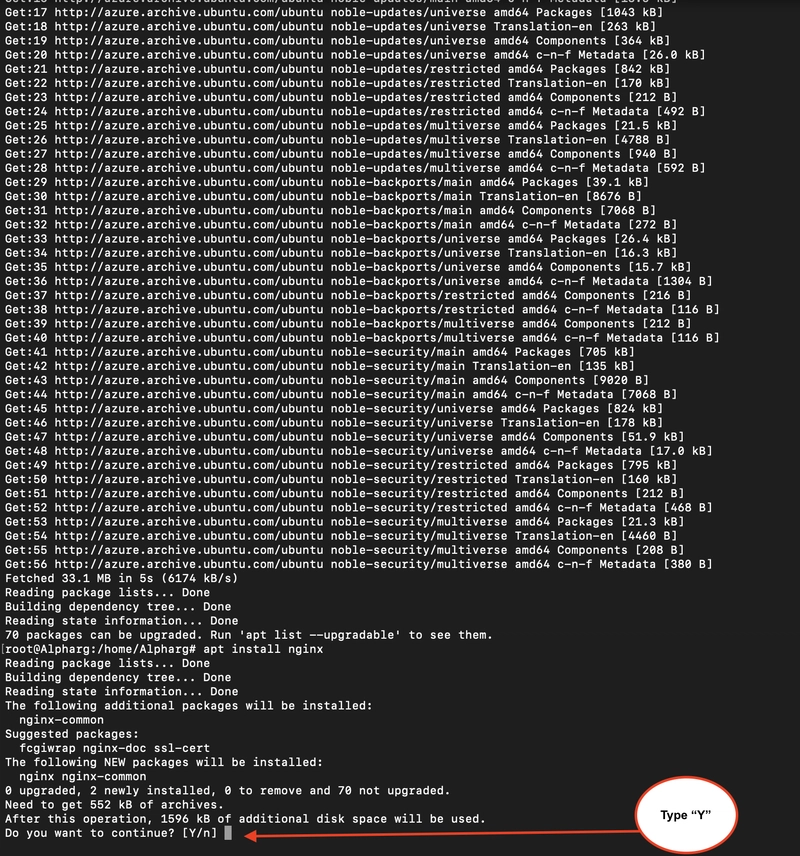
3.6. Type Y and click enter.
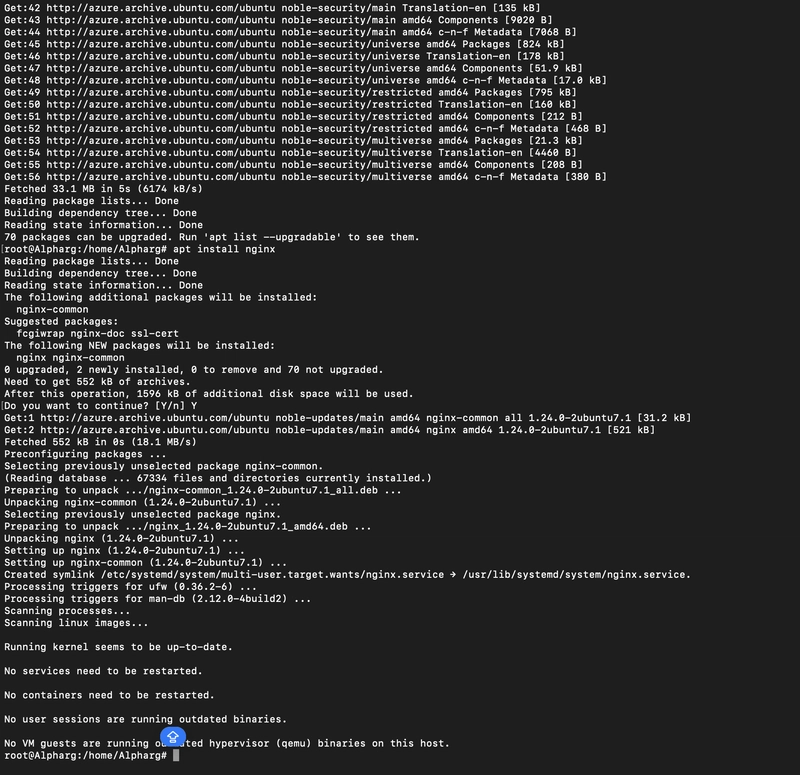
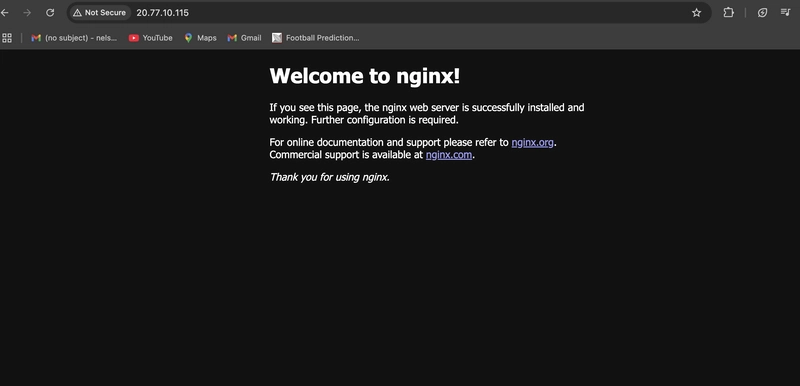
3.7. Nginx web server successfully installed. Now open a tab on your browser to verify by searching for the public IP address before terminating your Terminal window

4.0. Create an Azure IISVm
Login to your Azure account, navigate to virtual machines, and click on Create.
4.1. Fill in the project details.
4.2. Fill in the instance details
4.3. Navigate to the Administrator account and input your preferred username and password.

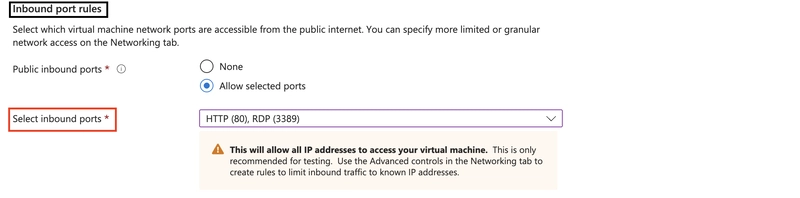
4.4. Select inbound ports HTTP 80 and RDP(3389) afterward.
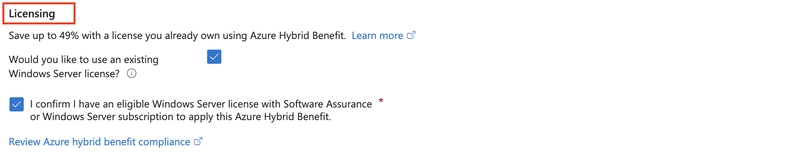
4.5. Go to licensing and tick the confirmation box.
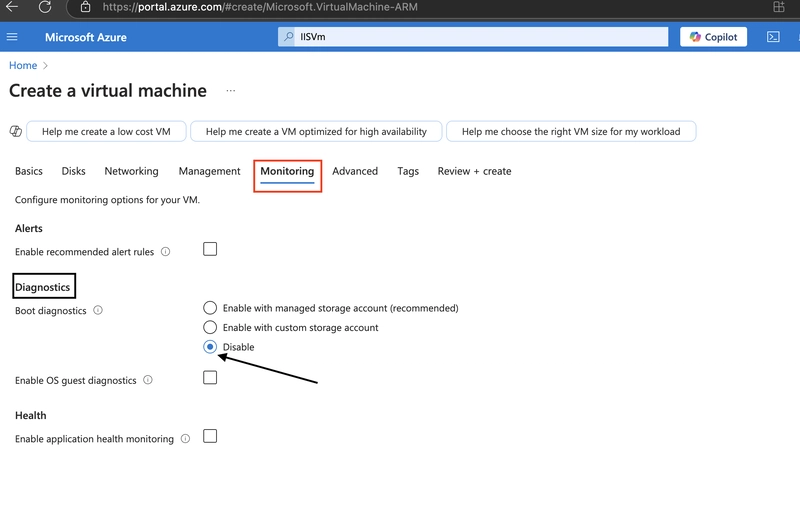
4.6. Navigate to the Monitoring session and disable diagnostics.
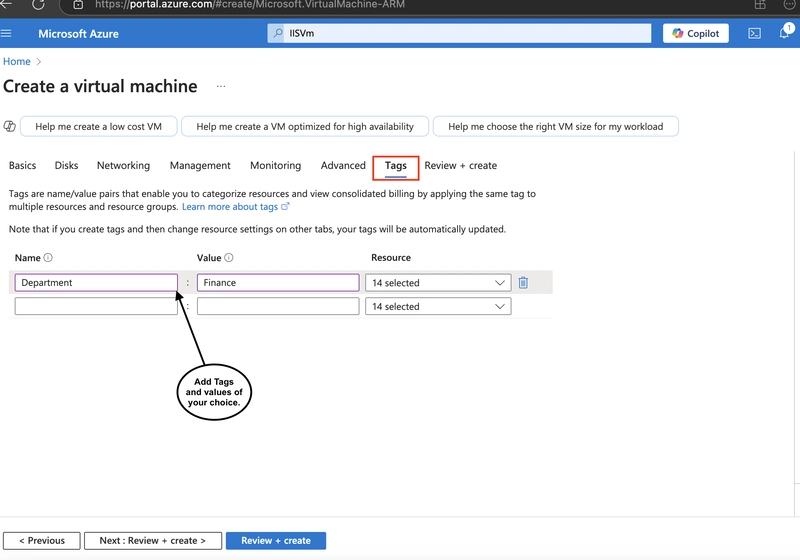
4.7. Go to the Tags section and add any of your choices.
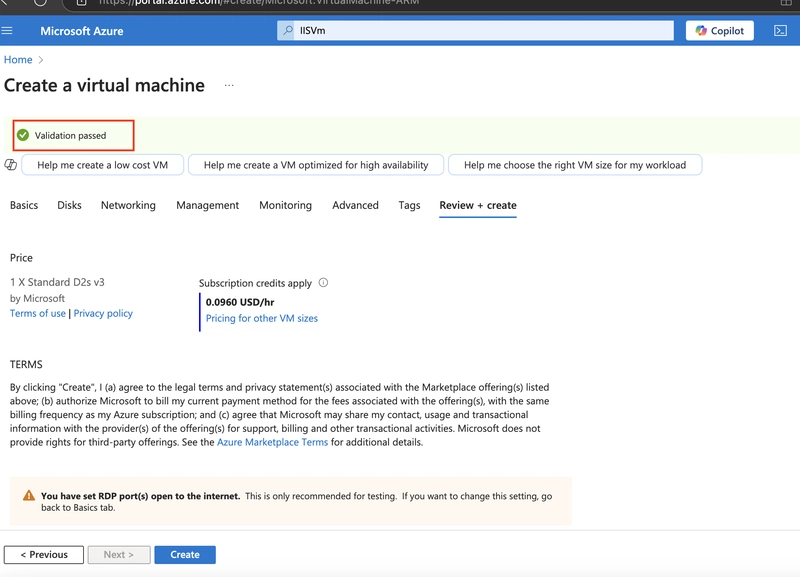
4.8. Click on the Review and create button and ensure validation is passed.
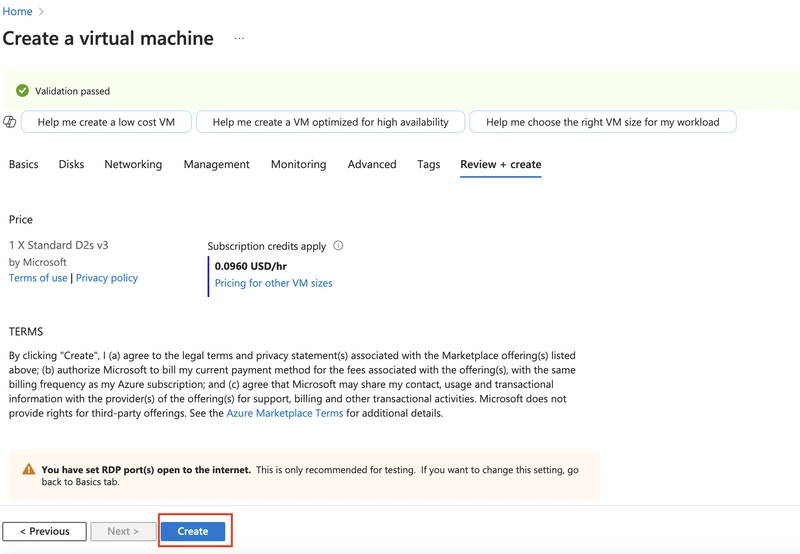
4.9. Click on the Create **button.
4.10. Go to **Resource.
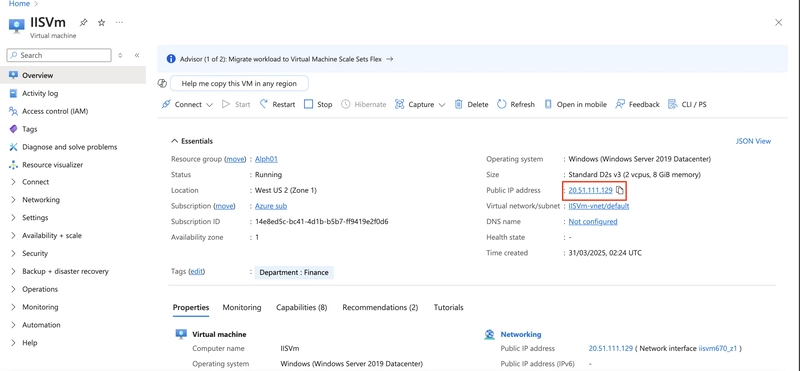
Click on the public address and extend the idle timeout, then save afterward.
 .
.
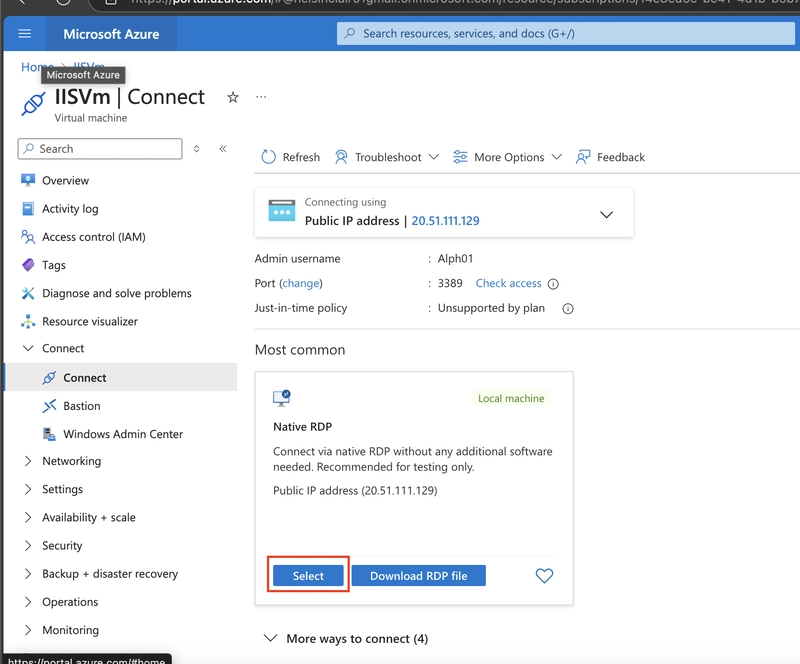
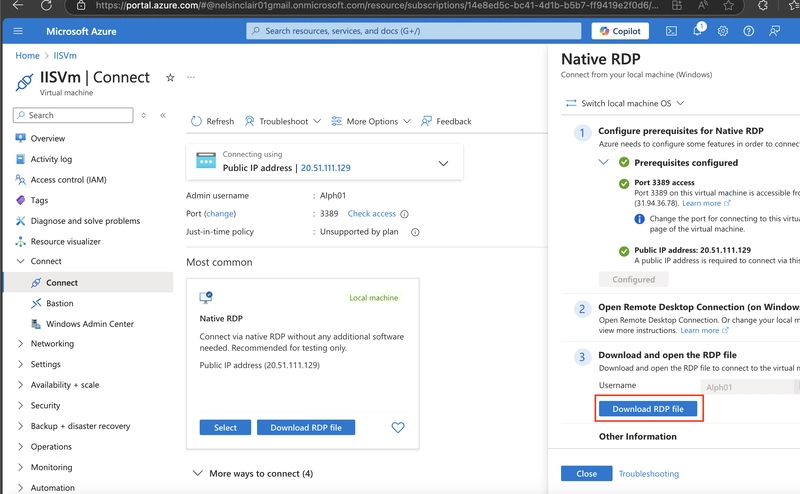
4.11. Click on Connect and click the Select button. Download the RDP file once the IIS VM is configured.
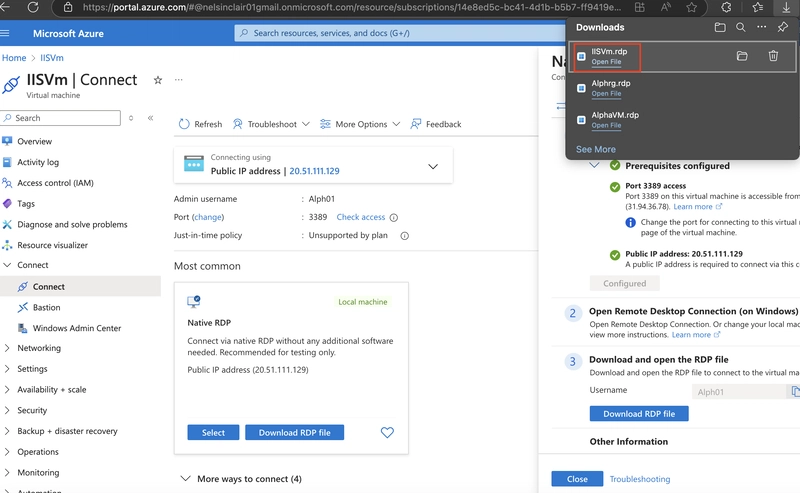
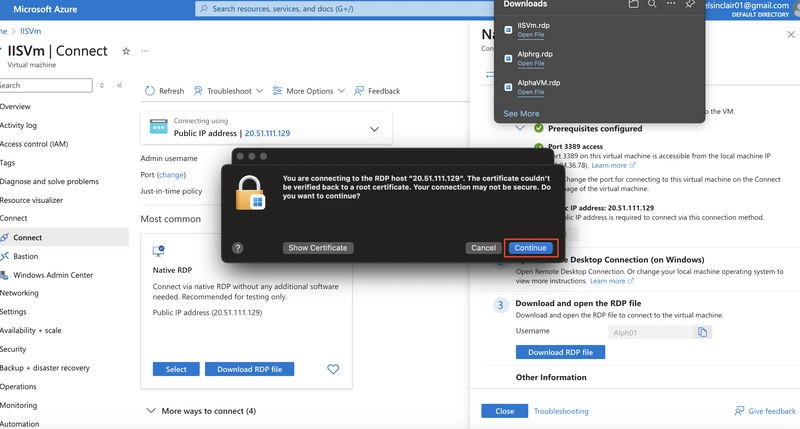
4.12. Open the IISVM using a downloaded Microsoft remote desktop.
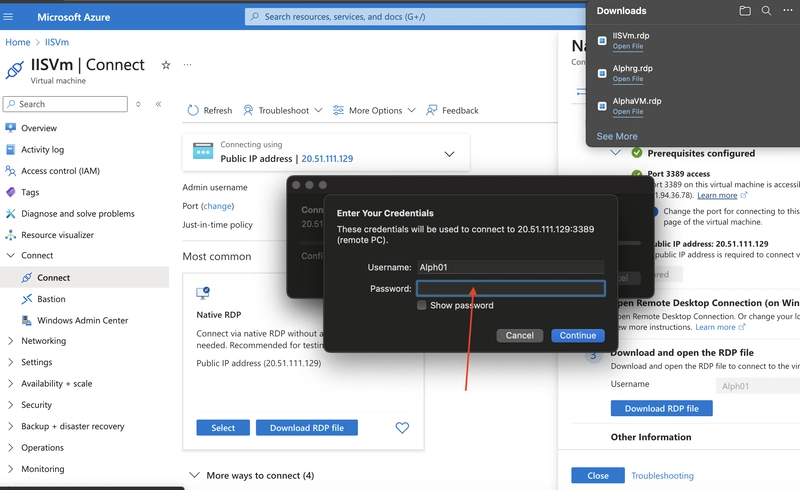
Enter the password
Close the server manager page that would pop up.
5.0. Install the IIS web server role via Powershell.
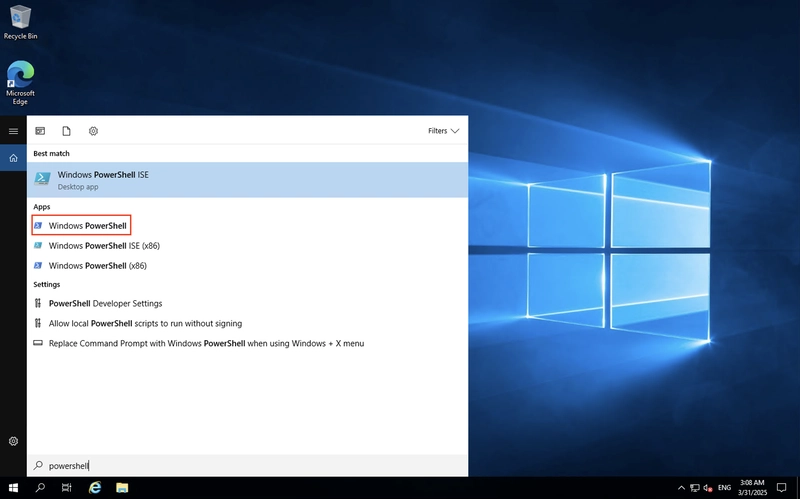
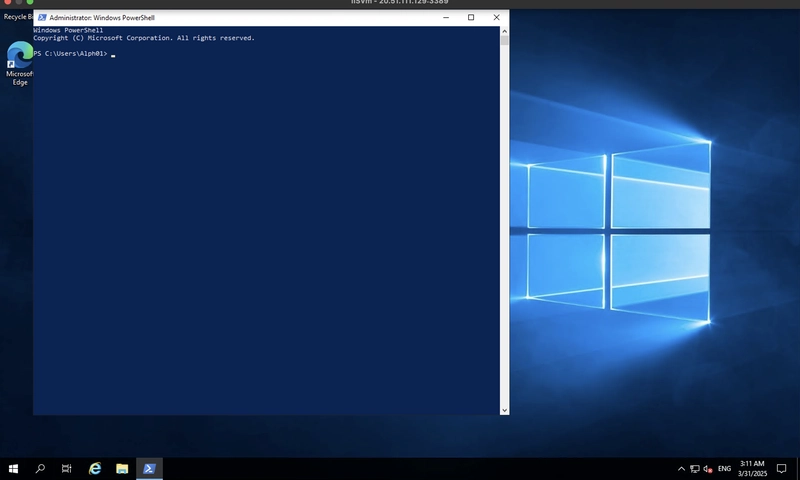
5.1. Type PowerShell in the search bar, right-click, and then run as administrator.
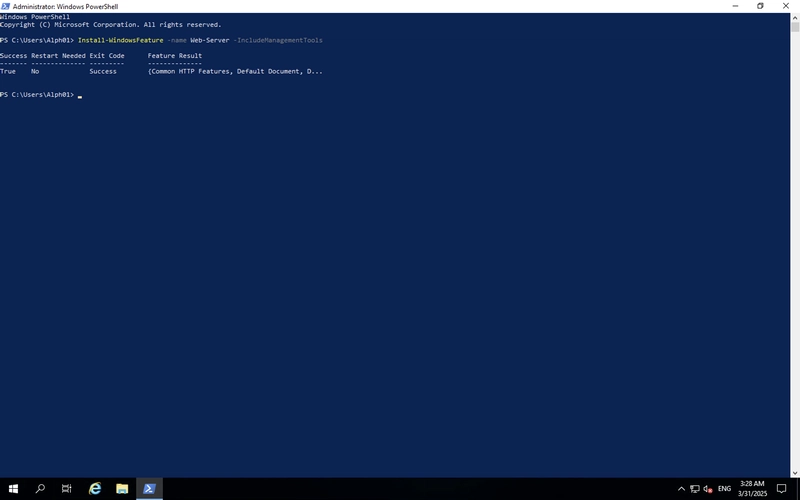
5.2. Copy and paste 'Install-WindowsFeature -name Web-Server -IncludeManagementTools' and click the enter button.

IIS Vm successfully installed.
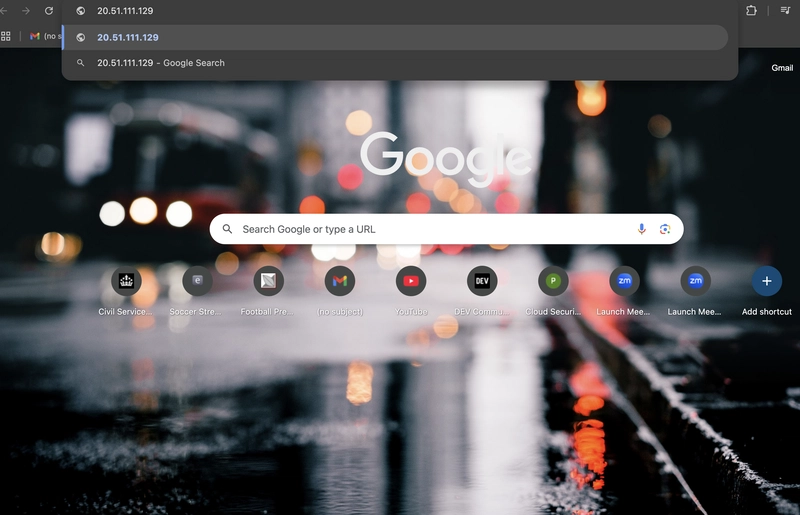
5.3. Verify this successful installation by copying the public IP address (20.51.111.129) and search it on any browser.
 .
.
Conclusion
With Nginx and IIS successfully installed and configured, your virtual machine can now efficiently serve web applications. Whether you're leveraging Nginx for its performance or IIS for its seamless integration with Windows environments, this guide has provided the foundation for setting up a robust and reliable web server. Just to remind you, continuous monitoring and optimization are key to ensuring your server effectively meets your needs.

Top comments (0)