This post will show you how to setup Tmuxinator help you run complex local setups. We will run a contrived example first, because running something basic with some Nodejs scripts.
Getting started
We need to install bot Tmux and Tmuxinator for this setup. I will use Brew, but if you require an alternative, check the documentation.
brew install tmux
brew install tmuxinator
Now that these are install
Example setup
Within your ~/.tmuxinator folder, add a new file example.yml and add the following:
name: example
root: ~/code # can be a path to whatever root you want

windows:
  - application:
      layout: tiled
      panes:
        - app-one:
            - cd ~/code/tmux-example/app-one
            - echo "Hello from app one"
        - app-two:
            - cd ~/code/tmux-example/app-two
            - echo "Hello from app two"
        - app-three:
            - cd ~/code/tmux-example/app-three
            - echo "Hello from app three"
In the above, we are declaring the name that we can reference and start with Tmuxinator.
Within the windows, we are declaring a project named application, setting the layout to be tiled and finally adding an arbitrary number of panes that we want to show up and run some basic echoes.
Once we have this file saved, we can use tmuxinator start example to get our Tmux application running.

We can run tmux kill-session -t example to now end the session from a terminal pane.
As for navigation, the default for Tmux is to use
Ctrl + b, then the action button. For example, to change between panes, you can useCtrl + b, arrow-key. A list of handy tips can be found here.
Making a slightly-less contrived example
As you may be able to tell from the above example, each pane has a set of commands we can set into the YAML array that will be executed in order. This means that we could use these two run basic Node applications.
Let's do the same echoes from three separate Node apps.
In ~/code/tmux-example, let's create these files.
cd ~/code/tmux-example
echo "console.log('hello from app one')" > ./app-one/index.js
echo "console.log('hello from app two')" > ./app-two/index.js
echo "console.log('hello from app three')" > ./app-three/index.js
We can now update out Tmuxinator config to run these apps:
name: example
root: ~/code # can be a path to whatever root you want

windows:
  - application:
      layout: tiled
      panes:
        - app-one:
            - cd ~/code/tmux-example/app-one
            - node index.js
        - app-two:
            - cd ~/code/tmux-example/app-two
            - node index.js
        - app-three:
            - cd ~/code/tmux-example/app-three
            - node index.js
If we run tmuxinator start example again, we can see that we successfully manage to get the three different Nodejs scripts to run from different panes.
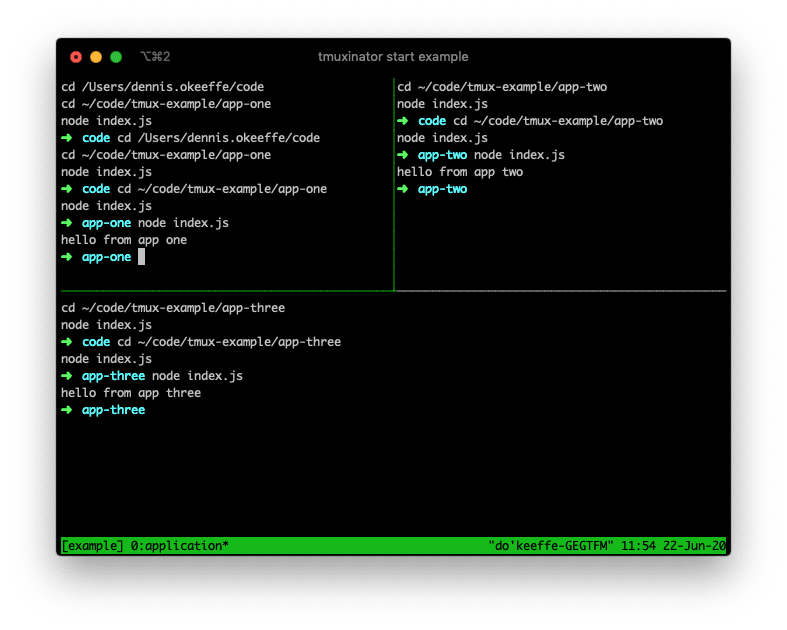
This stands in place as a simple example, but you could start to see how this can be used when dealing with multiple microservices or require resources to be run during local development.
Conclusion
This has been a very basic example, but it can be extended as much as you would like.
If you are looking for alternatives to help with local development, I also recommend to check out tools such as Foreman or Kubernetes. Each come with their own tradeoffs and use cases, but I will leave it to you to decide the right tool for the job.
Resources and Further Reading
- Getting started with Tmux
- GitHub - Tmuxinator
- GitHub - Tmux
- GitHub - Node Foreman alternative
- Tmux - Cheatsheet
Originally posted on my blog. Follow me on Twitter for more hidden gems @dennisokeeffe92.

Top comments (0)