Hi, guys.
I hope I make this a series of posts where we'll build animations together.
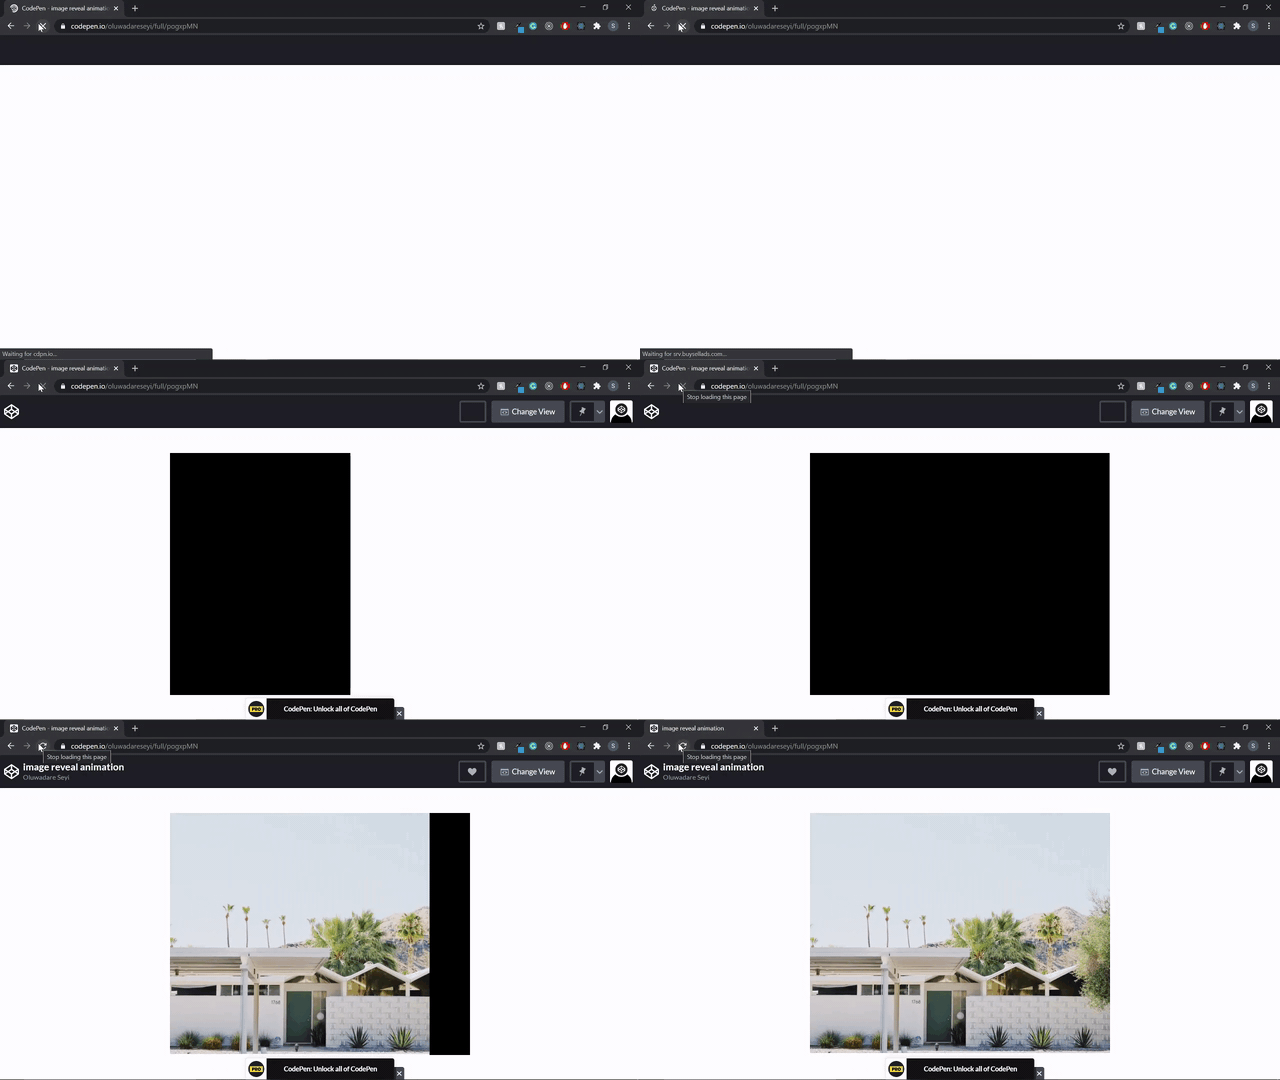
Today, what we'll be building is an image reveal animation:
I saw this animation on a website on Awwwards (They have totally cool websites on their platform btw, you should check it out).
I'll be using CodePen, and a link to the final project will be provided. I'll also be using GreenSock, an animation library, the best I've seen so far (even works perfectly with SVGs!). Here's their docs. Let's dive in.
First, we define the HTML:
<figure class="img-container">
  <img src="https://images.unsplash.com/photo-1594903057066-3c2abea0f9cf?ixlib=rb-1.2.1&ixid=eyJhcHBfaWQiOjEyMDd9&auto=format&fit=crop&w=600&q=60" alt="overlay-image">
</figure>
The image-container contains the image and our overlay. We then nest our img tag inside the parent.
Next, we define the styles (I used SASS, you can totally use CSS):
body {
  height: 100vh;
  display: flex;
  justify-content: center;
  align-items: center;
  margin: 0;
  padding: 0 40px;
  visibility: hidden;
}

.img-container {
  position: relative;
  overflow: hidden;

  &:after {
    content: "";
    position: absolute;
    width: 0%;
    height: 100%;
    top: 0;
    left: 0;
    background: #000000;
  }
img {
    width: 100%;
    opacity: 0;
  }
}
I'll quickly walk us through this. First, we define styles for the body, we want to center the image horizontally and vertically, so we declare a height of 100vh, we then use flexbox to align and justify center. We set a padding-left and right to add some spacing. I set the visibility of the body to hidden, you'll see why that is relevant soon.
Next, we work on our img-container, we'll be using the after pseudo selector, so we don't have to use an extra div, so we have to set it's positioning to relative, and we set a width of 100%.
We move to the after pseudo-selector, we position absolute, so it's position is relative to that of the img-container. We then give it a width of 0%, so it's hidden at first, a top of 0, and a left of 0 so the animation moves from left to right.
Next, we set the opacity of the image itself to zero, so it doesn't show at first.
Let's dive into the javascript:
You'll need to install GreenSock on whatever you're using (it supports frameworks such as React, Vue, etc. also). Here's the installation guide.
Here's the JavaScript code:
const tl = gsap.timeline();

const rule = CSSRulePlugin.getRule(".img-container:after");

tl.to("body", { duration: 0.5, autoAlpha: 1 })
  .to(rule, { duration: 1, width: "100%", ease: "Power2.ease" })
  .set(rule, { duration: 0, right: 0, left: "unset" })
  .to(rule, { duration: 1, width: "0%", ease: "Power2.ease" })
  .to("img", { duration: 0.2, opacity: 1, delay: -1 })
  .from(".img-container img", {
    duration: 1,
    scale: 1.4,
    ease: "Power2.easeInOut",
    delay: -1.2
  });
Let's walk through this. The first thing we do is declare a timeline, a timeline is like a series of animations you want to occur sequentially, instead of having to write multiple delays. It's a way of stacking animations. We then create a CSS rule so GreenSock can access the pseudo-selector of the img-container, and store that rule in a constant.
Once the above is done, we start the timeline by chaining animations. The first thing we do is to set the visibility of the body to visible, this ensures that the animation starts only when the JS loads, to prevent flashing.
The next thing we do is set the width of :after (which we stored in rule variable) to 100%, so it opens up. Before we set it back to 0 so the image shows, we unset the left and set a right of zero. This ensures that the overlay moves from left to right, we then set the width back to zero.
We then move to the img, and we set it's opacity to 1, so we can see it again. We, however, don't want to wait for the overlay animation to finish running before we set the opacity, so we add a negative delay so it runs 1 second before.
The next thing we want to do is to set the scale of the image to 1.4, then set it back to its default (1). To do that, we use from instead of to because we want to set it from a declared state to its original state. We set a scale of 1.4, then set a negative delay so it starts scaling down beforehand.
After all this, the animation should be complete. i used GreenSock because it's a really good library for writing performant animations, it handles everything for you.
Feel free to ask questions/make reservations in the comment section.
Here's the final code:


Top comments (5)
Hi there! I love your article and would have liked to share it. Unfortunately you're using the old GSAP syntax.
If you update this for future posts we can share your posts!
greensock.com/3/
Thanks for teaching
Hi, Cassie. Could you check again? Made some updates.
Great article. Looks good. Can you do one on getting started with Greensock? I have always wanted to learn it.
Hi, Amaka. That might possibly be my next article. You can check out the docs in the meantime. I'll look for any other helpful resource and send them to you.
Good stuff!