Introduction
In this session, we'll extend our previous code structure to develop a multi-section HTML page that simulates the layout of our future Pac-Man game. This guide builds on foundational concepts from HTML Basics, Semantic Markup, and Forms, leading us toward a single-page interface for our game.
For a deeper dive into structuring a game interface, check out Advanced HTML for Game Development.
Overview
In this session, we will:
- Practice creating a multi-section layout with a clear, logical content flow.
- Introduce three key sections: Introduction, Game Area, and Instructions.
- Enhance the structure for a game interface, keeping in mind future interactivity (e.g., JavaScript-based Pac-Man game mechanics).
- Build upon the code structure from earlier sessions.
Step-by-Step Explanation
1. Extending the Base Layout
We start with the existing structure from our last session, which includes:
- Header (game title).
- Navigation bar (game controls: Start, Pause, Restart).
- Main game area (where the game will render).
- Scoreboard (game metrics like time, score, and lives).
- Footer (branding/copyright info).
Now, we'll expand this layout by introducing multiple sections for better content organization.
2. Adding Multiple Sections
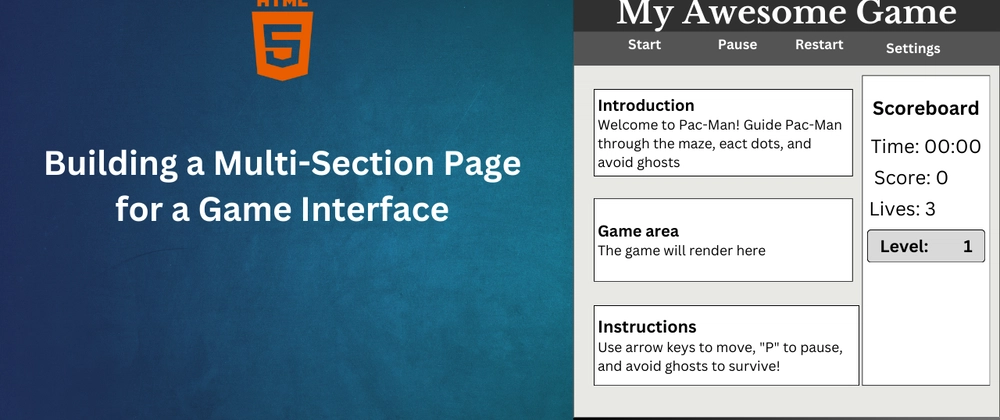
We introduce three new sections:
- Introduction Section: Provides an overview of the game.
- Game Area Section: The main area where the Pac-Man game will eventually render.
- Instructions Section: Explains game controls and mechanics.
3. Organizing Content with Flexbox
To maintain a structured layout, we use a Flexbox container (.content):
- Sections are stacked vertically for readability.
- The scoreboard remains as an
asidefor quick reference.
Code Example
Open your favorite code editor or an online tool like CodePen or JSFiddle and try the code below:
<!DOCTYPE html>
<html lang="en">
<head>
<meta charset="UTF-8">
<meta name="viewport" content="width=device-width, initial-scale=1.0">
<title>Pac-Man Game Interface</title>
<style>
/* Basic layout styling */
html, body {
font-family: Arial, sans-serif;
margin: 0;
padding: 0;
background-color: #f4f4f4;
height: 100%;
display: flex;
flex-direction: column;
}
header, footer {
background-color: #333;
color: #fff;
padding: 10px;
text-align: center;
}
nav {
background-color: #444;
padding: 10px;
text-align: center;
}
nav ul {
list-style: none;
padding: 0;
margin: 0;
}
nav li {
display: inline;
margin: 0 10px;
}
nav a {
color: #fff;
text-decoration: none;
}
main {
display: flex;
flex: 1;
padding: 20px;
}
.content {
flex: 3;
display: flex;
flex-direction: column;
}
section {
background-color: #fff;
padding: 20px;
margin-bottom: 20px;
border: 1px solid #ccc;
}
aside#scoreboard {
flex: 1;
background-color: #fff;
padding: 20px;
border: 1px solid #ccc;
margin-left: 20px;
}
</style>
</head>
<body>
<header role="banner">
<h1>Pac-Man: A Classic Reimagined</h1>
</header>
<nav role="navigation">
<ul>
<li><a href="#" id="startGame">Start</a></li>
<li><a href="#" id="pauseGame">Pause</a></li>
<li><a href="#" id="restartGame">Restart</a></li>
<li><a href="#" id="settings">Settings</a></li>
</ul>
</nav>
<main role="main">
<div class="content">
<section id="intro">
<h2>Introduction</h2>
<p>Welcome to Pac-Man! Guide Pac-Man through the maze, eat dots, and avoid ghosts.</p>
</section>
<section id="gameArea">
<h2>Game Area</h2>
<p>The Pac-Man game will be rendered here.</p>
</section>
<section id="instructions">
<h2>Instructions</h2>
<p>Use arrow keys to move, "P" to pause, and avoid ghosts to survive!</p>
</section>
</div>
<aside id="scoreboard">
<h2>Scoreboard</h2>
<p>Time: <span id="gameTimer">00:00</span></p>
<p>Score: <span id="gameScore">0</span></p>
<p>Lives: <span id="gameLives">3</span></p>
</aside>
</main>
<footer role="contentinfo">
<p>© 2025 My Game</p>
</footer>
</body>
</html>
Hands-On Exercises
1. Customize the Introduction
- Add an image inside the Introduction section.
2. Enhance Instructions
- Create a list of controls using
<ul>:
<ul>
    <li>Arrow Keys: Move Pac-Man</li>
    <li>P: Pause Game</li>
    <li>Space: Start Game</li>
</ul>
3. Modify Layout
- Change the background color or spacing of sections.
Additional Resources
- MDN Web Docs – HTML Sections and Outlines
- CSS Tricks – A Complete Guide to Flexbox
- MDN Web Docs – Using ARIA
Conclusion & Next Steps
This session focused on organizing a multi-section HTML page for our game interface. With a clear structure and accessible layout, we're one step closer to a fully interactive single-page game.
In the next session, we’ll refine this layout with advanced CSS styling and introduce JavaScript interactivity to bring Pac-Man to life!
Happy coding! 🚀

Top comments (0)