
If your starting out with tkinter, it can be overwhelming without prior understanding of GUIs. Whether you are trying to make a simple school project or are trying to create an internal application for your company, Tkinter GUI Builder will make this entire process easier.

PyUiBuilder — An Introduction
PyUiBuilder is a framework agnostic GUI builder tool. Meaning you can use the same GUI builder tool to make GUI’s in tkinter, customtk and others. The best part is that it can generate editable Python code.
Basics of GUI
Before we jump right into the GUI builder it is vital for you to understand some basics of GUI, especially if you have never created a GUI before.
Widgets — widgets are individual components such as labels, buttons, frames etc, that help you build your interface.
Layouts — Layouts define how widgets are arranged within a window or container. They help structure your interface by positioning widgets in a logical and visually appealing way. In Tkinter, you can manage layouts using different geometry managers like:
- pack() — Stacks widgets vertically or horizontally. Watch this video to understand how tkinter pack geometry works
- grid() — Arranges widgets in a table-like structure using rows and columns.
- place() — Positions widgets at exact coordinates. Choosing the right layout method ensures your interface adapts well to different window sizes and screen resolutions.
Here's a video to follow along
Building with PyUiBuilder
Lets start by trying to replicate the Signup form you see above.
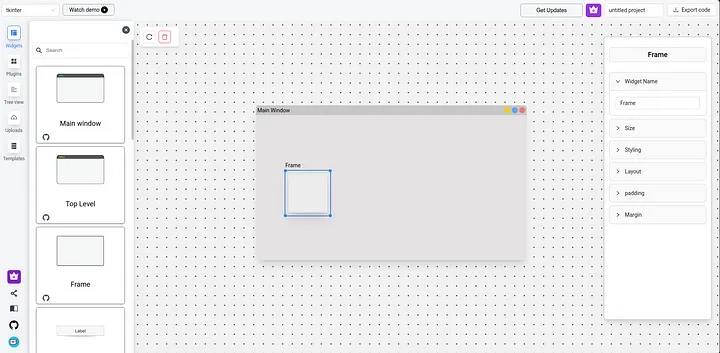
step 1: From the sidebar open the widgets tab and drag and drop a frame into the main window.
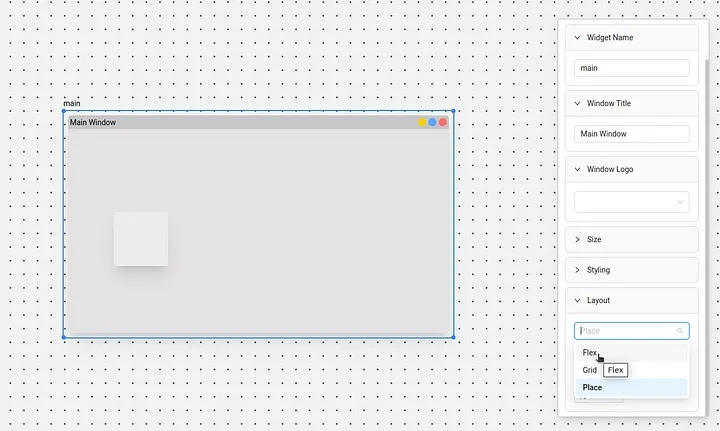
step 2: By default all the widgets use place layout, meaning they will be added where you drop them, but this won’t be responsive, so we’ll change the flex/pack, by clicking on the main window and from the righ toolbar layout dropdown
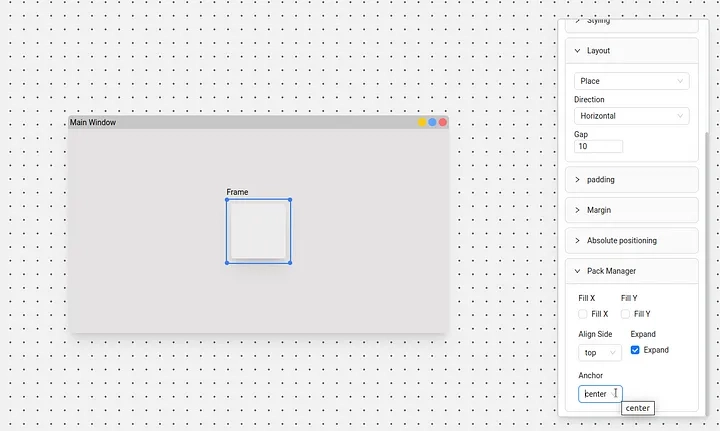
step 3: While this is great, the frame is not at the top, but we need to center it. To center it click back on the frame and from the toolbar go down to Pack Manager and click on expand and set anchor to center.
step 4: Now lets set the frame layout (from layouts dropdown) to be flex and add a label widget.
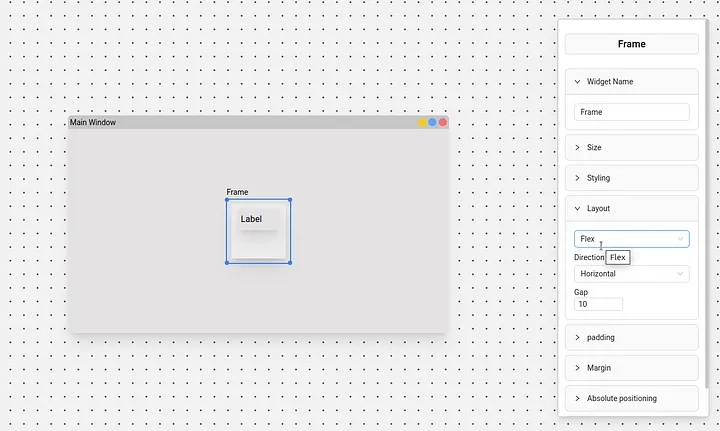
step 5: Now select the label widget and change the label to signup. We can also center this text by going under the styling accordion and changing Text align to center

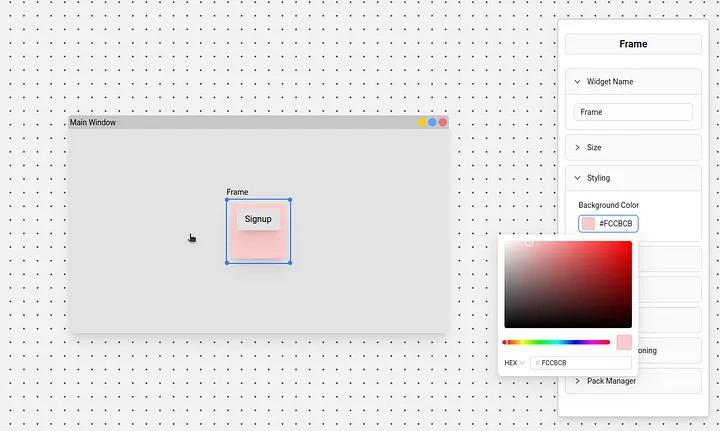
step 6: Lets change the background color of the base Frame so there is much more contrast.
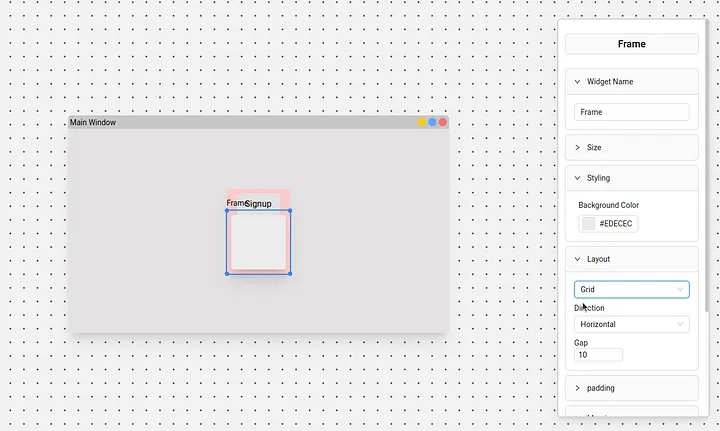
step 7: Now let us add another frame inside that base frame and set its layout to Grid.
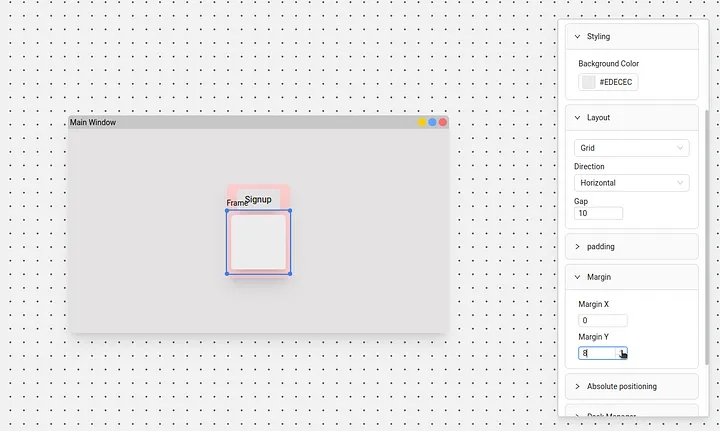
step 8: Let’s give it a margin in the y direction so there’s a space between Frame and Signup label.
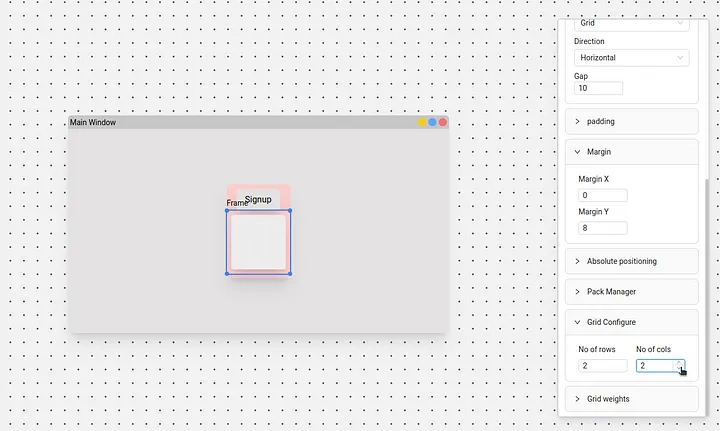
step 9: Let’s no configure the Frame’s grid to be 2 rows and 2 cols.
step 10: Add a 2 labels and 2 Entry widget in the order label -> Entry -> Label -> Entry and you’ll have the following.
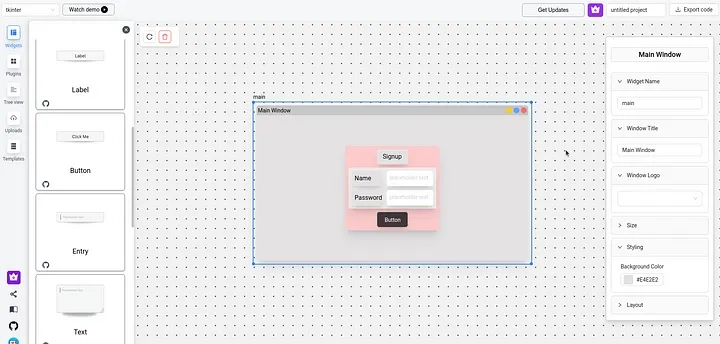
step 11: To finish it off add a button in the main Frame and vola you have a sign up form. Now all you have to do is click on Export code button on top right corner and execute the code and you’ll have something like below.
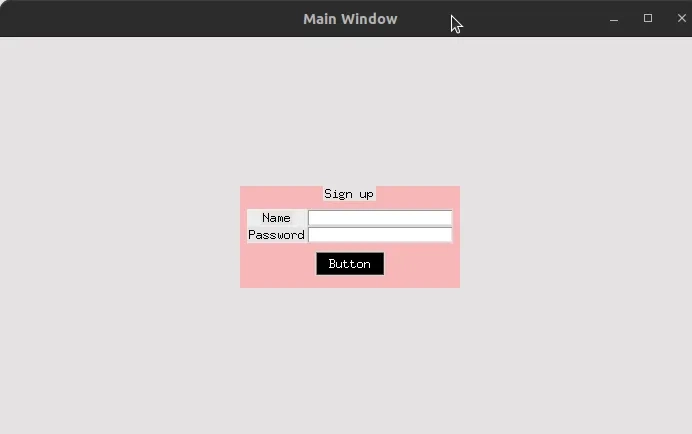
(Note: tkinter is OS dependent, so if you are on Mac, or windows you’ll see something a bit more different than if you are on a Linux.)
That’s all for now. More tutorial on PyUiBuilder will soon be added. Until then feel free to experiment and try building the UIs
If you have questions or need help her’s an invite to join the Discord server for PyUiBuilder

Top comments (0)