
Wordclouds are a quick, engaging way to visualise text data. In Python, the simplest and most effective way to generate wordclouds is through the use of the Wordcloud library. In this tutorial, I'll explain how to generate wordclouds using the Wordcloud library, showing how to customise and improve your visualisations.
This tutorial was written using using Jupyter notebooks, Python 3.7.5 and Wordcloud 1.6.0; things might behave slightly differently if you're in a different IDE or using different versions of the language/library.
You can find a complete copy of the code for this tutorial on Github, along with the text data and images used throughout.
Disclaimer
Every statistician I have ever met requires me to inform you that wordclouds are not useful for analysis because they are simplistic and often misleading; I recommend this excellent article which goes into more detail on the problems with the form.
The criticisms of wordclouds are absolutely valid, but that's not to say that wordclouds are pointless. While I wouldn't recommend them as a method of analysis or information extraction, they're a useful tool for presentation - people seem to find them fun and engaging, and they're a good thing to have on initial pages of presentations, etc. As long as you focus on using them for aesthetic, rather than analytic, reasons, they have a place.
Data source
In order to demonstrate the possibilities of wordclouds, some text data is required. For the purposes of this tutorial, I've chosen to use the text of Addie's Husband or Through Clouds to Sunshine, a novel by Mrs. Gordon Smythies, one of the most popular and most forgotten of Victorian novelists.
You can find a copy of Addie's Husband on Amazon or on Project Gutenberg. It's the affecting story of Adelaide, a young woman with bad lungs but a good heart. I accessed the text from Project Gutenberg, using the excellent Gutenberg Python library.
In order that this tutorial can focus almost entirely on wordclouds, rather than text cleaning, I've already processed the novel's full text into a more consistent form. To be specific, the following steps have been carried out:
- Removal of all metadata, including chapter headings, leaving just the prose
- Conversion of all text to lowercase
- Removal of all punctuation, special characters, and numeric values
- Removal of stopwords and all words with fewer than 3 letters
- Lemmatisation (converting each word to its dictionary form)
- Removal of all proper nouns I found on a cursory search
The end result of this process is a text file - adelaide.txt - containing a standardised and simplified form of Addie's Husband.
Required libraries
In order to work with the Wordcloud library effectively, you require several imports. Obviously the Wordcloud library itself, but also it helps to have libraries to deal with text processing and images.
from collections import Counter  # Count the frequency of distinct strings
from wordcloud import WordCloud, ImageColorGenerator  # Generate wordclouds
from PIL import Image  # Load images from files
import numpy as np  # Convert images to numbers
Loading and preparing the data
As already mentioned, the data for this tutorial is stored in a .txt file. The first step is simply to load the file's data.
# Load the data from a file
with open("./resources/adelaide.txt", "r") as file:
    text = file.read()

# View the first 200 characters of the text

text[:200]
'soldier sailor tinker tailor policeman plowboy gentleman lift lovely head dear marry gentleman miss absorbed enjoyment ruddy ribstone pippin turn blooming freckle face speaker answer pleasantly though'
Our current text is perfectly suitable for wordcloud generation - given raw text, the Wordcloud library will automatically process it and generate a wordcloud.
However, text can also be provided in the form of a frequency dictionary, in which the key:value pairs have the form word:frequency. I find this conceptually neater, as it allows you more explicit control over the processing steps before generating the cloud.
# Split the text into a list of individual words

tokens = text.split(" ")

# Count the frequency of each word

word_counts = Counter(tokens)

# Display the count for a single word.

word_counts["love"]
133
Basic wordclouds
In order to generate and display the most basic of wordclouds, very little is required. You need a WordCloud object, and then to call .generate() on it, passing a string as an argument.
Finally, to display the cloud, .to_image().
fog_machine = WordCloud()  # Create a wordcloud generator

fog_machine.generate(text)  # Generate the cloud using raw text

fog_machine.to_image()

Our basic wordcloud is rather small, and will require some customisation to improve.
In the code below, I've generated a slightly better one, by using the following parameters:
-
widthandheightto increase the size of the cloud's canvas area, and thus image quality -
min_font_sizeto ensure that no words are too small to read -
background_colorto demonstrate that it doesn't have to be black if you don't want it to -
colormapto choose a specific colour palette. Any valid Matplotlib colormap name is acceptable.
I've also chosen to generate the cloud using the frequency dictionary this time, not the raw text; that doesn't really have an effect on the style, it's just to demonstrate how you would do it.
# Create a wordcloud generator with some better defaults

fog_machine = WordCloud(width=800,
                        height=600,
                        min_font_size=14,
                        background_color="#333333",
                        colormap="spring")

# Generate the cloud using a frequency dictionary

fog_machine.generate_from_frequencies(word_counts)

fog_machine.to_image()  # Display the cloud

It's not the best thing ever - I don't really have much of a talent for visual design - but I think it's clearly an improvement.
Shaped wordclouds
Once you can create wordclouds with whatever colours you like, the next step is to shape the wordcloud, changing it from a boring rectangle into something appropriate to the content.
This is done by using an image as a mask; you provide the WordCloud object a numerical representation of an image with a white background, and the wordcloud will only draw words in positions where the image is not white.
As Addie's Husband is a romance, it seems appropriate that the mask we use should be a heart. The image I'm using was sourced from Template Trove.
image = Image.open("./resources/heart.jpg")  # Load the image from a file

image  # Display the image

Once the image is loaded in, we need to convert it into a numeric form, in which each pixel is represented as an array of three integers; the WordCloud object will then only draw words on top of pixels in the image which are not equal to [255, 255, 255].
mask = np.array(image)  # Convert the image to a numeric representation (a 3D array)

mask[0][0]  # Display the top left pixel of the mask, which is white
array([255, 255, 255], dtype=uint8)
After creating the mask, you create the wordcloud almost exactly as before, just passing in the mask parameter.
One key point to note is that masked wordclouds ignore the width and height parameters, instead sizing themselves based on the dimensions of the mask, so there is no need to include them.
# Create a wordcloud generator with a mask

fog_machine = WordCloud(mask=mask,
                        min_font_size=14,
                        colormap="Reds")

# Generate the cloud using a frequency dictionary

fog_machine.generate_from_frequencies(word_counts)

fog_machine.to_image()  # Display the cloud

Shaping wordclouds like this works best with simple images, as otherwise the core shape is not clear. By default, it also only works with images that have a fully white background - transparent backgrounds, for example, are treated as non-masked, and the wordcloud occupies the full rectangle again.
It is possible to convert any image so that it has the correct structure for wordclouds, but doing so is rather beyond the scope of this tutorial; we're focused on wordclouds today, not image processing.
Shaped & Coloured wordclouds
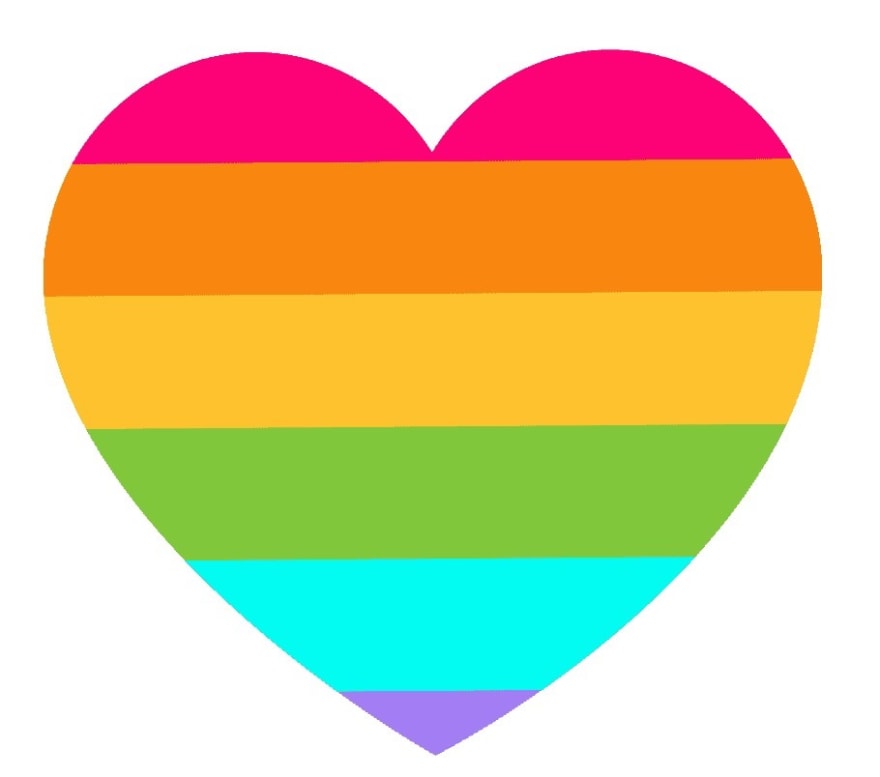
We can both shape and colour a wordcloud based on an image, so that the words not only form the rough shape, but that each word is coloured as the image is in the same place. For this task, we'll use another heart, this one rainbow-coloured, and sourced from PNGfuel.
It's important to note here that this is a relatively crude fitting - a word that spans across several colour changes on the image will still only be in one colour, and you're not going to get lines as crisp and clear as the image itself. Again, this works best with simple images, ideally with clearly contrasting colours.
The first step is to load in an image, as before.
image = Image.open("./resources/rainbow_heart.jpeg")  # Load the image from a file

mask = np.array(image)  # Convert the image to a numeric representation

image  # Display the image
Once you've created the mask, you can then use it as an input to the ImageColorGenerator class, which is also part of the WordCloud library. This generates colours based on an image, and then can be used to colour words to match.
image_colours = ImageColorGenerator(mask)
You can then pass the ImageColorGenerator to a WordCloud object using the color_func parameter.
In order to ensure that our wordcloud roughly matches the colours of the image, I've set the max_words argument to 2000. This means that the WordCloud object will use more words than the default of 200, which will result in smaller words and - hopefully - clearer bands of colour.
# Create a wordcloud generator with a mask

fog_machine = WordCloud(mask=mask,
                        max_words=2000,
                        color_func=image_colours)

# Generate the cloud using a frequency dictionary

fog_machine.generate_from_frequencies(word_counts)

fog_machine.to_image()  # Display the cloud

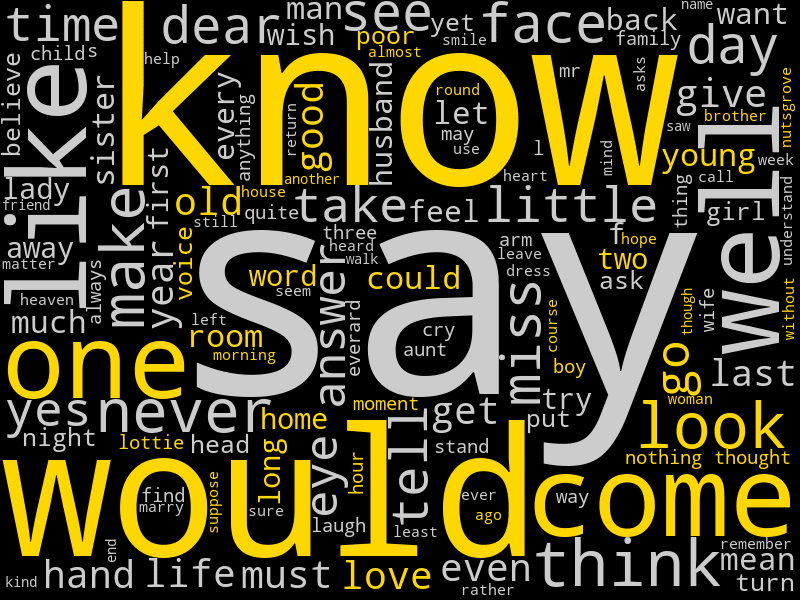
Custom colour functions
It is sometimes useful to have full control over the colours of words, so that you can highlight particular words or groups of word; you might, for example, wish to show positive words in one colour and negative words in another.
We can define a custom colour function to do this, passing it to the color_func parameter just as for mask colours. In the code below, I've defined a very simple one - return gold for words with the letter "o" in, grey for every other word - but you can customise this function to do whatever you want.
When the WordCloud object calls the function, it passes it a lot of information; this means that - when defining your custom function - it's better to have the parameters as *args, *kwargs, as then you can pick and choose which arguments to later care about. The word itself is always passed as the first argument, or args[0].
# The custom function

def custom_colours(*args, **kwargs):
    word = args[0]  # First argument is the word itself
    if "o" in word:
        return "#FFD700"
    return "#CCCCCC"

# Create a wordcloud generator with a custom color_func

fog_machine = WordCloud(width=800,
                        height=600,
                        min_font_size=14,
                        color_func=custom_colours)

# Generate the cloud using a frequency dictionary

fog_machine.generate_from_frequencies(word_counts)

fog_machine.to_image()  # Display the cloud
Saving wordclouds
You can save a wordcloud to a file with a single line of code.
fog_machine.to_file("wordcloud.png")
The header image
The header image for this tutorial was generated using Python and the techniques we've so far discussed. The code to create that wordcloud is below.
# One more wordcloud for Addie - the book does have a happy ending.
# The image is sourced from freepik.com.

image = Image.open("./resources/romance.jpeg")  # Load the image from a file

mask = np.array(image)  # Convert the image to a numeric representation

image_colors = ImageColorGenerator(mask)

# Create a wordcloud generator with a mask & colour function

fog_machine = WordCloud(mask=mask,
                        background_color="white",
                        max_font_size=28,
                        max_words=6000,
                        color_func=image_colors)

# Generate the cloud using a frequency dictionary

fog_machine.generate_from_frequencies(word_counts)

fog_machine.to_image()

Conclusions
The final wordcloud we've created is a lot more complex than the previous ones; with a max of 6000 words (almost as many as there are unique words in Addie's Husband), it takes a lot longer to generate, and the text is noticeably smaller. However, the end result is (in my opinion) worth the effort. Though the words themselves are now somewhat hard to read (always an issue with big wordclouds), it's an image that expresses one of the main ideas in Addie's Husband, using words from Addie's Husband, and I think that's neat.
The Wordcloud library is stuffed with extra tweakable parameters, and there's a lot more you can do to refine things than is covered in this tutorial. However, hopefully this gives some idea of the possibilities and the code to move towards them. The module documentation has many more examples.
There are a couple of caveats with wordclouds that should always be borne in mind. As already mentioned, it's easy to make confusing or misleading word clouds, because the focus on frequency ignores any information from the text that was contained in more than one word; "not happy" and "happy" are both going to make the word "happy" appear larger.
Even if your wordclouds manage not to be misleading, that still doesn't make them meaningful; again, the focus on frequency ignores context and significance. Even with stopwords removed, it's clear from the wordclouds generated in this tutorial that not all words are equally informative about what's actually happening in Addie's Husband. The word "say" is frequent, but would be equally so in almost any long narrative text. Arguably, the elaborate style of Victorian prose means that you'll get more frequent-but-not-significant words than a comparable modern text, but unless you do heavy cleaning, wordclouds will always contain some functional words that get in the way a bit.
With the above said though, I still think wordclouds are a useful thing to be able to generate; as long as you bear the caveats in mind, and don't use them too heavily as actual analysis tools, they're an accessible and appealing visualisation that people respond to well.
You can find a complete copy of the code for this tutorial on Github, along with the text data and images used throughout.
If you create any wordclouds using this tutorial, I'd love to see them. Send them to me via the links in my author bio, or tweet them to me at @peritract.

Top comments (2)
amazing work.
Thank you!