In this tutorial, you will learn how to build an app using Remix and use Netlify Graph to talk to third-party APIs. We will use Netlify Graph to fetch data from GitHub and show the user a collection of repository issues. Along the way we will learn about the tools chosen and why they are a great fit for our use case.
Source code and demo
The source code for this app can be found in this repository. Add an issue to the repository (or add a comment to an existing issue) to see the changes get reflected instantly on the demo app.
What is Remix
Remix is a full stack web framework that let's you focus on the user interface and work back through web fundamentals to deliver a fast, slick, and resilient user experience. Remix is great for our use case because it generates fast responding pages on the server so we can get the latest data from GitHub each time the user hits our pages.
What is Netlify Graph
Netlify Graph provides developers with a GraphQL-based approach to integrating with third-party APIs without needing to operate a seperate GraphQL server. Developers do not need to spend time learning the API structure of each provider and writing code to piece it together. This is great for our use case because we do not want to worry about how to authenticate with GitHub as Netlify will handle this for us.
Getting Started with Remix
Create a new Remix site. Choose "Netlify" when prompted:
npx create-remix@latest
Install dependencies
We will need to install some dependencies for our app to work. Change directory to your new project and run:
npm install slugify marked
- slugify : Generates URL-friendly paths based on a text string. We will use to generate URLs based on the title of our GitHub issues.
- marked : Markdown parser to convert Markdown to HTML. We will use it to render the GitHub issue body onto our HTML page.
Create a GitHub Repository
You will want to create a new repository in GitHub and commit the code that was generated in the earlier step. This will be the repository that we will be fetching data from using Netlify Graph.
cd [name of project]
git init
git add .
git commit -m "first commit"
git remote add origin https://github.com/your-username/name-of-project.git
git add push -u origin master
Install the Netlify CLI
Install the latest version of Netlify CLI and log into your Netlify account:
npm i -g netlify-cli@latest
ntl login
Change directory to your new project (if you have not done so already) and create a new Netlify site:
cd [name of project]
ntl lnit
Start Development Server
Start the Netlify Dev Server with the --graph flag:
ntl dev --graph
This will start up a local development server that we will use to build our app. It will also start up a Netlify Graph session that we will use in the next section.
Create a GraphQL query with the Graph Explorer
Select your site from your Netlify team dashboard and then select “Graph” from your Netlify site dashboard menu. Click on "Connect API or service".
Netlify Graph supports a handful of API providers that we can connect with:
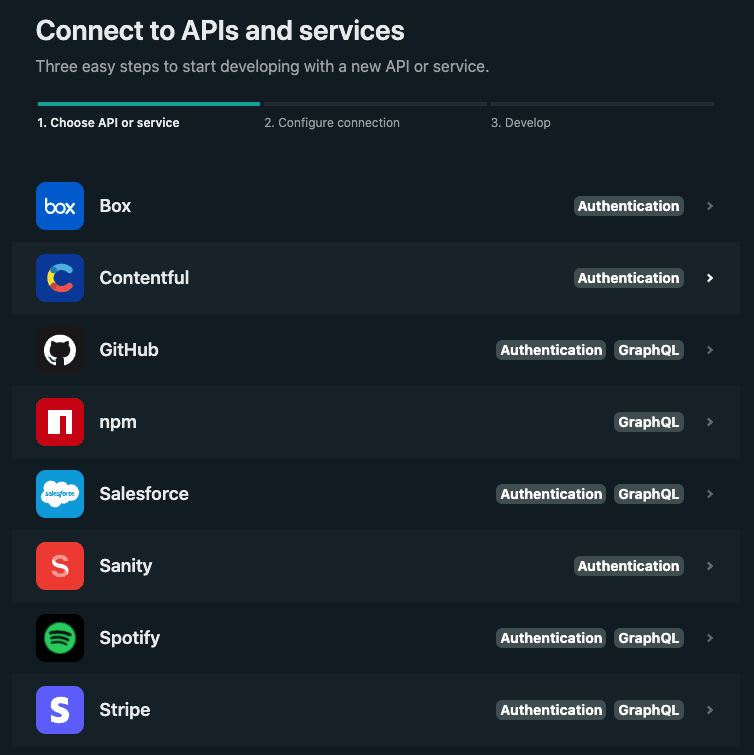
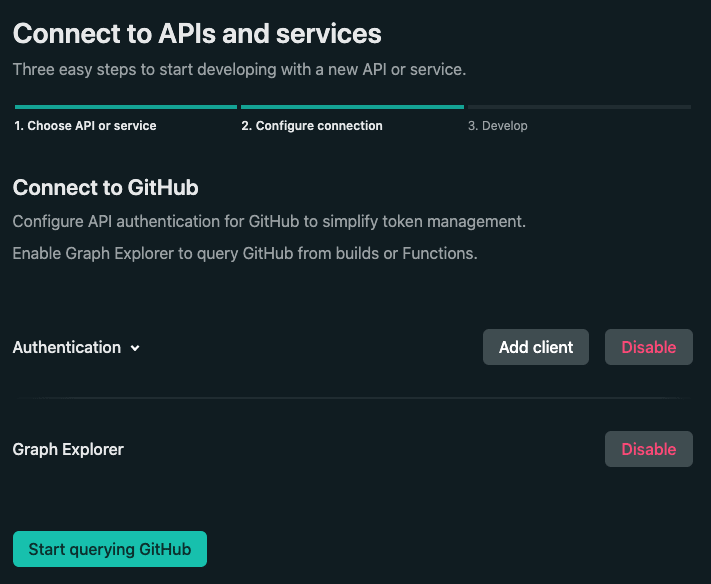
We are going to connect to GitHub. Select "GitHub" from the list of providers and you will need to enable both "Authentication" and "Graph Explorer". Then continue with "Start querying GitHub":
Once you have selected your open session (that was created when you started the dev server), you will be presented with a Graph Explorer. This will allow you to query the GitHub API for the data you are interested in fetching. For our use case, we will want to fetch the GitHub repository issues and their comments.
Below is a GraphQL query with Issues as its operation name. Copy the below snippet and paste it in the explorer.
query Issues($owner: String = "petermekhaeil", $name: String = "netlify-graph-remix") {
  gitHub {
    repository(name: $name, owner: $owner) {
      issues(first: 100, states: OPEN) {
        edges {
          node {
            id
            body
            title
            createdAt
            url
            comments(first: 100) {
              nodes {
                body
                createdAt
                id
                author {
                  avatarUrl
                  login
                }
                url
              }
            }
          }
        }
      }
    }
  }
}
After clicking "Save Changes", you can head back to your IDE and you will notice some changes that have been made to your workspace. A new netlifyGraph folder has appeared:
netlify/functions/netlifyGraph/index.d.ts
netlify/functions/netlifyGraph/index.js
netlify/functions/netlifyGraph/netlifyGraphOperationsLibrary.graphql
netlify/functions/netlifyGraph/netlifyGraphSchema.graphql
Netlify Graph has generated code for us to use to fetch the data from our app.
Fetching Data from Remix
The Remix app we created earlier came with a demo index page. We can remove it and replace the content of ./app/routes/index.jsx with the code below.
import { Link, useLoaderData } from 'remix';
import slugify from 'slugify';
import NetlifyGraph from '../../netlify/functions/netlifyGraph';

export const loader = async () => {
  const { data } = await NetlifyGraph.fetchIssues(
    { owner: 'petermekhaeil', name: 'netlify-graph-remix' },
    { accessToken: process.env.ONEGRAPH_AUTHLIFY_TOKEN }
  );

  return data.gitHub.repository.issues.edges.map(({ node }) => {
    return {
      ...node,
      slug: slugify(node.title).toLowerCase()
    };
  });
};

export default function Index() {
  let data = useLoaderData();

  return (
    <div>
      <h1>Issues</h1>
      <ul>
        {data.map((item) => (
          <li key={item.id}>
            <Link to={item.slug}>{item.title}</Link>
          </li>
        ))}
      </ul>
    </div>
  );
}
Walking through the code:
The
loaderfunction is a built-in data loading Remix API. Each Remix route is served from the server and each route can fetch external data before generating the HTML and returning it back to the user. It is in this function that we will fetch data from Netlify Graph and use it in the React template.NetlifyGraph.fetchIssuesis the generated function from Netlify Graph that we will use to fetch the data from GitHub. You can replace the value ofownerandnameto your own repository, or use the default value if you wish.The
useLoaderDatahook from Remix will return the data from theloaderfunction so we can use it in the React template.
Refresh your browser and you will see Remix rendering the list of issues from the GitHub repository.
There are two things we should note from the above code:
Authentication will be taken care by Netlify regardless of which API provider you decide to work with. This is an awesome feature of Netlify Graph because it allows us not to worry about the structures of the third-party APIs. Netlify takes care of this by handling the value of the
ONEGRAPH_AUTHLIFY_TOKENenvironment variable.Netlify Graph generated the JS function with the name
fetchIssuesbecause the GraphQL query that we wrote had the operation name asIssues. We can have many operations in the GraphQL Explorer and Netlify Graph will generate a JS function for each one with unique names based on the operation name.
Dynamic Routes in Remix
Instead of creating each page manually by hand, Remix can create a route for each of the GitHub issue dynamically.
We can create a dynamic route by creating ./app/routes/$slug.jsx:
import { useLoaderData } from 'remix';
import NetlifyGraph from '../../netlify/functions/netlifyGraph';
import slugify from 'slugify';
import { marked } from 'marked';

async function getLoaderData(title) {
  const { data } = await NetlifyGraph.fetchIssues(
    { owner: 'petermekhaeil', name: 'netlify-graph-remix' },
    { accessToken: process.env.ONEGRAPH_AUTHLIFY_TOKEN }
  );

  const post = data.gitHub.repository.issues.edges.find(({ node }) => {
    return slugify(node.title).toLowerCase() === title;
  });

  return post?.node;
}

export const loader = async ({ params }) => {
  const post = await getLoaderData(params.slug);

  const html = marked(post.body);

  return {
    ...post,
    slug: params.slug,
    html
  };
};

export default function PostSlug() {
  const post = useLoaderData();

  return (
    <div>
      <h1>{post.title}</h1>
      <div dangerouslySetInnerHTML={{ __html: post.html }} />
    </div>
  );
}
Walking through the code:
getLoaderDatawill fetch the GitHub data via Netlify Graph and filter for the GitHub issue we want by the value oftitle.We have been introduced to
paramsin theloaderfunction.paramscontain the dynamic key that is attached after the$in the filename. In our example, the filename$slug.jsxwill returnparams.slugwith the value from the URL. We will use this value as the title of the GitHub issue we want to display on this page.
Now if you refresh the page and click on any of the GitHub issues, you'll be redirected to a page with the full issue content. An example of a dynamic route from the demo app:
What we learnt today
Each Remix route supports a loader function that is called on the server before rendering. It provides data to the route and can be used in the React template.
Remix supports dynamic routes by using the
$filename convention.Expected errors can be caught in Remix and we can render user-friendly messages using a CatchBoundary.
Netlify Graph uses a Graph Explorer to query the data we need and is synced with the session opened by the CLI.
Netlify Graph generates code that we can use to fetch data from a third-party API without needing to worry about authentication or understanding the API structure.

Top comments (0)