The first thing you need to do when you are gonna make an Laravel API, is to install composer, you can get composer here.
after you finish install composer, now you can create a new laravel project, by typing bellow code in command prompt.
composer create-project laravel/laravel laravel_api_1
description:
laravel_api_1 is the project name, so you can change it to your desire.
and then you can go to the directory.
cd laravel_api_1
you can try to run the project, to test wether laravel are successfully installed or not, by typing this.
php artisan serve
so if you go to browser now, and type http://localhost:8000, you will see the homepage of your freshly installed project.
Next thing you need to do, is to settings the database in your env file, for this tutorial im gonna use sqlite database. you can find .env file in your root project directory, Change it to
DB_CONNECTION=sqlite
DB_HOST=127.0.0.1
DB_PORT=3306
and then you go to database directory, and create database.sqlite.
if you want to use another database, such as mysql, sqlserver, that is fine you can change it as you wish.
after you set your database, now we need to make a new table. type this in your comman prompt.
php artisan make:model Product --migration
so you can see in the app/models there is a product.php file, and you can also find the migration file inside database/migration folder that has the name create product table.
inside the migration file that been generated , you can see that there is two function, it is up and down, up is for code that we are gonna run, and down is the code that will be run when we did a rollback migration. change the schema in the up function like bellow code.
Schema::create('products', function (Blueprint $table) {
            $table->id();
            $table->string('name');
            $table->string('slug');
            $table->string('description')->nullable();
            $table->decimal('price',5,2);
            $table->timestamps();
        });
description:
nullable() : to make the field optional, and can be null or empty when you added a new data.
and then run bellow code in the command prompt, to apply the migration that we have created.
php artisan migrate
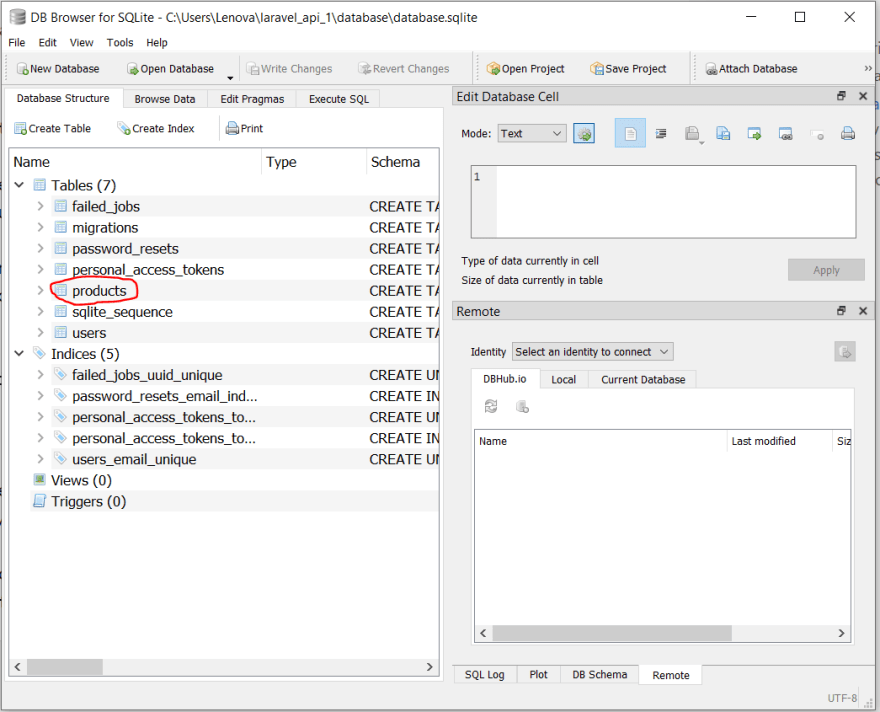
you can use db browser for sqlite, to browse the database that we have been created. you can download it in here
as you can see bellow, i can see the table have been created successfully.

the other bunch of table that you see in the database, are built in or default table by laravel.
ok now lets make some route, go open file api.php inside routes table.
Route::get('/products', function(){
    return Product::all();
});
save that, and you can test the route using postman.
to download postman you can visit here.
inside a postman app, enter the request url.
http://localhost:8000/api/products
and its gonna be return an empty data because we obviously didnt have any data yet.
as you can see in the above picture, the square bracket are representation of empty data, and the "200 ok", means that the route is worked, and you successfully access it.
now lets make a post route. Before we make it,we should add a fillabel property inside Product model. Open the Product.php inside app/models. and add the following code.
class Product extends Model
{
    use HasFactory;
    protected $fillable = [
        'name',
        'slug',
        'description',
        'price'
    ];
}
Ok now we can create our post route inside routes/api.php
Route::post('/products', function(){
    return Product::create([
        'name'=> 'Product One',
        'slug'=> 'product-one',
        'description'=> 'This is product',
        'price' => '99.99'
    ]);
});
lets test it in postman, choose the method post, with the same url.
as you can see in the above image, it is state that 201 created, so it means the data has been created successfully, and you can see the return data that been saved in the bellow section.


Top comments (2)
Where is the Sanctum Authentication?
use App\Models\Product;
api in routes folder