
Puppet Edge Workflows, available with Puppet Enterprise Advanced, provide the orchestration tools to define multistep workflows to run against your infrastructure. This allows Puppet experts to create workflows that Ops teams can run without having deep Puppet language knowledge or the underlying infrastructure. The goal with workflow definitions is to provide your teams with the ability to do common automation tasks with a few parameters, configured and controlled by a small team of experts who manage the automation solution.
Why Introduce Workflows?
Orchestration across all of your systems is a complex task. Infrastructure automation doesn’t end when your team first creates the infrastructure, either. That infrastructure continues through a lifecycle of operations, maintenance, scaling, and (eventually) teardown. Infrastructure experts often design sophisticated automation during Day 1, and then the Day 2 operations team is left to run these tasks even though some of them may not have the same depth of Puppet expertise as those who built the automation.
Puppet Edge Workflows builds upon the foundation of Puppet Enterprise plans, tasks, and orchestration tooling and adds capabilities to support network devices and running playbooks in Puppet Edge. This new orchestration layer can be used by infrastructure architects to package complex, multistep runbooks into reusable, parameterized workflows. These workflows give your Ops team the ability to accomplish daily tasks reliably and securely—without having to understand the underlying Puppet logic or even how the automation accomplishes the task.
This separation of concerns enables smoother handoffs between teams, reduces human error, and supports a more consistent handling of critical infrastructure tasks. Puppet Edge Workflows also help to centralize your orchestration and continuously iterate in a single source of truth.
How It Works: Creators and Users
Puppet Edge workflows are built on Puppet Enterprise tasks and plans, which orchestrate actions across your infrastructure. The workflow model introduces two key roles:
The Creator
- Typically, a developer, infrastructure engineer, implementation partner, or automation architect.
- Designs the workflow using Puppet tasks and plans.
- Defines the parameters required to run the workflow.
- Often involved early in the project life cycle but not in day-to-day operations.
The User
- Often a site reliability or operations engineer, system administrator, or environment administrator.
- Is on the front line, receiving tickets that require operations on existing environments and systems.
- Runs the workflow by supplying the required parameters.
- Doesn’t need to understand Puppet internals—just the goal of the workflow.
This model allows workflows to be reused, delegated, and transferred across teams and organizations, supporting long-term operational scalability.
Working with Workflows
- Define the parameters:
- Creator configures parameters that are used in the workflow.
- Some parameters will be global constants, defined by the creator. The user won’t have to specify these. An example might be a host name for an external service.
- Some parameters will be arguments that users provide when the workflow is run. The creator defines the set of inputs that will be requested from the user.
- Define the workflow:
- Creator defines a multistep plan that achieves a goal.
- The creator uses the defined parameters in each step. The parameters can include target nodes, actions, application versions, environment names, and more.
- User runs the workflow:
- User selects the workflow to run.
- User provides any required values for runtime parameters.
- Puppet Enterprise runs the steps in sequence, managing orchestration, error handling, and logging.
Real World Use Cases
Here are some practical examples of the types of jobs you might want to package as workflows:
Scenario 1: Providing Access to an Environment
In this scenario, the user wants to add a new environment admin or a developer to all systems in an environment, including the network devices. The user might want to specify the environment and the level of access, and the workflow would then grant the access to all systems.
Scenario 2: Patch Day on a Load-Balanced Architecture
In this scenario, the workflow might redirect traffic away from a load balancer, patch all backend servers behind the load balancer, and then restore the traffic flow. Separate workflows might be defined for different environments or node groups. These workflows can be packaged up to require minimal input from the operations team so that patches are automatically applied when the workflow is run.
Scenario 3: Updating an Application on a Cloud-Hosted System with Ansible Playbooks
In this scenario, the user wants to update an application on a cloud service. The user automates the process with Ansible playbooks to make use of the Puppet Edge Playbook Runner module and their existing library of automation playbooks. The end user can use a completely packaged-up runbook to ensure that the target cloud system is updated without having to provide parameter values.
How to Build a Puppet Edge Workflow
This tutorial will walk you through the process of creating a workflow within Puppet Enterprise Advanced. The workflow will have three steps that will update an nginx application service by stopping and starting the service and using the Playbook Runner module to update the application. You will learn how to:
- Create a three-step workflow definition in Puppet Enterprise Advanced.
-
Define constant parameters for the workflow so users do not have to provide them.
💡Tip: A parameter type of constant means that the specified value is embedded in the workflow definition and cannot be changed.
Configure steps to use the defined constant parameters.
ℹ️ Prerequisites:
- You have Puppet Enterprise Advanced installed and running.
- You have the Playbook Runner module installed and enabled.
- Note that as of Puppet Enterprise 2025.6, the Playbook Runner module is preinstalled and requires only a valid license. For other versions, you must install the Playbook Runner module.
- You have deployed your playbook YAML file to the host running your Playbook Runner. You can use any playbook, or this sample provided on GitHub, which updates an nginx application using yum.
- ⚠️ Restriction: If you use the sample playbook, your target system must support yum updates of applications. Your system might use apt instead, or another method, so please update the playbook to fit your learning needs.
Create a Workflow Definition
- Log in to Puppet Enterprise Advanced.
-
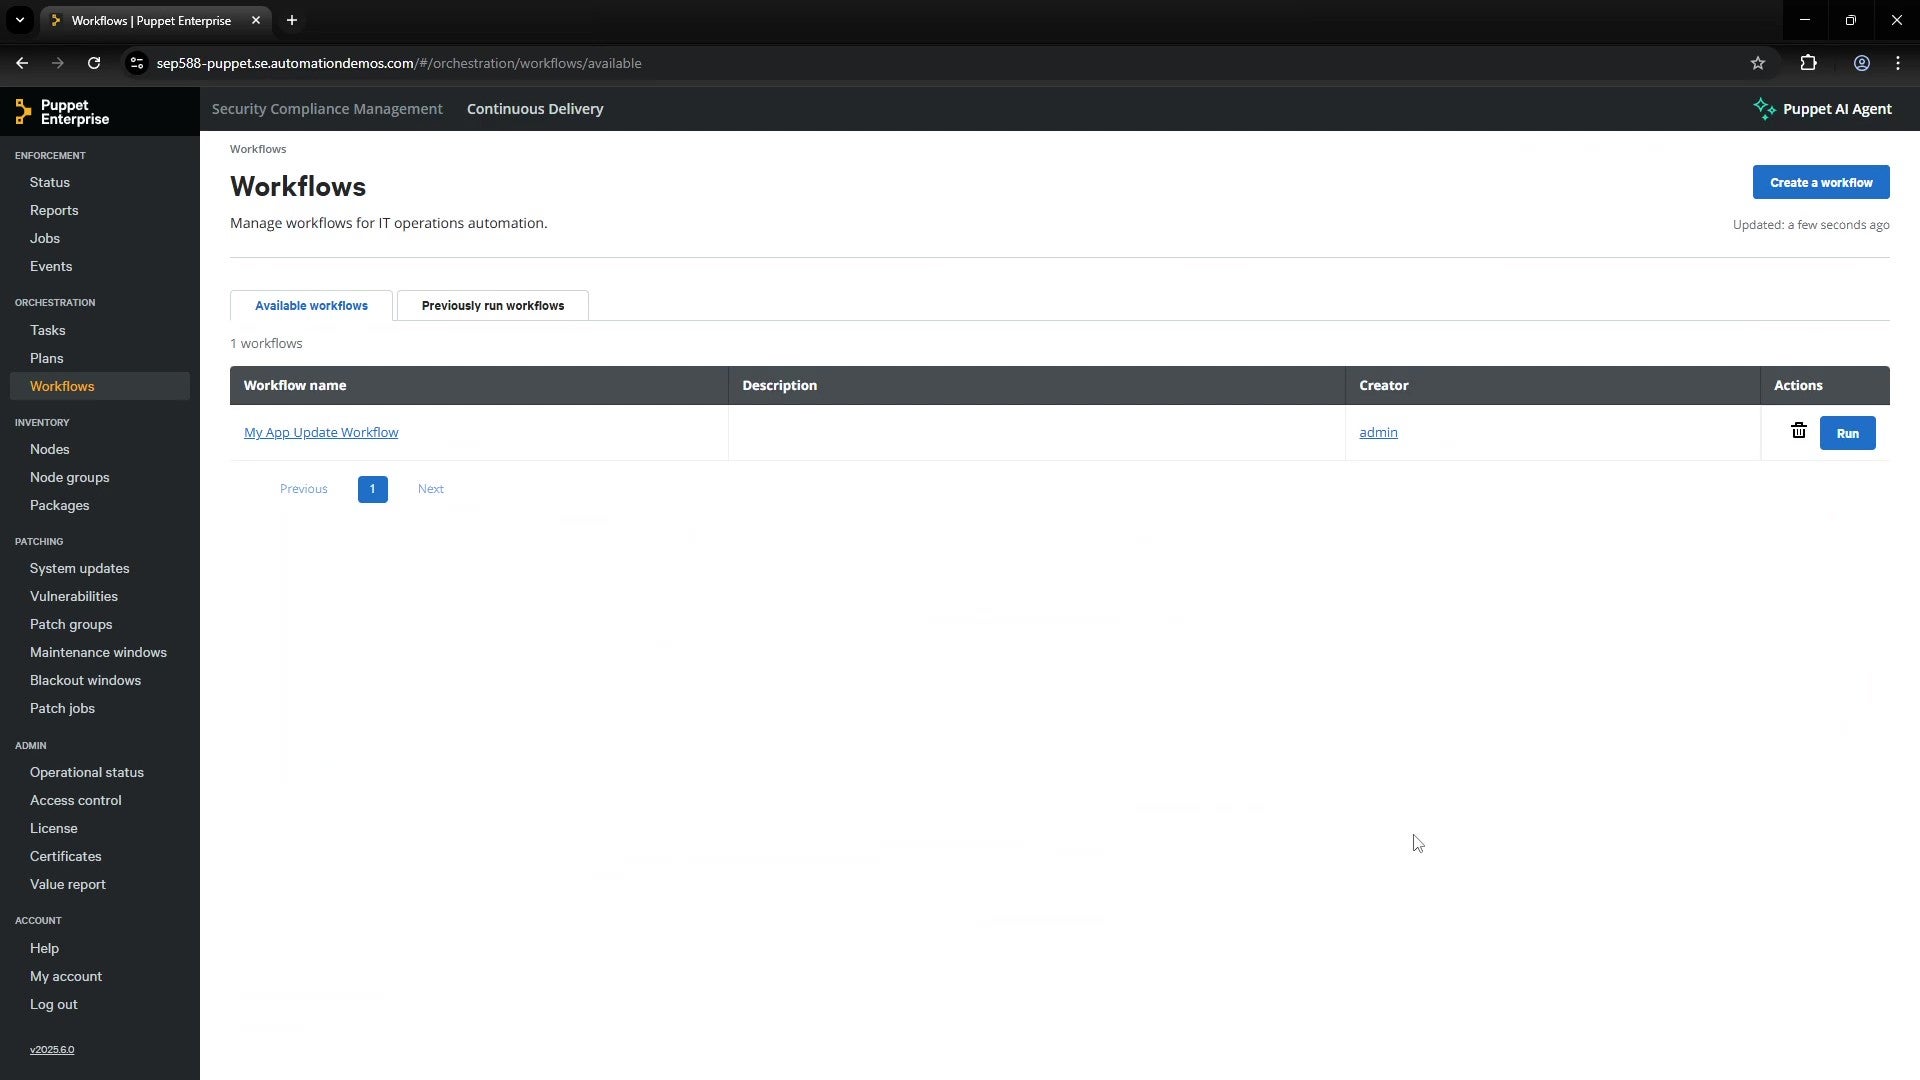
From the Puppet Enterprise navigation pane, click the Workflows link to navigate to the workflows management screen. Any previously created workflows are displayed here.

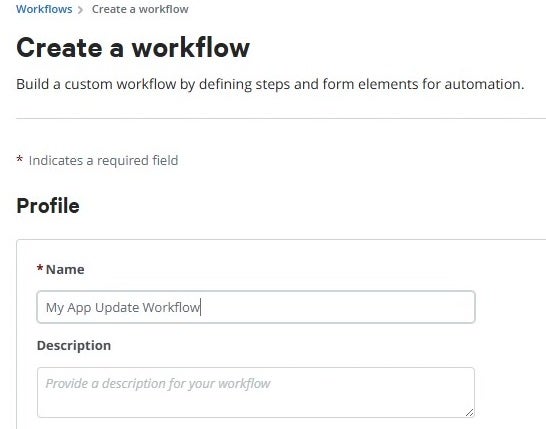
To launch the workflow creation screen, click Create a workflow.
In the Name field, enter the name you want to display for the workflow when the workflow appears in lists or tables. In this tutorial, use My App Update Workflow as the name.
-
(Optional) In the Description field, add details about your workflow to help others understand its purpose. For this tutorial, you can leave the Description field empty.


Create a Stop Service Workflow Step
Next, you will create a workflow step to stop an nginx service that is running on a target system:
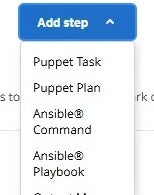
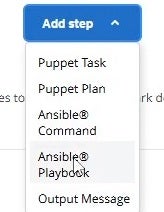
- At the bottom of the workflow creation page, following the Steps section, click Add step to add your first step to the workflow.
-
Click Puppet Task to add a step to the workflow and display the step creation form.

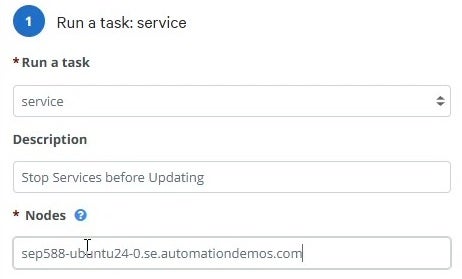
In the step details form, click the Run a task list and choose service.
(Optional) In the Description field, describe the purpose of the step. For this tutorial, enter Stop Services before Updating.
-
In the Nodes field, enter the system where the service is running. If you have multiple values, separate them with a space. For this tutorial, use the value sep588-ubuntu24-0.se.automationdemos.com

-
In the Parameters table, for the action parameter, click the Parameter type drop-down and select constant. A parameter type of constant means that the specified value is embedded in the workflow definition and cannot be changed. The user running the workflow will not have to specify a value.


When the parameter type is specified as constant for the action parameter, in the Parameter mapping column, you must select a constant value to map to the parameter. The list of options is currently empty because no constants are defined yet for this workflow. You will now create the constants.
💡Tip: Using constants is a great way to capture the knowledge you have around your automation. With defined constants, other users can run your automation workflows without having to understand how parameter values drive logic in the workflow. In other cases, however, a variable parameter makes more sense. For example, if you define an automation workflow for creating users, and a unique name must be specified for each user, you would use a variable parameter.
Create ‘stop’ Constant
The first constant you will create is a stop constant parameter. The stop constant will be used in your Stop Service workflow step for the action parameter.
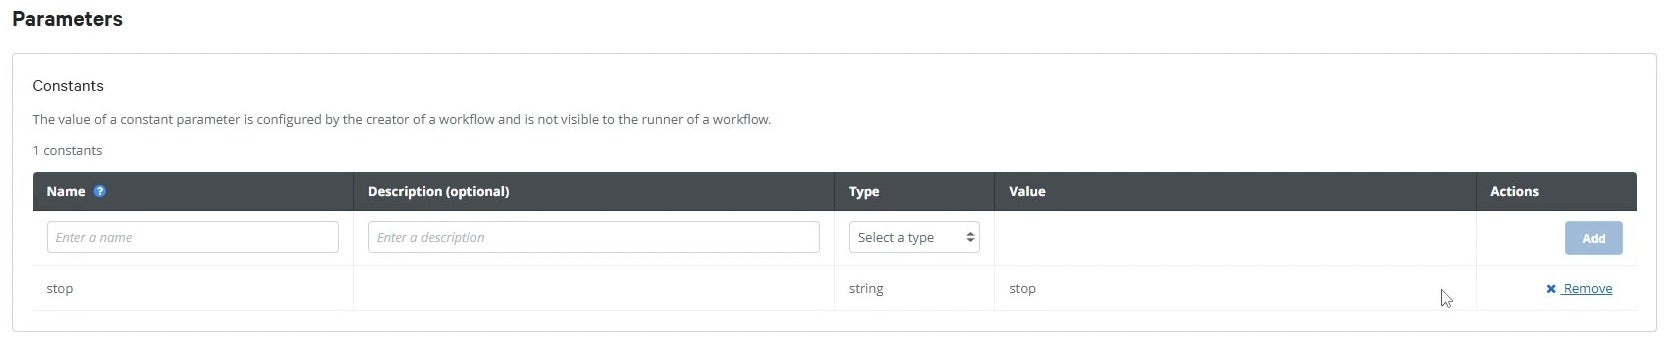
- Navigate to the Parameters section of the workflow creation screen and locate the Constants table, which lists the defined constant parameters.
- In the Name field, enter stop.
- (Optional) In the Description field, describe the purpose of the constant. For this tutorial, leave the value empty.
- In the Type list, click string.
- In the Value field, enter stop.
-
To add the constant parameter to the table, click Add.

-
Navigate back to the Steps section. In the Parameter mapping list for the action parameter, click stop.


The action parameter is now mapped to the stop constant and configured!
Create ‘service_name’ Constant
For the name parameter, you must specify the name of the service to be stopped. In this tutorial, you will be stopping the nginx service. The name parameter in this tutorial will use a constant value. You will now create a constant for the service name and then map the constant to the name parameter.
- For the name parameter, in the Parameter type list, click constant. You will now define a new constant for this parameter.
- Navigate to the Parameters section of the workflow creation screen and locate the Constants table, which lists the defined constant parameters..
- In the Name field, enter service_name.
- (Optional) In the Description field, describe the purpose of the constant. For this tutorial, leave the value empty.
- In the Type list, click string.
- In the Value field, enter nginx.
-
To add the constant parameter to the table, click Add.

-
Navigate back to the Steps section. In the Parameter mapping list for the name parameter, click service_name.


Now that both the action and name parameters are mapped to constants, the Stop Service step is now configured!
Create an Update Application Workflow Step
Next, you will create a workflow task to update the nginx application using the Playbook Runner module.
- At the bottom of the workflow creation page, following the Steps section, click Add step to add your next step to the workflow.
-
In the Add step list, click Ansible Playbook to add a step to the workflow and display the step creation form.

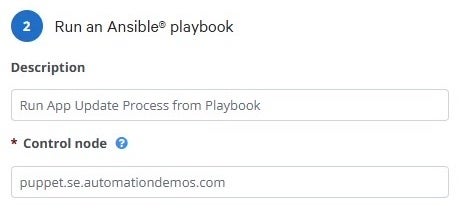
(Optional) In the Description field, describe the purpose of the step. For this tutorial, enter Run App Update Process from Playbook.
-
In the Control Node field, enter the system where the Playbook Runner host is running. In this tutorial, puppet.se.automationdemos.com is specified for the control node, but the value will differ in your environment.

When creating the Stop Service workflow step, you learned that constant parameters require a constant value to be defined. You will now create all the constant parameter values needed to configure the Playbook Runner step parameters.
Create ‘playbook_inventory’ Constant
You will now create a ‘playbook_inventory’ constant to specify the path to the YAML file that contains the Ansible inventory and then map the ‘playbook_inventory’ constant to the inventory parameter.
- Navigate to the Parameters section of the workflow creation screen and locate the Constants table, which lists the define constant parameters.
- In the Name field, enter playbook_inventory.
- (Optional) In the Description field, describe the purpose of the constant. For this tutorial, leave the value empty.
- In the Type list, click string.
-
In the Value field, enter the path to your inventory YAML file. In this tutorial, the value /root/ansible_inventory.yaml is specified. The value might differ in your environment.

To add the constant parameter to the table, click Add.
Navigate back to the Steps section.
In the Parameters table, in the Parameter name column, in the Select a parameter list, click inventory.
In the Parameter type list for the inventory parameter, click constant.
In the Parameter mapping list for the inventory parameter, click the new playbook_inventory constant.
To add the parameter, click Add.

Create ‘playbook_file’ Constant
You will now create a ‘playbook_file’ constant to specify the path to the playbook file you want to run. You will then map the ‘playbook_file’ constant to the playbook parameter.
- Navigate to the Parameters section of the workflow creation screen and locate the Constants table, which lists the defined constant parameters.
- In the Name field, enter playbook_file.
- (Optional) In the Description field, describe the purpose of the constant. For this tutorial, leave the value empty.
- In the Type list, click string.
- In the Value field, enter the path to your inventory YAML file. In this tutorial, the value /root/super_awesome_playbook.yaml is specified but your specified value must match the file name of your playbook. If you are using the example playbook provided, you would use the name update-application.yaml
-
To add the constant parameter to the table, click Add.

Navigate back to the Steps section. In the Parameter mapping list for the playbook parameter, click the new playbook_file constant.

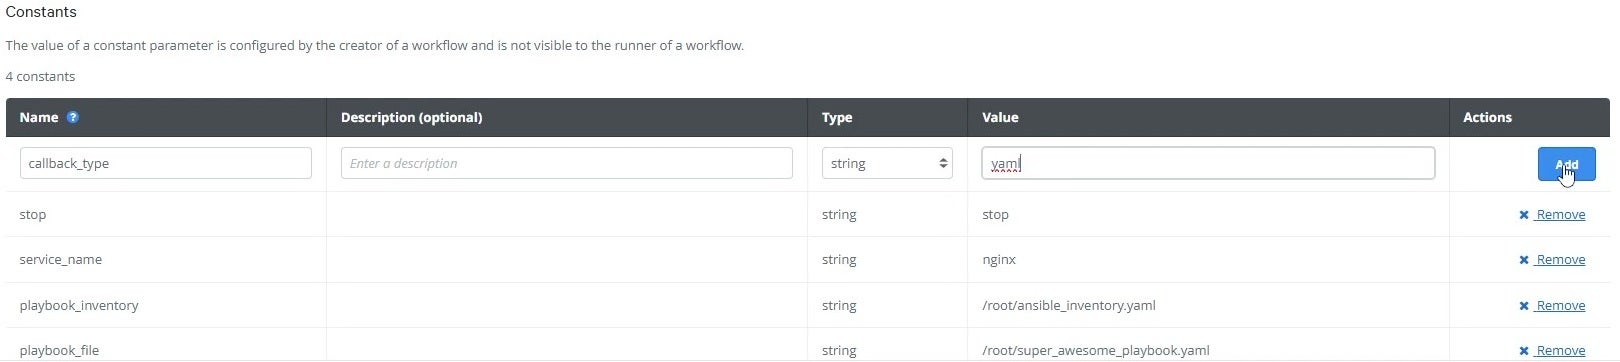
Create ‘callback_type’ Constant
You will now create a constant named ‘callback_type’ to specify the format used for storing playbook logging output. You will then map the ‘callback_type’ constant to the stdout_callback parameter.
- Navigate to the Parameters section of the workflow creation screen and locate the Constants table, which lists the defined constant parameters.
- In the Name field, enter callback_type.
- (Optional) In the Description field, describe the purpose of the constant. For this tutorial, leave the value empty.
- In the Type list, click string.
- In the Value field, enter yaml.
-
To add the constant parameter to the table, click Add.

Navigate back to the Steps section to create the stdout_callback parameter.
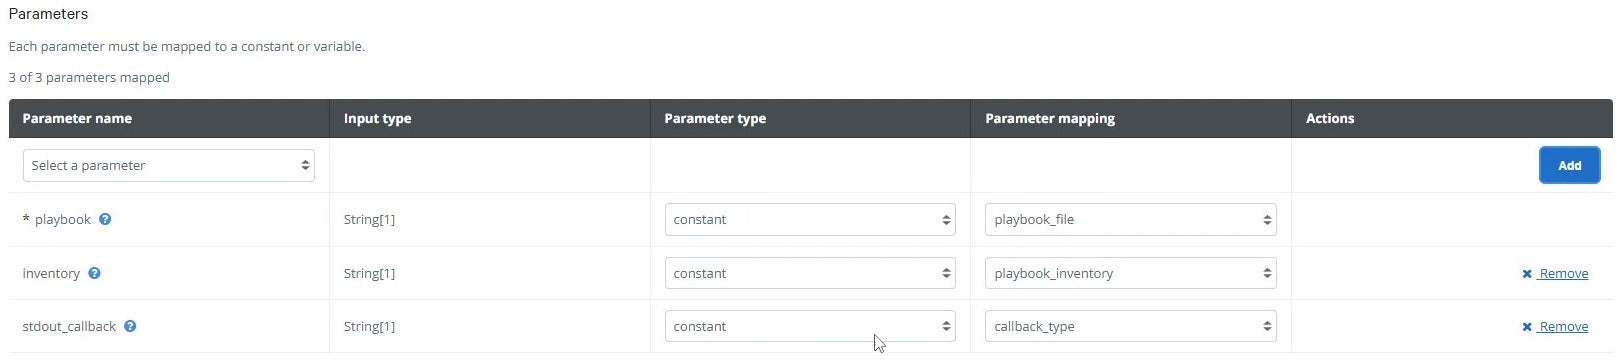
In the Parameters table, in the Parameter name column, in the Select a parameter list, click stdout_callback.
In the Parameter type list for the stdout_callback parameter, click constant.
In the Parameter mapping list for the stdout_callback parameter, click callback_type.
To add the parameter, click Add.
The Run an Ansible playbook step is now configured! You have successfully created the constants for playbook_file, playbook_inventory, and callback_type and mapped them to their respective parameters on the step.
Create a Start Service Workflow Step
The final step of the workflow will restart the nginx service after the service was previously stopped and updated.
- At the bottom of the workflow creation page, following the Steps section, click Add step.
- Select the Puppet Task option to add a step to the workflow and display the step creation form.
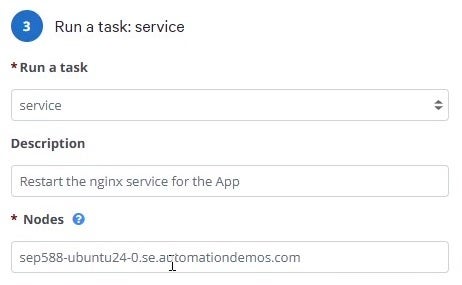
- In the new step, in the Run a task list, click service.
- (Optional) In the Description field, describe the purpose of the step. For this tutorial, enter Restart the nginx service for the App.
-
In the Nodes field, enter the system where the service is running. If you have multiple values, separate them with a space. For this tutorial, paste in the node name from a single node where you want to run the task. This tutorial uses the value sep588-ubuntu24-0.se.automationdemos.com.

In the Parameters table, for the name parameter, in the Parameter type list, click constant. To ensure the step targets the same service that was stopped, select the existing service_name option.
The basic configuration of the restart step has been completed, but the action parameter also must be configured. For the action parameter, you need a new constant to specify the ‘start’ action.
Create ‘start’ Constant
In these steps, you will create a ‘start’ constant and then map the constant to the action parameter.
- Navigate to the Parameters section of the workflow creation screen and locate the Constants table.
- In the Name field, enter start.
- (Optional) In the Description field, describe the purpose of the constant. For this tutorial, leave the value empty.
- In the Type list, click string.
-
In the Value field, enter start.

To add the constant parameter to the table, click Add.
Navigate back to the Steps section for the starting the service step.
In the Parameters table, for the action parameter, in the Parameter type list, click constant.
In the Parameter mapping list for the action parameter, click start.

The Start Service workflow step is now configured! Both the action and name parameters are mapped to constant values.

Save and Run the Workflow
-
To save all the configurations made so far for the workflow, click Create workflow. The workflows listing screen is displayed.
In the Available workflows table, the My App Update Workflow is listed with its description and your username listed in the Creator column.

-
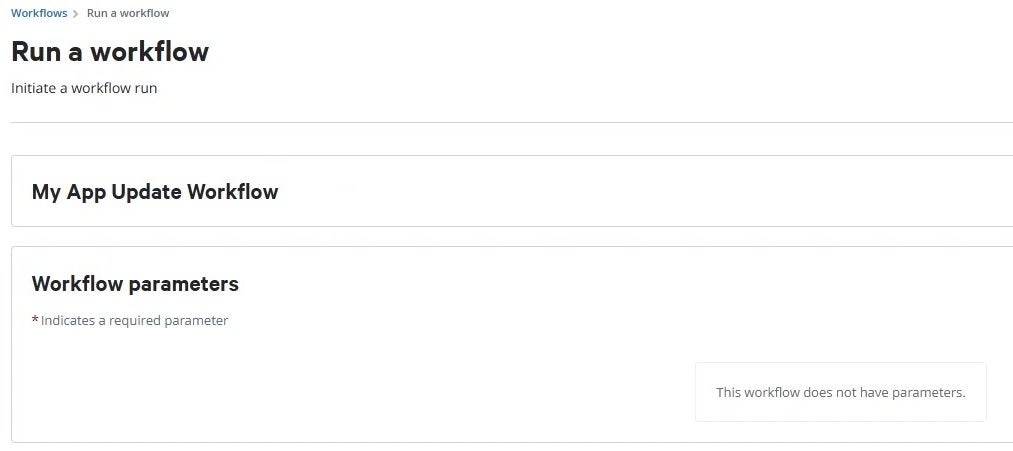
In the Actions column, click Run to load the workflow initiation screen.
💡Tip: The workflow initiation screen prompts the user to provide any values required for running the workflow. In this tutorial, all parameters were packaged as constants, so the user does not have to provide any values!

-
Click Run workflow to start the workflow. Your workflow is displayed in a running state in the Previously run workflows table.

-
In the Workflow name column, click the name of your workflow run to see the details of the current run.


Review: Key Takeaways
✅ Success! You have built a functioning workflow, which you can pass along to other users. They’ll be able to run the automation from the Puppet Enterprise console without having to know how the underlying automation was created.
In these steps, you learned about:
- Creating workflow definitions.
- Adding steps to a workflow.
- Creating constants and mapping to constant parameters on a step.
- Running workflows from the Workflows window.
What’s Next?
The example in this tutorial is just the beginning – a single use case showing how you can leverage workflows as part of your overall Puppet automation strategy. Keep an eye on Puppet Edge and look for other new features from the Perforce Puppet team. These innovations can help you and your team put Puppet orchestration at the center of your infrastructure automation, regardless of which tools you use or the types of nodes you manage.
Want to learn more right now? Check out these official docs and other resources to help you get started:
- Create a workflow (help.puppet.com)
- Run a workflow (help.puppet.com)
- Nginx Application Update Playbook (github.com)
- Expanding Your Infrastructure Automation Across the Lifecycle Using Puppet Edge (puppet.com)
- Automating Network Devices with NETCONF and YANG in Puppet Edge (puppet.com)
- Tutorial: Build Tasks for Network Devices Faster with Code Assistance and Puppet Edge (puppet.com)
- Tutorial: Running Ansible Playbooks from Puppet Edge (puppet.com)
- Puppet Edge official product page (puppet.com)

Top comments (0)