
Firebase is very popular and is becoming necessary for android developers. Firebase features real-time databases, cloud messaging, crashlytics, and more. In this post, I am sharing a super-quick and easy-to-understand tutorial for Android Firebase remote config.
Many Android developers may not have used Firebase remote config. Many think the Firebase remote config feature is unnecessary, but they don't know it's helpful in a few ways. The question arises when you are stuck in a situation: how will you update the app without having to circulate a new version to the Play Store? The solution is this blog!
What is Firebase Remote Config?
It's a cloud service that changes the behavior and appearance of the app without publishing an app update to the Play Store for all users. Basically, the Firebase remote config api allows you to maintain parameters on the cloud. Also, we can say it is an Android Firebase remote config as we are working on an Android project. Parameters can be text, color, and images received from the app by the remote config REST API (Firebase remote config api).
Firebase Remote Config Types
- Default Config: Defines default values. If no corresponding keys are found on the remote, then the default value is copied in the active config and sent to the client.
- Fetched Config: Fetched most recent config but not activated. It can be activated manually to copy all values in the active config.
- Active Config: Directly accessible from App and have values of default or fetched.
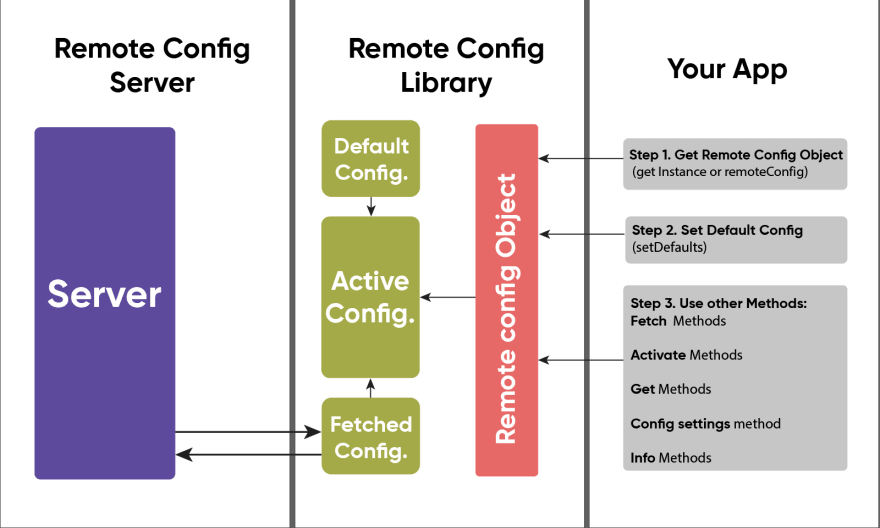
How Does the App Decide Which Value to Use?

Implementing Firebase Remote Config in Android
Creating the Project
In this section, the created android app will use Firebase remote config to change the background color, text remotely, and font size of all components, whether it's a user interface too. Let's start by creating the project by selecting the quick start option from the welcome screen.
So let's start! In the new project dialog, enter the name RemoteConfig in the name field, enter your company domain, and click the following button.
On the next screen, tick/enable the phone and tablet options and set the minimum SDK to API 16: Android 4.1. Now, configure an empty RemoteConfigActivity named
Read more: A Step-by-Step Guide to Mobile App Development Process
Add Remote Config Support in The Project
The project must be registered as a Firebase project and set up with the relevant Remote Config libraries to use Remote Config.
- In the android studio, select the tools > firebase menu option to show the firebase assistant panel.
- Within the panel, find the Remote Config selection, and click on the
Set up Firebase Remote Configlink. - On the Remote Config Set up, click the connect to firebase button. Before pressing the connect to firebase button, click on examples of the project from the list of existing projects.
- After connecting the project to the firebase, click on
Add Remote Configon your application button. Accept the changes.
Design the User Interface
Now, the project is created! Open the file activity_remote_config.xml in the layout editor tool and drop a button widget into the layout like in the image below.
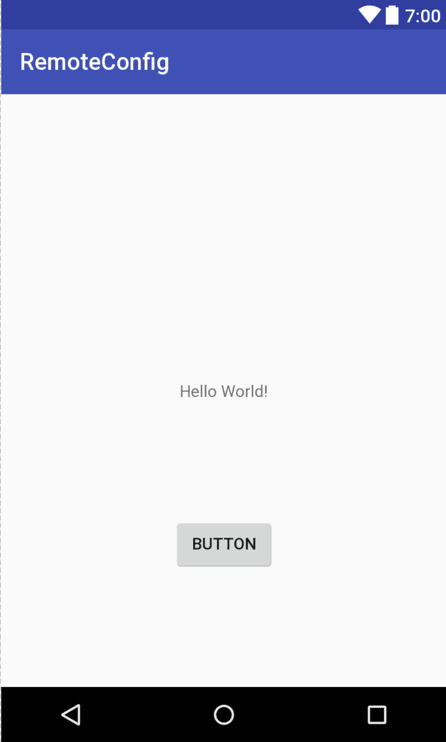
Set the text property of the Button widget to Update Config and the onClick property to call updateConfig using the Properties tool window. Change the ID property of the TextView widget to welcomeText.
Alter the ID of the layout in the properties panel of the layout by selecting the ConstraintLayout pass in the Module/component Tree tool window.
Now, click the Infer Constraints button to add appropriate constraints to the layout.
Set the Default In-App Parameters
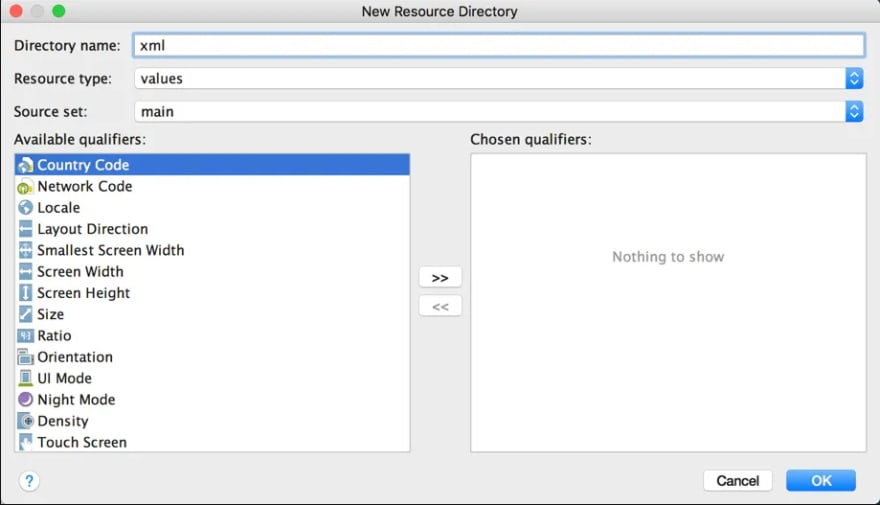
The project must now add an XML resource file to hold the in-app parameters. Locate and right-click the app -> res folder in the Project tool window, then choose the New -> Android Resource Directory menu option. Enter XML into the folder name field and select XML as the resource type in the following dialog box before clicking the OK button:
Now, right-click on the new folder, and select New from the file menu option. In the new dialogue box, before selecting the OK button to create the file, enter remote config params.xml in the new file dialog box. Now load the new XML resource file into the editor, then change it to define the following values as the default in-app parameters:
<?xml version="1.0" encoding="utf-8"?>
<defaultsMap>
    <entry>
        <key>welcome_text</key>
        <value>Welcome to Firebase</value>
    </entry>
    <entry>
        <key>welcome_font_size</key>
        <value>16</value>
    </entry>
    <entry>
        <key>main_background_color</key>
        <value>#42f486</value>
    </entry>
</defaultsMap>
Config Parameters Loading
To retrieve a FirebaseRemoteConfig object, load the default in-app parameters into it from the XML resource file; must now add code to the main activity class.
To change the code, open the RemoteConfigActivity.java file and make the necessary changes. In addition, many import directives have been added to the code in anticipation of future class additions:
package com.ebookfrenzy.remoteconfig;

import android.support.v7.app.AppCompatActivity;
import android.os.Bundle;
import android.graphics.Color;
import android.support.annotation.NonNull;
import android.support.constraint.ConstraintLayout;
import android.view.View;
import android.widget.TextView;

import com.google.android.gms.tasks.OnCompleteListener;
import com.google.android.gms.tasks.Task;
import com.google.firebase.remoteconfig.FirebaseRemoteConfig;
import com.google.firebase.remoteconfig.FirebaseRemoteConfigSettings;

public class RemoteConfigActivity extends AppCompatActivity {

    private FirebaseRemoteConfig fbRemoteConfig;

    @Override
    protected void onCreate(Bundle savedInstanceState) {
        super.onCreate(savedInstanceState);
        setContentView(R.layout.activity_remote_config);

        fbRemoteConfig = FirebaseRemoteConfig.getInstance();
        fbRemoteConfig.setDefaults(R.xml.remote_config_params);

        fbRemoteConfig.setConfigSettings(
             new FirebaseRemoteConfigSettings.Builder()
                .setDeveloperModeEnabled(true)
                .build());
    }
}
Note that code to enable developer mode has also been added to the method for testing reasons.
The application of the parameter values to the user interface requires the addition of some code next. ApplyConfig() will be added and called from the onCreate() method for the sake of this example.
@Override
protected void onCreate(Bundle savedInstanceState) {
    super.onCreate(savedInstanceState);
    setContentView(R.layout.activity_remote_config);

    fbRemoteConfig = FirebaseRemoteConfig.getInstance();
    fbRemoteConfig.setDefaults(R.xml.remote_config_params);
.
.
    applyConfig();
}

protected void applyConfig() {

    ConstraintLayout layout = (ConstraintLayout) findViewById(R.id.layout);
    TextView textView = (TextView) findViewById(R.id.welcomeText);

    String bg_color = fbRemoteConfig.getString("main_background_color");
    layout.setBackgroundColor(Color.parseColor(bg_color));
    textView.setTextSize(fbRemoteConfig.getLong("welcome_font_size"));
    textView.setText(fbRemoteConfig.getString("welcome_text"));
}
Verify that the in-app parameters are being utilized to set the background color, text, and font size before compiling and running the app. The following task is to add server-side parameters within the Firebase console, presuming the code is functioning.
Add Server-Side Parameters
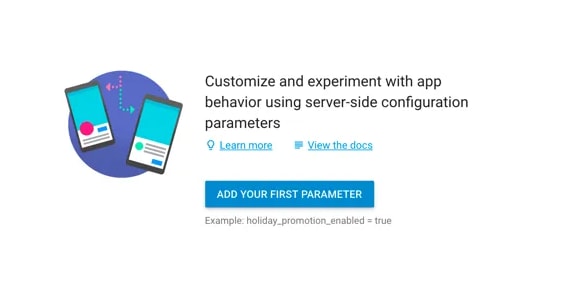
Access the Firebase console by opening a browser window, then choosing the Firebase Example project. After the project has loaded, click the Add your first parameter button and then the Remote Config option in the navigation panel:
The welcome text should be the first parameter added. Enter welcome text into the Parameter key box and Welcome to Remote Config into the Default value field in the new parameter dialog, then click the Add Parameter button.

Repeat step and add the main_background_color and welcome_font_size parameter set to #f4419d and 35.
Fetching and Activating the Remote Parameters
Now let's add the RemoteConfigActivity.java file and updateConfig() callback method as follows:
public void updateConfig(View view) {
    fbRemoteConfig.fetch(0).addOnCompleteListener(this,
            new OnCompleteListener<Void>() {

        @Override
        public void onComplete(@NonNull Task<Void> task) {
            if (task.isSuccessful()) {
                fbRemoteConfig.activateFetched();
                applyConfig();
            } else {
               // Fetch failed
            }
        }
    });
}
With a cache timeout setting of 0, the code above invokes the get() method of the FirebaseRemoteConfig instance. Additionally, a listener is added, activating the fetched parameters and invoking the applyConfig() method to make the modifications directly apparent in the user interface.
Run the application once more, select Update Configuration, and ensure that the UI modifications made in the console are reflected. Check that the parameter keys declared in the Firebase console match those in the in-app parameter resource file if any changes fail to take effect. To confirm that the fetch operation succeeds, provide some logging output within the completion listener callback.
Managing Changes at Startup
To fetch remote config changes while the App is running, edit the onCreate() method first to activate any parameters. To do a new fetch for the next time the app is started by a user:
.
.
@Override
protected void onCreate(Bundle savedInstanceState) {
    super.onCreate(savedInstanceState);
    setContentView(R.layout.activity_remote_config);

    fbRemoteConfig = FirebaseRemoteConfig.getInstance();
    fbRemoteConfig.setDefaults(R.xml.remote_config_params);

    fbRemoteConfig.activateFetched();
    applyConfig();
    fbRemoteConfig.fetch(0);
}
.
.
Establishing a Conditional Parameter Change
It is the final step for the Android Firebase remote config. Here we will edit the main_background_color parameter in the remote Config Firebase console screen.
Let's add value like the image shown below:
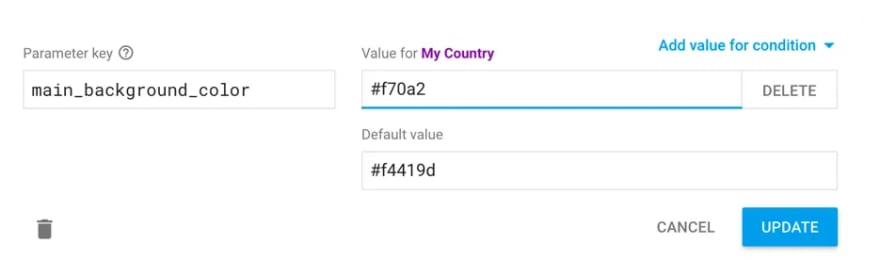
Now, select the Define new condition option from the condition menu. You can change the my country selection and choose your country. Now, create a condition button to return to the parameter dialogue.
That's it. We added the Android Firebase remote config in our app project.
Final Words
In this post, you have seen remote config support for the Android project with FirebaseRemoteConfig and the implementation of in-app parameters using a resource file. It's advantageous for minor app updates without pushing them to the Play Store.
I hope you got some great and helpful information regarding the Android Firebase Remote Config and Firebase Remote Configuration API, which will be helpful for your next Android project in remote configuration. Thanks for reading!

Top comments (0)