Background and Assumptions
For this series, I'll be focused more on explaining thought process than going over code. If anyone has questions about code, feel free to leave a comment. In general, I'm assuming a basic understanding of the involved technologies, so I won't spend too much time breaking down code snippets. Both repositories are available for review and will be linked at the end of this series.
The Layout
As this app is focused on generating an image, I wanted the focus of the app to be the image. I also knew there needed to be options for changing the image design.
This meant there would need to be two primary components that would make up the layout: the image and the settings. The image would need to take up most of the available real estate. The settings would take up the remaining.
I decided to add in a header for navigation and a footer for application links and info. The navigation would only lead to two other pages: about and help, which I would populate with some content to explain the app vision and FAQs.
The Image
After some research, I determined the features I wanted to implement could be accomplished with HTML Canvas, so the image design would take place using a canvas element.
I created a component called the Blokii Canvas to encapsulate the canvas and contain all related canvas drawing logic. It would watch for changes in settings selected by the user and draw and redraw the canvas based on user settings.
The Settings
Following the features defined, the user would need to be able to add a title, subtitle, and author byline. None are required but should be optionally customizable. The settings component would need to allow the user to customize these four elements. The user should also be able to change the color of the text and change the font family if desired.
To keep things simple, I pre-selected a subset of font faces that I would allow the user to select, taking a few from each family of fonts.
I also needed to enable the user to select an image or provide an image url to use as the background. If they wanted to download the image, a filename would also need to be provided. Finally, the user should also be able to add technology icons to their image. I pre-selected these options as well to keep things simple.
Once I grouped the functionality into their respective parts, I could break things down further.
State Management
I used vuex for state management so I could track the user's settings globally. This allowed me to update the canvas as soon as the user changed something.
Image Filters, Text Options
I stored image filter selections and text options in their respective state modules to keep them separate. Each css filter had a value associated with it to adjust the strength of the filter.
Global State
The global state module kept track of application level settings, like the filename of the downloadable image.
BlokiiCanvas
Developing the BlokiiCanvas was a bit of trial and error - as tends to be the case with design, sometimes it's hard to know if it looks good until you see it. This includes adjusting the default font size and positions. As these are fixed, I had to be sure the final result would be OK. I suppose it'd also be great if these settings were also customizable. Perhaps that can go into the next release.
Once I figured out how to add the image to the canvas and apply the css filters, I could easily iterate on it and create a bunch of if/else cases based on the outcome of user settings.
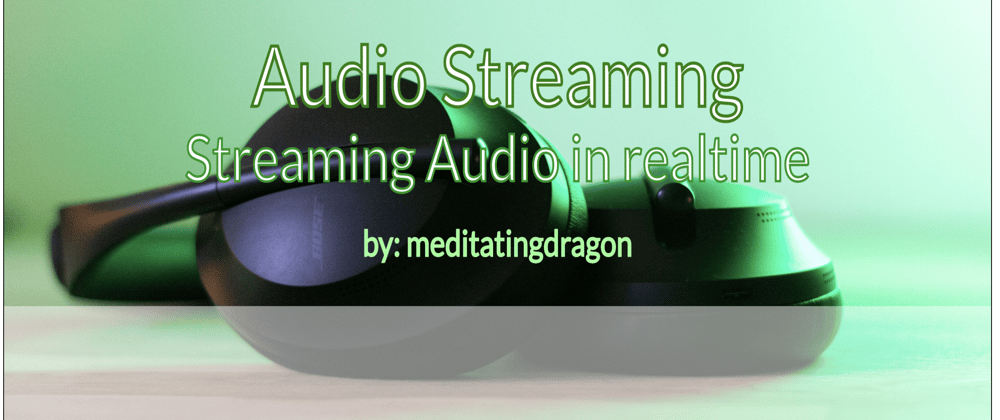
This gave me a drawable canvas that could produce this:
Good enough for now.
Settings Panel
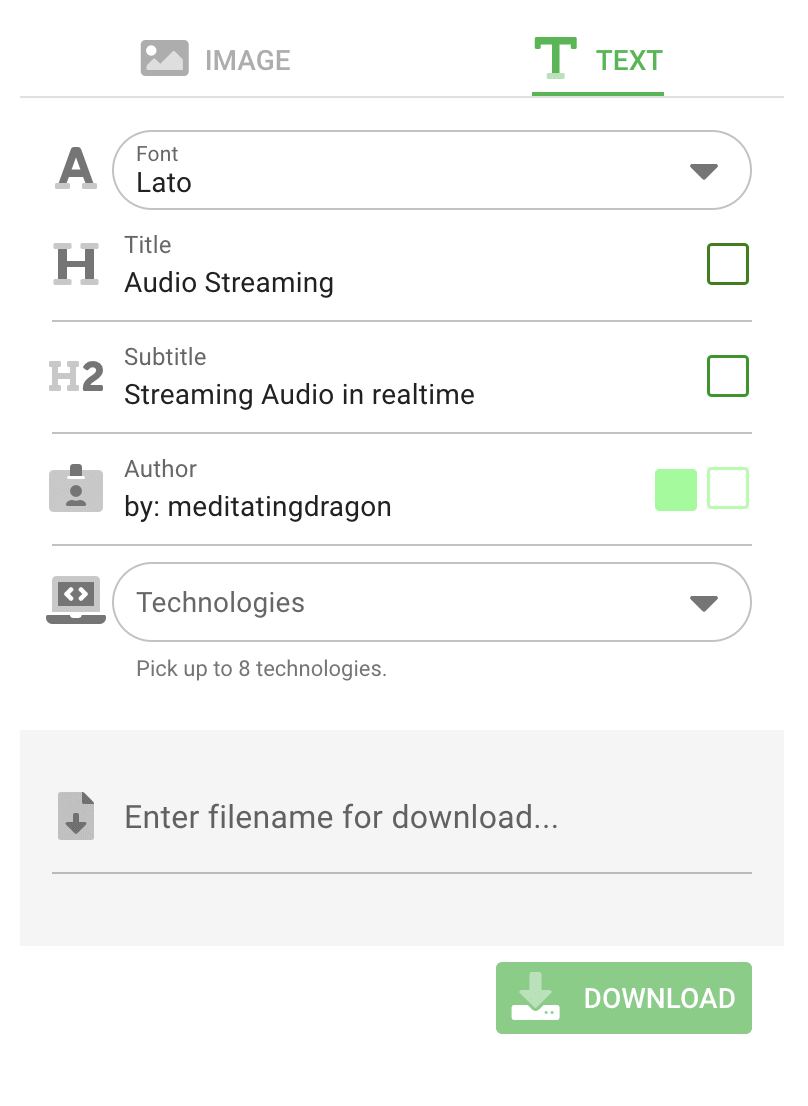
Once I figured out how to lay things out on the canvas, I could make it variable. The settings panel would allow users to select options. I provided options for selecting font faces, title, subtitle, and byline text, and adjusting font colors. Finally, I also needed to allow the user to select the technologies they are blogging about, so I created a dropdown with options they could search against. I stored these settings as a json object in the vuex state.
Here's the text settings panel:
It's quite simple in how it accepts user input. I probably should add more validation...but there's limited validation at this point in time.
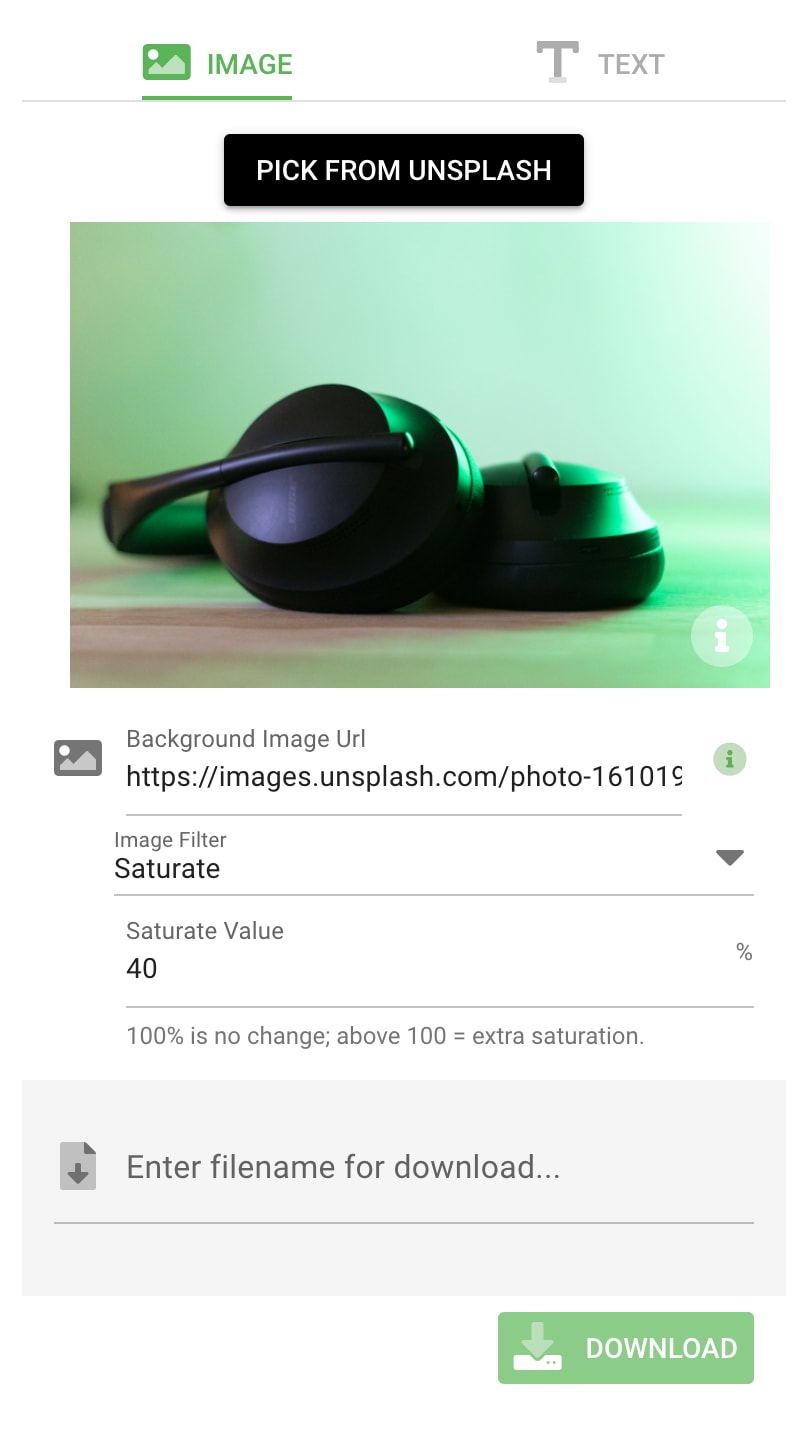
And here's the image settings panel:
The image settings allows user to either enter an existing url or to pick an image from Unsplash. Users can then opt to select an image filter for the selected image.
Download
To download the image, the user must enter a filename to name the downloaded file. The browser then convert the data from the canvas and encodes it to an image file for the user to download.
Feature Check
Let's see where we're at now...
The user interface can do the following:
Enable the user to add a titleEnable the user to add a subtitleEnable the user to add a bylineEnable the user to select a font family for the textEnable the user to change the fill and stroke color of the textEnable the user to add technologies- Select image from Unsplash
Download the final image from the website- Deploy site as a static SPA
I'll cover Unsplash in the next section as I build out the server API.
Questions, comments, thoughts?


Oldest comments (0)