
In this tutorial we will explore the easiest way to upload an image to Cloudinary, a firebase alternative to upload images for free.
GitHub URL -> Wallpaper Website MERN
Now let's get to the introduction of technologies that we are needing for this project.
About Cloudinary
Cloudinary is a cloud solution that work as an alternative to firebase when it comes to uploading images. Cloudinary provides its SDK for almost all major languages. Not just through SDK, you can also use their API URL to upload Images directly from frontend, here is the tutorial.
Once file uploaded to their server, Cloudinary provide us with delivery URL that hot link the image that we have uploaded.
About Multer
Multer provides us with API that we need to upload image to our server. In our context we are using Multer to store image into memory as a buffer. You can also use this to upload your image to your local storage instead of Cloudinary. You will find more information through their official documentation.
Making a Backend Cloudinary Uploader is very straight forward. All you need are these few steps:
- Creating a frontend that provide a single file uploader.
- Making a route to the endpoint.
- Creating a middleware using Multer to store file as a buffer in a memory.
- Creating an entry point function that points to Cloudinary uploader function and make an entry in mongodb.
- Making a function that upload the image stream to Cloudinary.
- Converting image buffer into readable stream and then write it into Cloudinary.
Frontend Code
import { useState } from 'react';

export default function Submit() {
    const [formData, setFormData] = useState({
        title: '',
        img: null,
    });

    const [selectedImg, setSelectedImg] = useState(null);
    const [loading, setLoading] = useState(false);
    const [error, setError] = useState('');

    // Handle file selection
    const handleFileChange = (e) => {
        setFormData(prev => ({ ...prev, img: e.target.files[0] }));
        setSelectedImg(URL.createObjectURL(e.target.files[0]));
    };

    // Handle text input changes
    const handleChange = (e) => {
        setFormData(prev => ({ ...prev, [e.target.id]: e.target.value }));
    };

    // Handle category selection
    const handleCategoryChange = (e) => {
        setFormData(prev => ({ ...prev, category: e.target.value }));
    };

    // Submit form
    async function handleSubmit(e) {
        e.preventDefault();
        console.log('Submit button clicked');
        setLoading(true)

        if (!formData.img) {
            alert("Please select an image to upload.")
            setLoading(false)
            setError("Enter an image file to proceed")
            return;
        }

        const formDataToSend = new FormData();
        formDataToSend.append("img", formData.img);
        formDataToSend.append("title", formData.title);
        try {
            const res = await fetch('http://localhost:8080/wallpaper/upload', {
                method: 'POST',
                body: formDataToSend
            });
            const data = await res.json();
            console.log("Upload Success:", data);
            setLoading(false)
        } catch (error) {
            setLoading(false)
            setError('Error occurred while uploading wallpaper:', error)
            console.error('Error occurred while uploading wallpaper:', error);
        }
    }

    return (
        <div>
            <form onSubmit={handleSubmit}>
                <h1>Select an image file to upload (supported: .jpg, .png, .webp):</h1>
                <input type="file" id="img" onChange={handleFileChange} accept="image/*" required />

                {formData.img && (
                    <div>
                <img src={selectedImg} alt=""/>

                <label htmlFor="title">Title:</label>
                <input type="text" id="title" onChange={handleChange} required />

                <button type="submit">{loading ? "Uploading Wallpaper...." : "Upload Wallpaper"}</button>
                </div>
                )}


                {error && <p>{error}</p>}
            </form>
        </div>
    );
}
So far, we have made a simple page that have an input to upload image and a button to submit the form.
We have an endpoint http://localhost:8080/wallpaper/upload which we create in next step.
Route to endpoint
import express from 'express';
import {uploadFileMiddleware, uploadWallpaper} from "../somepath.js"
const router = express.Router();
router.post('/upload', uploadFileMiddleware, uploadWallpaper)
export default router;
We have created a route where we can send some data to upload our image.
Now before I start with the actual code, I want to make a quick schema for mongoose.
import mongoose from 'mongoose';

const wallpaperSchema = new mongoose.Schema({
    title:{
        type: String,
        required: true
    },
    img:{
        type: String,
        required: true
    },
    timestamp: {
        type: Date,
        default: Date.now
    }
});

const Wallpaper = mongoose.model('Wallpaper', wallpaperSchema);
export default Wallpaper;
Setting Up Middleware
Let's get to our imaginary somepath.js and set up middleware function.
In order to do that we need to install Multer.
First install Multer.
npm install multer
Importing Multer to our project.
import multer from 'multer';
const storage = multer.memoryStorage()
const upload = multer({storage:storage})
export const uploadFileMiddleware = upload.single('img');
We first create a storage that points to memoryStorage that means we are storing our image as a buffer into memory. And since we are storing it in memory the file size of an image may affect your system performance, but you don't need to worry since image file in many of our case won't go above 20MB (at best).
Then we will make an instance of multer named upload, that is configured to use memoryStorage.
Now we define our middleware. We are uploading a single image i.e., "img" in memory that will be accessible through req.file.
Setting up uploadWallpaper Function
uploadWallpaper is the entry function to upload image to Cloudinary as well creating an entry to mongoDB.
export const uploadWallpaper = async (req, res, next) => {
    console.log("uploadWallpaper");
    try {
        if (!req.file){
            console.error('Image not selected.')
            return next(404, 'Image not selected.');
        }
        const {img, title, altTitle, category, tags} = req.body;

        if (!title) {
            console.error('Title not filled.')
            return next(404, 'Title not filled.');
        }
        const uploadedUrl = await uploadToCloudinary(req.file.buffer, title);
        console.log("uploading wallpaper...");
        if (!uploadedUrl) {
            return next(500, 'failed to upload image to cloudinary');
        }
        console.log("uploadedUrl", uploadedUrl);
        const newWallpaper = await Wallpaper.create({
            title: title,
            img: uploadedUrl.secure_url.toString(),
        });
        res.status(200).send(newWallpaper)
    } catch (error) {
        console.log(error);
        next(error)
    }
}
I have made a next middleware to handle all the message that I need to send as a response.
Here is the code for that, you can put it into your index.js
app.use((err, req, res, next)=> {
    const statusCode = err.statusCode || 500;
    const message = err.message || 'Internal Server Error';
    res.status(statusCode).send({
        success: false,
        status: statusCode,
        error: message
    });
Setting up uploadToCloudinary Function
We are making a function that is uploadToCloudinary we are receiving file name (title) and the image file as a buffer through uploadWallpaper entry function.
Our job is to convert that buffer into a readable stream of data and upload that as a stream to Cloudinary.
We are using cloudinary SDK, if you need more information on that you can check their official documentation.
Before doing that we need certain access-data from Cloudinary that is their Cloud Name, API Key and API Secret. You will find API Key and API secret right from their dashboard through "Go To API Key" button.

You will find the cloud name there as well. You can change your cloud name from Settings > Product Environment if you like to do so.
Let's install Cloudinary to our project now.
npm install cloudinary
In our uploadToCloudinary function, the first order of business is configuring the access-data we have now. I would put this data into an env so uploading it to github doesn't expose my sensitive information to the public.
    cloudinary.config({
        cloud_name: process.env.CLOUDINARY_CLOUD_NAME,
        api_key: process.env.CLOUDINARY_API_KEY,
        api_secret: process.env.CLOUDINARY_API_SEC
    });
In order to check wether your connection is working or not, you can ping to cloudinary using the below code, thanks to this github.
    await cloudinary.api.ping((error, result) => {
        if (error) {
            console.error("Ping failed", error);
        } else {
            console.log("Ping successful:", result);
        }
    });
Our uploadToCloudinary function will return a promise. Inside the promise we will create another function uploadedImage that will connect with upload_stream to upload our image.
        const uploadedImage = cloudinary.uploader.upload_stream(
            {
                resource_type: "image",
                public_id: `wallpaper/${title.trim()}`,
                display_name: title,
                overwrite: false,
                media_metadata: true,
            },
            (err, result) => {
                if (err) {
                    console.log('Error uploading image to server', err)
                    return reject(err)
                }
                else {
                    console.log(result)
                    console.log('Image uploaded successfully', result.secure_url)
                    resolve(result)
                }

            }
        )
upload_stream works on certain options, you can configure it as per your choice or just use the one I have here.
The public_id however reflect in delivery url as well, it provides the url that has /wallpaper/certainimage.jpg. Thing to note here is wallpaper is not a folder but a prefix.
display_name will display the name of the image in cloudinary media explorer.
media_metadata has some specific informations regarding your image like piexlPerUnitX etc, you most like don't need it but I kept it true in case I may need it later.
You can find more information on it through their official documentation.
Turning this fileBuffer into a Readable Stream
In order to do that, first we need to import Readable from Stream (pretty convenient, eh?)
import {Readable} from "stream"
Then we store the stream into a variable str.
let str = Readable.from(fileBuffer)
Once done, we will pipe this stream into uploadedImage function, that function will now upload the image as a stream.
str.pipe(uploadedImage)
Pipe method will transfer readable stream to writeable stream. Picture what a pipe does in real life with a stream of water (not read and write offcourse) taking water stream from point source to destination that's what we are doing here.
Now we are done with it.
Here is the one uploading page I made for my project.
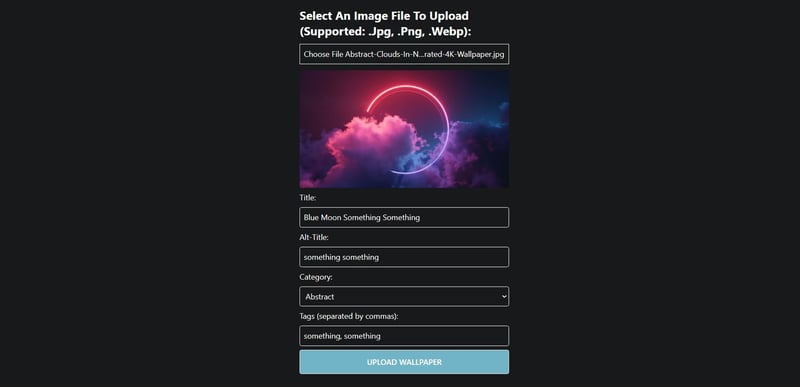
Clicking Upload Wallpaper will upload this image to Cloudinary with the title I chose.

Here is the url to download this image in case you find it wallpaper worthy!
I will put more tutorials on my dev.to page and I would like to continue this particular project on my website RM Ideas Blog. If you are interested, you can bookmark it for future reading. If you need any help, please add your comment and click on heart button if you liked this tutorial.

Top comments (0)