In this post, we are going to take a look at a new tool called snowpack-ui which is a Browser based interface to manage your Snowpack projects.
You can create new Snowpack projects using the create-snowpack-app, start the development server, build projects, install dependencies and so on, using this web application. And all of this can be done from the convenience of your browser instead of switching back and forth between the terminal and the browser.
I don't have to quote any research text to tell you the time wasted in context-switching between various tools during the development phase. So this tool brings a new perspective and productivity boost for web developers who are using Snowpack.
Inspiration
I am a great fan of the vue-cli-ui which allows you to manage all your Vue projects from a single place in the browser. Taking inspiration from that, I have created one for Ember.js called ember-cli-ui. Snowpack UI makes heavy use of the code from ember-cli-ui and reuse a lot of concepts and functionalities from both these projects.
Installation
You can install this tool from npm
npm i -g snowpack-ui
or you can run the tool directly with npx
npx snowpack-ui
New Project
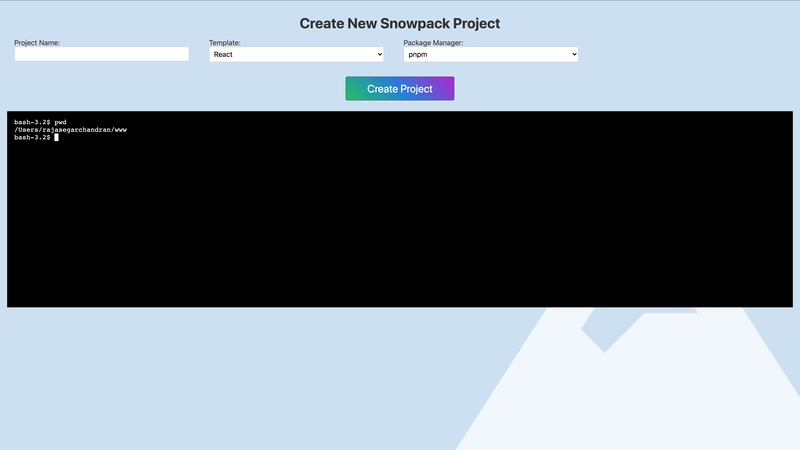
Creating a new project with snowpack-ui is a breeze. You have the intuitive UI for selecting the app template and the package manager to use. It's way better than typing these long commands in the terminal. For example, if you want to create a React app with create-snowpack-app you should enter the following command:
create-snowpack-app my-app --template @snowpack/app-template-react --use-yarn
Once your project is created by making new folders, installing the dependencies you will get the following message which tells you to move to the project home. You can do that by clicking on the "Take me to Project page".
Project Home
Once you created a new project, in the project home page, you can see some details about the dependencies used in the project, the snowpack version and so on. I am planning to include more exhaustive information here, if you feel any other important information need to be added here, please let me know in the comments or feel free to open an issue in the Github repository.
Build Project
You can build your Snowpack projects by going to the build page. Once you click the Build Project button, the tool will run the snowpack build command and the terminal output is shown live in the page. Once the build is complete, you will get the list of assets that were built along with the statistics like file size, gzipped size and the download time it will take on various networks. This particular feature of download times was heavily inspired by the vue-cli.
This will give you a rough idea about how much time these assets will take to download in the browser.
Dev Server
This page will be the most used one during development, where you can start the dev server and view the live terminal output of the build process.
Install dependencies
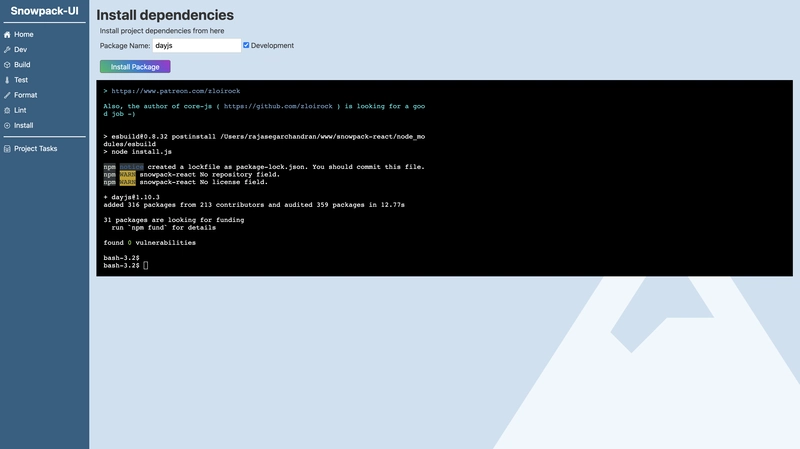
You can also install additional npm packages to your projects without going to the command line, from within the snowpack-ui. All you need to do is to go to the Install page and type your npm package name, and optionally check the Development checkbox if you want to install it as a dev dependency.
Project Tasks
Oftentimes, you need to carry out a lot other tasks in your project apart from dev server and build. That's why we have a separate section in snowpack-ui to run your project's tasks. All the tasks from your package.json from the scripts section is populated here, you can choose any one and click the Run Task button to run that task.
Demo Video
I have put together a walkthrough video for snowpack-ui. You can watch the complete workflow from creating a project to building it for production, here
What's next for Snowpack UI?
- Save app templates as default
- Manage Snowpack config
- More extended dependency info ( things like outdated packages etc.,)
Source code
The code for this project is hosted in Github


Top comments (0)