
Hey there! In this tutorial we are going to build a simple but cool Slideshow component with ReactJS.
Basically, our Slideshow will be compost of three images. One image for the current slide, one for the previous and another for the next one. It'll also have controllers for advancing to the next or previous slide and it'll also be able to change the slide automatically every period of time.
You can find the result of the Slideshow component here.
Notes
If you're going to follow along with this post, you'll need to be familiarized with ReactJS and NodeJS.
Table of Contents
Setting up
Alright, for this tutorial I'll use my Personal Website as the base project. Naturally, you can use any ReactJS project as the base of the project.
I'm going to use VS Code as IDE, but you can use any text editor or IDE you want.
With that said, this is how the directory tree of my website looks like.

As you can see, in some way, all the code is inside the src directory. Consequently, all the components are inside the components folder. For organization purposes, I'm going to create a folder named Slideshow, with a empty index.js and styles.css file inside.

Basic Component
First, we'll set up a simple component inside the index.js file.
import React from 'react';

import './styles.css';

export default function Slideshow(){
    return (
        <section className="slideshow">
            Slideshow
        </section>
    )
}
Now I'll start the project with yarn start (you can use npm as well). I want to add the slideshow component right below the bio in this page.

Now I'll import the Slideshow component into the web page and add it right below the bio.
import React from 'react';
import Box from '../../components/Box';
import Slideshow from '../../components/Slideshow';

import './styles.css';

export default function About(){
    return (
        <>
        <Box color="#e5e5e5" bgColor="#421567" title="Carlos Magno" column >
            <div className="bio-container">
                <img src="./assets/dev.jpg" alt="dev" id="dev-pic" title="Magno"/>
                <div className="bio-text">
                    <p id="bio">
                    Introvert, Geek, Web Developer, Horde Player and CS Student...<br/>
                    Also known as <span className="italic">Raymag</span>, his hobbies are watching animations, learning new stuff, reading useful books and running.
                    </p><br/>
                    <p>prayk11@gmail.com</p>
                    <p>prayk11@outlook.com</p>
                </div>
            </div>
        </Box>
        <Box title="Gallery">
            <Slideshow />
        </Box>
        </>
    )
}
The Box component is just a component I made to help me make those big sections with different colors, so it's not important to us. Anyway, this is the result.

Structure
It's time to make the HTML structure of the Slideshow component. So let's edit the index.js file.
(<section className="slideshow">
  <div className="slide-holder"></div>
  <div className="slideshow-controller">
    <span>Previous</span>
    <span>Next</span>
   </div>
</section>)
Okay, we first have the section "slideshow" that hold the whole component. Inside this section we have two main elements, the div "slide-holder" (which will hold all the slides) and the div "slideshow-controller" (which will hold the buttons for going to the next or last slide).
Now, I'm going to add three sections inside the "slide-holder". Each section represents a slide: the last, current and next one.
(<section className="slideshow">
  <div className="slide-holder">
    <section className="slide previous-slide">
      <div className="slide-thumbnail"></div>
    </section>
    <section className="slide current-slide">
      <div className="slide-thumbnail"></div>
    </section>
    <section className="slide next-slide">
      <div className="slide-thumbnail"></div>
    </section>
  </div>
  <div className="slideshow-controller">
    <span>Previous</span>
    <span>Next</span>
   </div>
</section>)
Adding Style
It's time for add some styles for this component. So let's modify the styles.css file. Since CSS and UI is not the focus here, I'll not explain much about this part.
section.slideshow{
    width: 80%;
}
section.slideshow div.slide-holder{
    display: flex;
    justify-content: space-evenly;
    align-items: center;
    flex-direction: row;
}
section.slideshow section.current-slide{
    width: 400px;
    height: 300px;
    margin: auto 10px;
}
section.slideshow section.previous-slide,
section.slideshow section.next-slide{
    width: 200px;
    height: 150px;
}
section.slideshow section.slide div.slide-thumbnail{
    width: 100%;
    height: 100%;
    background: #541d82;
    background-size: cover;
    background-position: center;
    border-radius: 6px;
    box-shadow: 5px 5px 6px #551d829c;
}
In short, all I've done is give all slides a purple background and made the current slide bigger. I'll also add some styles for the controllers as well.
section.slideshow div.slideshow-controller{
    margin-top: 10px;
    display: flex;
    justify-content: space-between;
    align-items: center;
}
section.slideshow div.slideshow-controller span{
    padding: 10px;
    width: 100px;
    border: none;
    background: #541d82;
    color: #f5f5f5;
    cursor: pointer;
    text-align: center;
    box-shadow: 3px 3px 5px #551d8283;
    user-select: none;
}
section.slideshow div.slideshow-controller span:hover{
    color: #ffc200;
    text-shadow: 3px 3px 5px #ffc200;
}
section.slideshow div.slideshow-controller span:active{
    color: #541d82;
    text-shadow: 3px 3px 5px #541d82;
    background: #ffc200;
}
And that's the output.
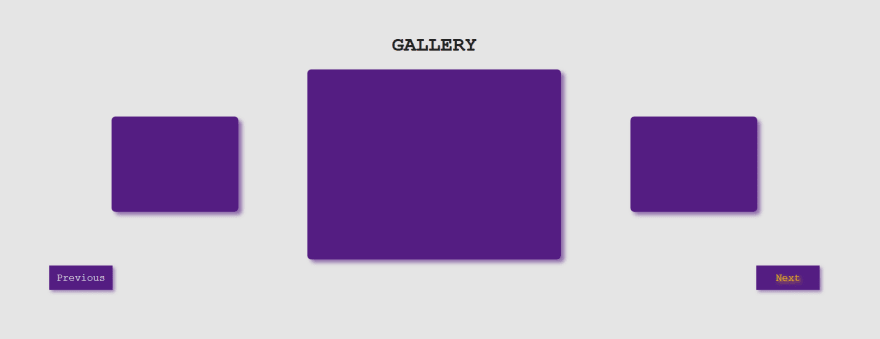
Functionality
Now that we have added styles to it, we can finally start to code the functionalities of the component. For that purpose, we'll need a set of props and a few states.
I'm going to use a array of images and a interval of time as props and since we're not using classes, we'll need to use React Hooks for controlling the states of the component. Which is why I'll import useState and useEffect methods from React.
With that in mind, let's modify our index.js file.
import React, {useState, useEffect} from 'react';

import './styles.css';

export default function Slideshow({images=[], interval=3000}){
    const [thumbnails, setThumnails] = useState([]);
    const [currentSlide, setCurrentSlide] = useState(0);
    const [currentSlideStyle, setCurrentSlideStyle] = useState({});

    return (
        <section className="slideshow">
            <div className="slide-holder">
                <section className="slide previous-slide">
                    <div className="slide-thumbnail"></div>
                </section>
                <section className="slide current-slide">
                    <div style={currentSlideStyle} className="slide-thumbnail"></div>
                </section>
                <section className="slide next-slide">
                    <div className="slide-thumbnail"></div>
                </section>
            </div>

            <div className="slideshow-controller">
                <span>Previous</span>
                <span>Next</span>
            </div>
        </section>
    )
}
As you can see, I've also created a few states.
- thumbnails: It holds the images array.
- currentSlide: It holds the index of the current slide in the thumbnails array.
- currentSlideStyle: We'll use it for setting the backgroung-image of the "slide-thumbnail" div.
Note that I've also assigned currentSlideStyle to the style property of the div inside the "current-slide".
Changing the background
Fine. Now we'll need to use the Effect Hook since we need to update the slides every time the component mounts or updates. So right below the state definitions we'll call our useEffect function passing our effect as a callback function.
useEffect(()=>{
        setThumnails(images);
        setCurrentSlideStyle({
            backgroundImage: "url('"+images[currentSlide]+"')"
        });
    }, [images, currentSlide]);
This simply assigns the images array to the thumbnails state and also uses the currentSlide state (which holds the image index of the current slide) to set the currentSlideStyle state. Consequently, it sets the background-image of the "current slide" section.
Now I'll just pass a array of images and a interval to the Slideshow component in the page I want it to appear.
<Slideshow
  interval={3000}
  images={[
    './assets/slideshow/img_1.jpg',
    './assets/slideshow/img_2.jpg',
    './assets/slideshow/img_3.jpg',
    './assets/slideshow/img_4.jpg',
    './assets/slideshow/img_5.jpg',
    './assets/slideshow/img_6.jpg'
  ]}
/>
This is how it is looking right now.
Making up the controllers
With that, we can now make the buttons start to working. For that, I'll just create two functions.
import React, {useState, useEffect} from 'react';

import './styles.css';

export default function Slideshow({images=[], interval=3000}){
    const [thumbnails, setThumnails] = useState([]);
    const [currentSlide, setCurrentSlide] = useState(0);
    const [currentSlideStyle, setCurrentSlideStyle] = useState({});

    useEffect(()=>{
        setThumnails(images);
        setCurrentSlideStyle({
            backgroundImage: "url('"+images[currentSlide]+"')"
        });
    }, [images, currentSlide]);

    function previous(){
        if(currentSlide>0){
            setCurrentSlide(currentSlide-1);
        }else{
            setCurrentSlide(thumbnails.length-1);
        }
    }

    function next(){
        if(currentSlide === thumbnails.length-1){
            setCurrentSlide(0);
        }else{
            setCurrentSlide(currentSlide+1);
        }
    }

    return (
        <section className="slideshow">
            <div className="slide-holder">
                <section className="slide previous-slide">
                    <div className="slide-thumbnail"></div>
                </section>
                <section className="slide current-slide">
                    <div style={currentSlideStyle} className="slide-thumbnail"></div>
                </section>
                <section className="slide next-slide">
                    <div className="slide-thumbnail"></div>
                </section>
            </div>

            <div className="slideshow-controller">
                <span onClick={previous}>Previous</span>
                <span onClick={next}>Next</span>
            </div>
        </section>
    )
}
So the previous function gets the current slide index, finds out what is the previous one and assigns it to the currentSlide state.
In case the current slide index is 0 (the first one) it will then use the last position of the array.
Now the next function works in a similar way, it will find out what is the next slide position and assign it to currentSlide state.
But in case the current slide index is the last one it will use the first position of the array.
Every time the currentSlide states changes, the component will update and the useEffect function will run again. In other words, it will change the background of the current slide.
Note that I've also assigned the previous and next functions to the onClick event of each controller inside the "slide-controller" div.
Automatically Advancing Slides
How to make the Slideshow component changes its slides every period of time? We just need to use the setInterval method inside the useEffect.
useEffect(()=>{
        setThumnails(images);
        setCurrentSlideStyle({
            backgroundImage: "url('"+images[currentSlide]+"')"
        });

        const loop = setInterval(()=>{
            if(currentSlide === images.length-1){
                setCurrentSlide(0);
            }else{
                setCurrentSlide(currentSlide+1);
            }
        }, interval);
        return () => clearInterval(loop);
    }, [images, currentSlide, interval]);
I've made a constant and assinged it to the setInterval function, passing a callback function and a interval (which is a prop). The callback function is basically the copy of the next function and it just sets the currentSlide to the next position.
With that, every period of time, the callback function will be executed and since it changes the currentSlide state, the component will updates and the useEffect will run again. Consequently, updating the background.
Using the return of the useEffect, we then clear the constant of the interval function to prevent it to going crazy and causing a stack overflow.
If you run the component now, it will start to advance the slide every interval of time.
Next and Previous Slides
What about the other two "slides" sections we've got in the "slide-holder"? Very well, it's time for us to make them work as well.
With the same logic of the current slide, we'll need a state for holding the styles of the next and previous slides.
We'll also need to update the useEffect function to make it updates the next and previous slides as well.
As well, we can't forget to add each style state to the "slide-thumbnail" in its "slide" section.
Since the code for that follows the same principle of the next and previous functions, I don't see necessity of explaining it further.
import React, {useState, useEffect} from 'react';

import './styles.css';

export default function Slideshow({images=[], interval=3000}){
    const [thumbnails, setThumnails] = useState([]);
    const [previousSlideStyle, setPreviousSlideStyle] = useState({});
    const [currentSlide, setCurrentSlide] = useState(0);
    const [nextSlideStyle, setNextSlideStyle] = useState({});
    const [currentSlideStyle, setCurrentSlideStyle] = useState({});

    useEffect(()=>{
        setThumnails(images);
        setCurrentSlideStyle({
            backgroundImage: "url('"+images[currentSlide]+"')"
        });

        if(currentSlide>0){
            setPreviousSlideStyle({
                backgroundImage: "url('"+images[currentSlide-1]+"')"
            });
        }else{
            setPreviousSlideStyle({
                backgroundImage: "url('"+images[images.length-1]+"')"
            });
        }

        if(currentSlide === images.length-1){
            setNextSlideStyle({
                backgroundImage: "url('"+images[0]+"')"
            });
        }else{
            setNextSlideStyle({
                backgroundImage: "url('"+images[currentSlide+1]+"')"
            });
        }

        const loop = setInterval(()=>{
            if(currentSlide === images.length-1){
                setCurrentSlide(0);
            }else{
                setCurrentSlide(currentSlide+1);
            }
        }, interval);
        return () => clearInterval(loop);
    }, [images, currentSlide, interval]);

    function previous(){
        if(currentSlide>0){
            setCurrentSlide(currentSlide-1);
        }else{
            setCurrentSlide(thumbnails.length-1);
        }
    }

    function next(){
        if(currentSlide === thumbnails.length-1){
            setCurrentSlide(0);
        }else{
            setCurrentSlide(currentSlide+1);
        }
    }

    return (
        <section className="slideshow">
            <div className="slide-holder">
                <section className="slide previous-slide">
                    <div style={previousSlideStyle} className="slide-thumbnail"></div>
                </section>
                <section className="slide current-slide">
                    <div style={currentSlideStyle} className="slide-thumbnail"></div>
                </section>
                <section className="slide next-slide">
                    <div style={nextSlideStyle} className="slide-thumbnail"></div>
                </section>
            </div>

            <div className="slideshow-controller">
                <span onClick={previous}>Previous</span>
                <span onClick={next}>Next</span>
            </div>
        </section>
    )
}
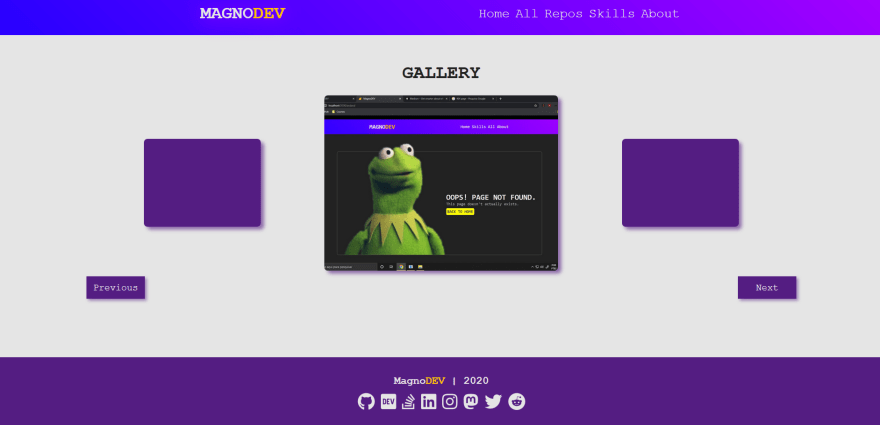
Conclusion
After all the hard work, we finally made it! This is the final result of the Slideshow component we've built here.

If you've read until here, I'm really thankful for that.
If you have any suggestions, corrections and even doubts about something related to the post, feel free to leave a comment or contact me.

Top comments (1)
great