
Hello Cloud adventurers, I have been on a learning journey this year with containerization, specifically docker. Continuing the series of blogs, I wanted to try deploying Grafana to Azure but as a docker container. I know there are different ways and different services within Azure that you can use to deploy a container, but I will be using Azure Web Apps.
Deploying Grafana to Azures Web Apps for Containers is a straightforward process:
A storage account
An Azure Files share
Initiate an empty Sqlite database
Web Apps for Containers Azure App Service
Mount the Azure Files share
Set an environment variable
Lets get started.
Create a Storage Account
Begin by creating an Azure Storage account. This is where we will create the File Share later. You might ask, why do we need a File Share?
If I deployed Grafana as a container, the Sqlite database (and plug-ins) would be lost as soon as the container is reset. Hence, we will be using the File Share as storage for our Grafana database.
I have created grafana-rg as the resource group where all the resources will be deployed for this blog post. For the Storage Account, make sure you use a unique name and I went with Standard performance with Geo-Redundant Storage (GRS). I left everything else as default.

Create an Azure Files Share
Navigate to your newly created storage account and scroll down to File Shares.

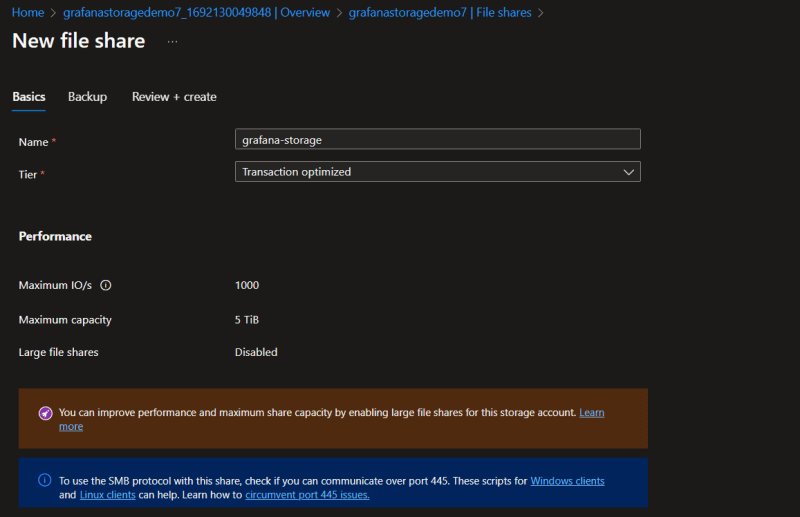
Click on the + File share button.
For the Name, I chose grafana-storage you can choose whatever you like. I went with the Transaction optimized tier. Everything else was left to default.
Initiate an empty Sqlite database
I found it the hard way that if we leave Grafana to create the database, it will run into a database lock error. To overcome this, were going to create a Sqlite database manually and then, using the Azure CLI, we will upload the database to the file share.
On a Windows machine, you can run the following commands.
💡
Provided youve already installed choco.
If you are on macOS, Sqlite is already installed and, therefore, you can skip the first command.
Also, youll need Azure CLI installed and authenticated with your Azure account.
choco install sqlite


sqlite3 grafana.db 'PRAGMA journal_mode=wal;'
Now, let's copy the grafana.db to our File Share. We will use the azcopy command.
az login az storage copy -s .\grafana.db -d https://<storage_account>.file.core.windows.net/<file_share> --subscription <subscription_name>
Replace , , and , with the appropriate values: the name of your storage account, the name of your file share and your subscriptions id or name.

App Service
Create a new Azure web application that publishes a Docker Container and choose Linux for the OS. Choose a pre-existing Linux App Service Plan or create a new one.
There is a Free F1 Plan, but I went with Basic B1.

For the Docker options, were going to leave the defaults for the moment. Well update this later once we have our environment fully configured. All other options we will the default.
💡
Make sure the Enable Public Access is checked.

Once the Azure Web App has been successfully configured, you can access it by the app service URL. You should see the nginx message.

Now we will configure the Web App container to use the Azure File Share as storage.
Mount the Azure Files share
In the Azure portal, on the App Services blade, click on Configuration, then Path mappings.

Now click on + New Azure Storage Mount.

Name the storage mount whatever youd prefer and choose the Storage Account you created before, Azure Files for Storage Type, and the Azure File share created before for the Storage Container. Finally, most important, for the Mount path, type in /var/lib/grafana.

Click OK then Save at the top.
We just attached our Azure File share to our container and it will be mounted at /var/lib/grafana which is Grafanas default file path for the database and its plugins. This means, should our container be restarted for any reason, none of our settings will be lost.
Set an Environment Variable
Now we have Grafana storing the database in our /var/lib/grafana mount path. However, it will not use the PRAGMA flag that we used earlier, therefore, we will experience database locking.
Grafana allows us to overwrite default configuration variables by leveraging environment variables. So, were going to use Grafanas default database connection string, but append the necessary flag.
Click on the Configuration blade once again for your Web App(you should still be on the Configuration blade from the previous step).
Now, choose Application settings and add a + New application setting.

For the setting, enter the following:
Name: GF_DATABASE_URL
Value: sqlite3:///var/lib/grafana/grafana.db?cache=private&mode=rwc&_journal_mode=WAL
Leave the Deployment slot setting unchecked.

Make sure you click Save.

Awesome, now we have the environment configured, but we need to update our containers image source.
In the App Service blade, under Deployment Center, choose Settings.

By default, the Full Image Name and Tag will be set to nginx(which was set when we created the App Service).
We want to use the Grafana Container Image, I have my own docker image for Grafana that I want to use, but you can use the default one that is provided by Grafana.
Curious on how to create your own Docker image, watch this video on how I did it.

Change the registry source to Docker Hub, and the image to grafana/grafana if you want to use the official Grafana Image.
Click Save.

It may take a moment for Azure to pick up the changes once you submit them. You can click Refresh a few times and check the logs to ensure the container was deployed correctly.

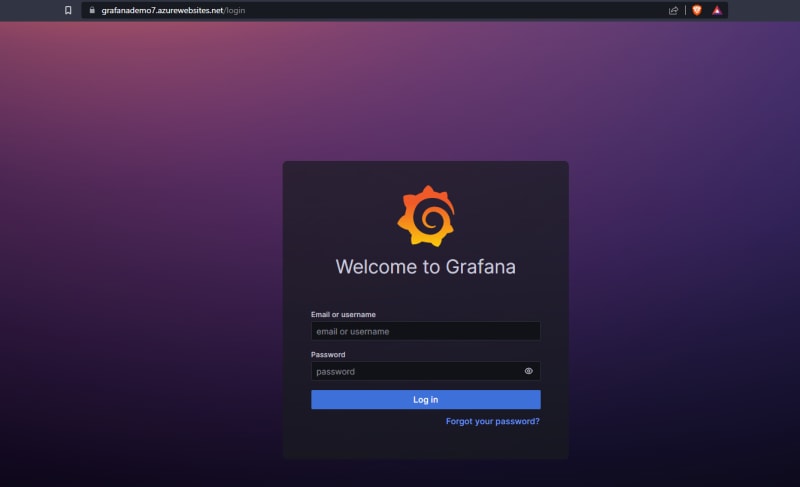
Now let's visit the Web App URL to see the changes.
Conclusion
We did it! We now have Grafana deployed to Azure Web Apps for Containers with Azure File Share as storage, making it redundant, not prone to losing data on container restarts and the ability to scale to support the necessary load.

Top comments (0)