
Work with GitHub like a pro
In the previous blog we have learned about the git in detail and we have learned about the version control system in detail. In this blog we will learn about GitHub. Suppose you and your team have worked on some software for over a year and all the files are in your pc and suddenly one day water get spilled on your pc and your data your code all gone! Then? What will you do? Will you write the code from the beginning?

Scary, right? To solve this problem we have GitHub! GitHub is a provider of Internet hosting for software development and version control using Git. It offers the distributed version control and source code management(SCM) functionality of Git, plus its own features. It provides access control and several collaboration features such as bug tracking,feature requests, task management,continuous integration.
Creating a GitHub repo:
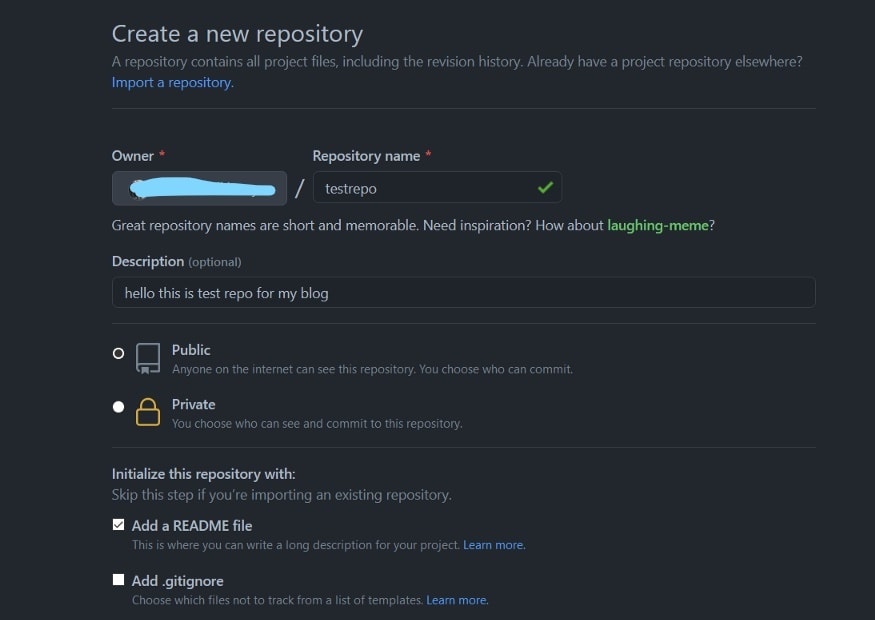
Repositories contain a collection of files of various different versions of a Project. These files are imported from the repository into the local server of the user for further updations and modifications in the content of the file.
Suppose GitHub is a virtual computer and you want to make a folder where your project data can be saved along with the data of the different versions of your project, so that folder will be called a repository.This folder can be cloned to your local pc (we will learn how later in this article) for further updations and changes.
How to push the changes to your repo?
First make the folder on your local system in which you want to save all the files of your project. Now initialize the repository using the git init command. Now check the status of the repository using the git status command to check what are the files which are yet to be staged. Now use the git add . command to add the files to the staging area which are ready for the commit. Now git commit -m 'your message', adds the change to the local repository,which can later be pushed to the GitHub repo. We have discussed all these things in detail in my previous blog post.
If you want to see what changes you have made in each commit you can use git log -p command.
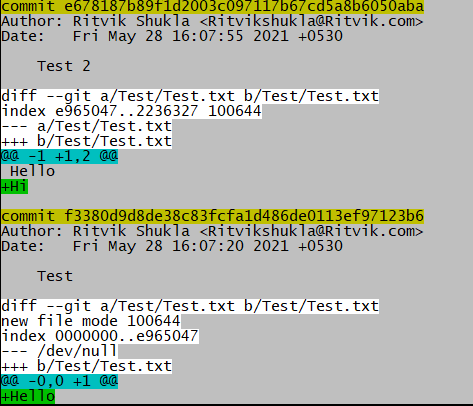
Like this you will see all the commits and the changes you have done in each commit. And I have told you earlier that using git log command you can see all the commits that are done and also who have committed that change but not what is changed for that you have to use git log -p .
Now you have to generate and add the SSH key to your GitHub account. Simply adding SSH key means you are confirming GitHub that yes it is your pc and you will push code from there.
To generate SSH key follow this  .
.
After adding the SSH key to your GitHub account you can use the git push -u origin master to push the changes you have done.
How to pull the changes that have been done on GitHub by other contributors?
We can pull the changes that have been done by the other contributors on GitHub on our local pc by the git pull command.
git pull origin master is the command which you should run in Git Bash to pull the changes.
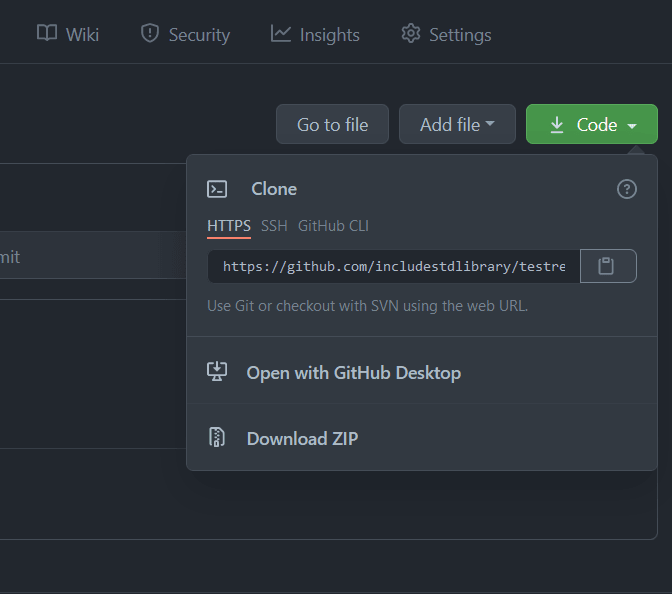
How to clone any repository on your local system?
$ git clone https://github.com/your-username/your-repository
This command will clone the repository to your local pc where you can do what ever changes you want to do in the project repository.

Now we will learn how to merge the two branches or more in the repository.
How you will merge more than one branch of the repository to the main branch?
Branch of a repository-
Suppose in your school/college your teacher dictate notes very fast and you were not able to write it properly so you take out two pages from your classroom copy in which you will write the notes and then after the class you will ask from your friends if anything is wrong in that notes, and if there is not anything wrong then you will paste those pages in your copy.
So here your copy is main branch of your repo and those 2 pages are the branch of your repository and your friends are the maintainers of the repo who will tell you about any mistakes. And then the pasting of those pages is just like merging the branch to the main branch after testing(finding errors and correcting it).
You can see all the branches using the $ git branch command.
To delete a branch after you have merged it to the main branch and the new branch is of no use you can use the command
$ git branch -d branch-name
but this command will not delete the branch from your GitHub account, so for that you can use the following command
$ git push --delete branch-name
To make a new branch and switch to that branch from master we can use the following command
$ git checkout -b branch-name
To delete your git repo you can use the following command, this will note remove your data but you have to start again from git init:
$ rm -rf .git
To switch the branch you can use the following command:
$ git checkout branch-name
To merge the desired branch to the main branch you can:
Switch to the master branch
Run $ git merge branch-name command
Your branch will be merged to the master branch.
To see all the branches, their last commit, and their last commit message you can run
$ git branch -v
To see which branch has been merged you can run
$ git branch --merged
To see which branch has not been merged you can run
$ git branch --no-merged
If you want to delete any branch which has not yet been merged but you want to delete it you can run
$ git branch -D branch-name
So these are all the important commands which everyone should know, you can learn more commands if you want to but i will not suggest to mug up all the commands you should know the use of each commands after that you should pick any one language and start learning it.
I am ending this article with Dennis Ritchie quote:

Sources you can follow :


We will meet in MY next blog post.
Till then,
Keep Learning! Keep Hustling!!
Happy Coding!

Top comments (0)