In my previous post explained how to print from a ReactJS using Epson POS SDK for JavaScript.
I implemented it into my React application, tested it in my local environment and everything went pretty well. The problem was when I published as a Static Web Application in Azure. From the Azure environment, it didn't print. I checked at the console and found out the following error message:

This error only doesn't happen on my local environment because my application was running over HTTP. Once it's published on Azure, now my application is loaded over HTTPS and the printer address call is through HTTP. This mixed content is not allowed by Chrome, nor any other modern browser (I tried on Safari, Edge and Firefox).
Googling the error message I've found the post https://stackoverflow.com/a/48700852/1167420 which suggest adding the following tag to the page:
<meta http-equiv="Content-Security-Policy" content="upgrade-insecure-requests">
This directive will replace any HTTP request into an HTTP URL. It make sense, so I added the directive in the index.html file in the HEAD element:

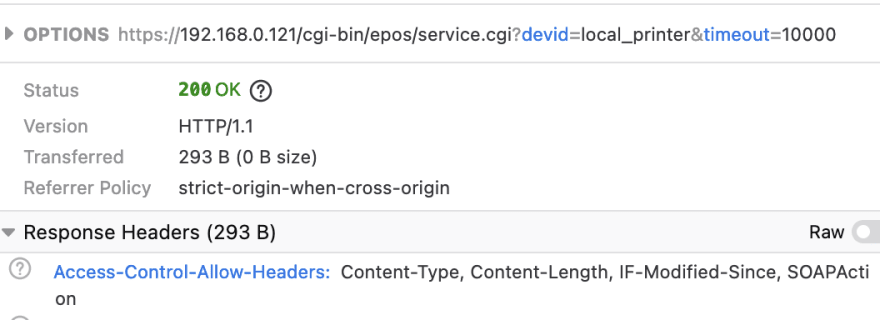
I published again and it made it work, now the SDK url is through HTTPS:
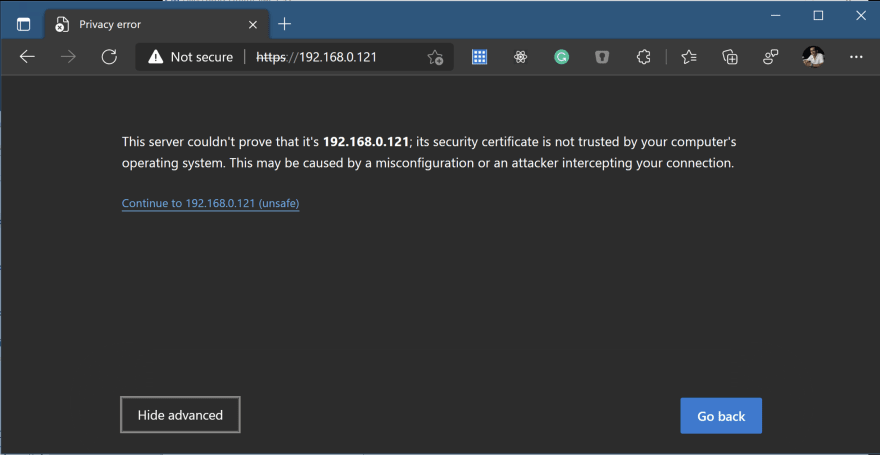
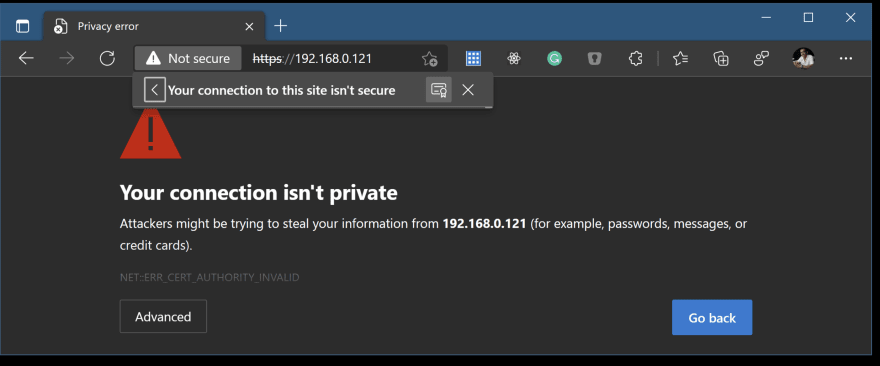
Now the problem is the printer certificate (the factory default) is invalid:

So, I needed to regenerate the certificate and install it on the printer.
I've created the new certificate using the TM-T88VI Utility:
-
Go to Network/Detailed Settings/Certificate.
- Deleted the current certificate.
- Click on "Self-signed certificate" button.
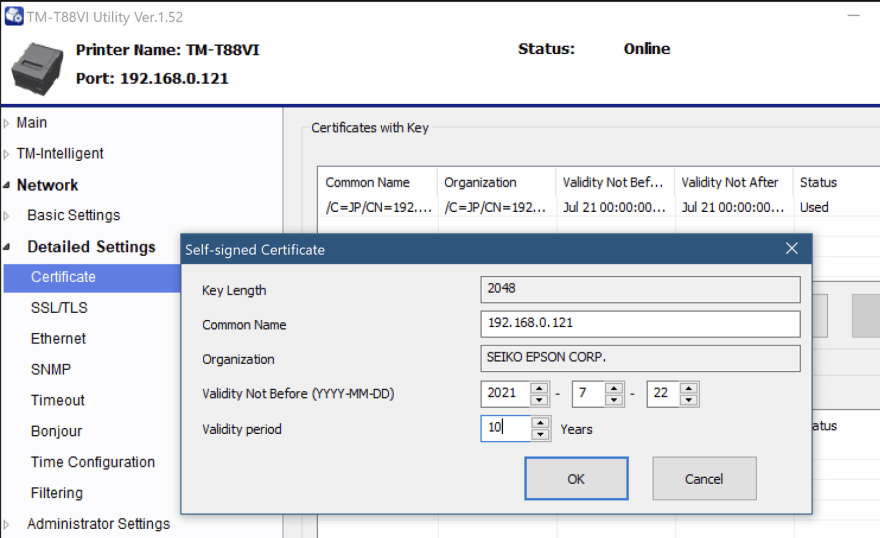 Enter in "Common Name" field the printer IP (make sure the printer has a static IP address).
Click "Ok" then "Set", this will create the new self-signed certificate and push it to the printer.
Enter in "Common Name" field the printer IP (make sure the printer has a static IP address).
Click "Ok" then "Set", this will create the new self-signed certificate and push it to the printer.
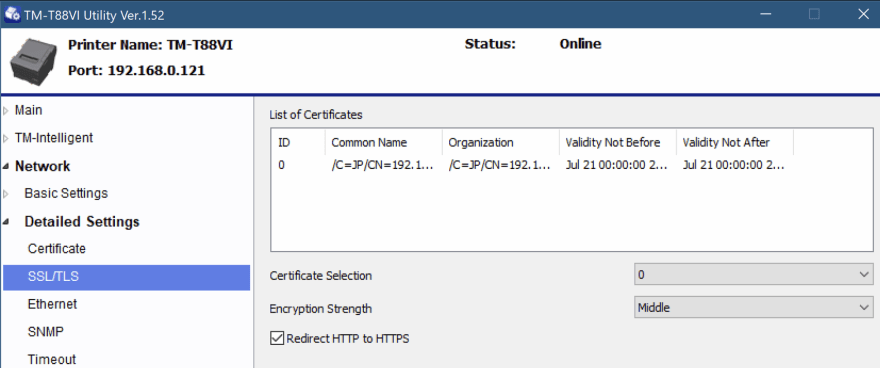
Go to Network/Detailed Settings/SSL/TLS option and make sure to have the following settings:
Once you have a valid certificate installed in the printer, you should be able to print, but as the browser still untrusts the certificate.
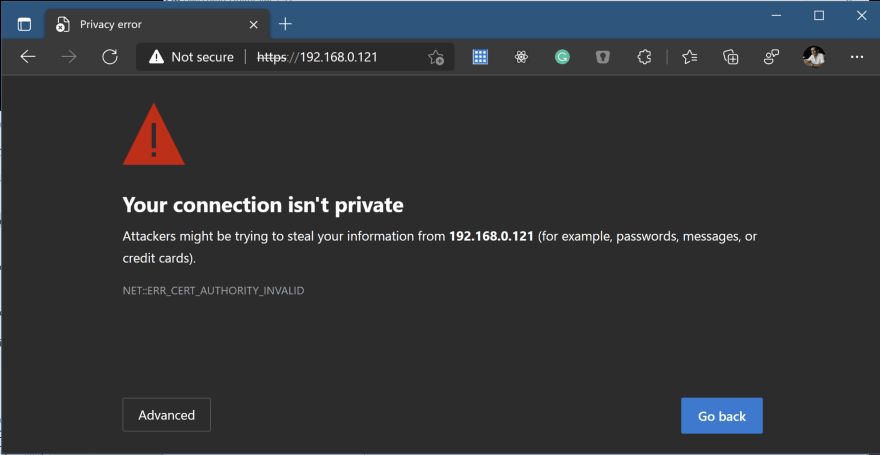
You can trust on certificate for this session, clicking on "Advanced" button, and continue:
But for a permanent trust you'll need to install the certificate in your computer/device. To do so, you'll need to export the certificate, you can do this from the browser, clicking on the certificate window:
In Windows, go to details tab and clic on "Copy to File..." button, select "DER encoded binary X.590 (.CER)" format and select the destination for the exported file.
In MacOs, drag the certificate image to your desktop or any folder
Finally needed to install the certificate:
- In windows, on start menu type "Manage computer certificates", select the "Trusted Root Certification Authorities" branch, then "All Tasks" and "Import..." and import the exported certificate.
- In MacOs double click on the downloaded certificate, and in the keychain manager clic on "Trust" button.
- In Android, copy the certificate to the device and open it. It'll ask for your credentials, type the printer's IP as the certificate name and select the "VPN and apps" option.

Top comments (1)
I had some issues creating the ssl this way, but this article helped me:
epson.eu/viewcon/corporatesite/kb/...